Wallpapering is a situation that if not everyone, then certainly every second person, has encountered in their lives. Wallpaper is now the most popular material in wall decoration, despite the fact that the choice possible materials more than wide. Most often, wallpaper is re-glued on its own, and it would seem that there is no easier task in the construction business than this. But it is worth considering some nuances and tricks so that the finished surface pleases you and is a source of pride.
Required Tools
To hang wallpaper, in addition to the wallpaper itself, you will need a number of tools, including:
- a spatula 30-40 cm wide and an angled spatula for applying putty;
- container for preparing putty;
- paint tray for glue and primer;
- paint roller for applying primer;
- tape measure to measure the required amount of wallpaper;
- scissors for cutting strips of wallpaper to the required length;
- painting knife for cutting off excess parts of wallpaper;
- for applying glue to the wall or wallpaper;
- bucket for preparing glue;
- a plumb line for evenly gluing strips of wallpaper;
- a pencil to mark on the wall the level at which you will focus when gluing;
- wallpaper pressing spatula to level the wallpaper immediately after gluing;
- a soft rag or sponge to wipe off excess glue from the wallpaper;
- roller for wallpaper joints - it can be used to roll the joints so that they are as little noticeable as possible;
- stepladder - it will be convenient to glue wallpaper near the ceiling.
Surface preparation
In the entire process of wallpapering, surface preparation is almost the most important stage, because no matter how professionally and carefully you hang the wallpaper, if the surface is crooked, then you can’t expect an aesthetic result. Therefore, it is important to keep it dry - this is not difficult to do by following the recommendations.
Cleaning walls from old coating
If wallpaper is not glued to walls in a new building that have not been decorated with anything before, then you will have to tinker with removing the old coating, and this is sometimes not as easy as it seems.
It is better to first cover the floor with thick plastic film and stock up set of tools in the form of a bucket with warm water or liquid for dissolving wallpaper glue, several spatulas different forms, roller and sponge. In the easiest case, after the wallpaper is moistened with warm water, it will begin to recede slightly from the surface of the wall, and it will not be very difficult to remove it with a spatula. Instead of water, in more severe situations, you can use special compounds that dissolve the glue faster. Instead of such compositions in warm water You can add dishwashing detergent, fabric softener or other products that can act on the glue. Wide spatulas will help you pry up wallpaper in open areas, but corner spatulas will work in more difficult-to-reach areas.
In some cases may be needed even a knife and a wallpaper tiger - a roller with several needles, thanks to which you can pry up and remove pieces of old wallpaper. The most difficult case is considered to be wallpaper glued with PVA - it is impossible to remove it even with the help of special compounds, so here you will have to work either with sandpaper or with a nozzle in the form of a metal brush. A home steam generator can also come to the rescue.
Removing the old paint layer
It is better to apply it in two thin layers, otherwise the streaks from the spatula will be very noticeable. And so, it is better to putty first in the vertical direction, and then in the horizontal. Another option is to do everything diagonally. A spatula with a width of 30-40 cm, which should be held at an angle of 25-30 degrees, is perfect for these works. Don't forget about the corner spatula as well.
When the layer has dried, you can proceed to sanding it with sandpaper and removing any dust that has appeared. Then a finishing layer of putty is applied to smooth out even the smallest irregularities; this layer is also sanded.
Surface primer
We eliminate possible defects
Even if you follow all the rules described above, there is no complete guarantee that some defects may later be identified. Here are the main possible problems and ways to solve them:

We start with choosing wallpaper. Today the range is quite diverse - both in color and type. The standard range includes non-woven, vinyl, acrylic, paper, textile, glass wallpaper, as well as cork, structural for painting and much more. The choice is yours.
Now you need to correctly select the glue for the selected wallpaper, since each type has its own option. To avoid mistakes, carefully read the instructions on the glue packaging; it will definitely indicate what type of wallpaper it is intended for. Manufacturers often write this: “for light” or “for heavy” wallpaper. IN in this case you just need to remember that “heavy wallpaper” is vinyl, acrylic, textiles, cork and glass wallpaper. And the term “light wallpaper” implies all the paper variety.
So, wallpaper and glue have been purchased, and the tools have been prepared. WITH ? Of course, with the preparation of the walls. Naturally, we remove the old wallpaper, which can be slightly wetted beforehand. Then we level and prepare the walls, since even the highest quality wallpaper will not adhere to an unprepared surface. Here we safely use putty to seal cracks and primers to increase the absorbency of the wall.
At the next stage of work, we dilute the glue, following the instructions from the manufacturer. Usually there are consumption rates on the packaging. Pour the required amount of water into a clean container, then pour the glue in a thin stream, stirring vigorously but gently until homogeneous mass. Now our adhesive solution needs to sit for some time (you can also check the time period in the instructions on the package). The main thing is to remember to mix it again before starting work.
The glue is ready, now you need to apply it correctly and glue the wallpaper correctly. Using a wide brush, apply glue to the underside of the cut wallpaper. If you have non-woven wallpaper, it is recommended to apply glue to the entire height of the wall. We give the glue a little time to absorb and very carefully apply our piece of wallpaper to the wall. It should be remembered that the air temperature in the room should not be lower than 20C. A higher indicator guarantees the appearance of bubbles and peeling of joints, and a lower temperature increases drying time. During the first minutes after applying the canvas to the wall, slight movement is allowed, for example, to align the height or to align the pattern. After final fixation and removal of bubbles, the wallpaper allowance at the border line with the ceiling must be removed using a sharp knife and a metal ruler.
After reading the instructions, you know how to hang wallpaper yourself. If you follow all the rules, then redecorating will go smoothly, with ease and “without bubbles”!
Instructions
You cannot glue wallpaper without preparing the walls. First of all, remove the old layer. Regardless of the type of wallpaper, for various reasons, they may not respond to the persistent actions of a spatula. In this case, moisten them with a soap solution mixed with a small amount of glue. Cut thick wallpaper in several places so that the mixture penetrates faster into the structure of the material.
Remove the top layer with a spatula. Soak the residue again and remove completely. Wash the wall with soapy water and remove loose plaster. Places with cracks and depressions should be filled with an even layer. Apply primer on top, which is sold in hardware stores.
To save money, coat the walls with a solution prepared from 500 ml of PVA glue in a bucket of water. Go through the areas with putty again. Such manipulations help to smooth out the unevenness a little so that the wallpaper lays down easily without showing various disadvantages walls, and served for a long time.
Before purchasing wallpaper, calculate the required number of rolls. To do this, measure the length of the wall, add this number and divide by the width of the wallpaper. Their diversity in appearance, structure, type of material, price category has no boundaries. It is easier and cheaper to glue wallpaper that does not require matching the pattern. Start with the wall next to the window. Dilute the glue as directed on the package, kneading all lumps until smooth.
Using a plumb line, draw a straight vertical line on the wall to which the first strip will align. Measure its length from the ceiling to the floor, adding about 10 cm to the resulting number. Cut the required number of strips of the calculated length and fold them in one place. On the packaging with wallpaper it is indicated whether to coat only the canvas or the wall with glue, or all together, it is noted how long it will take and whether it is necessary for impregnation.
Use a brush to smooth the glue over the wallpaper from the center to the edges so as not to stretch it lengthwise. If necessary, lubricate the wall, making strokes along and across. Bring the folded fabric with the adhesive parts inward to the drawn line, and, starting to fit it to it, glue the strip. Using a roller, brush or soft cloth, press the wallpaper from the center to the sides so that air escapes and bubbles do not appear. Cut off the excess from the top and bottom with a construction knife. Or draw a line with a pencil, and then use scissors, protruding the wallpaper a little, to cut off the strip.
If the edges are not sticking well, apply glue and carefully roll over them. If the wallpaper is thin, you can glue the next strip on top of the previous one, if the wallpaper is thick, only end-to-end. Puncture the resulting air bubbles with a needle. Using a syringe filled with glue, inject the mixture and press down gently. During and after completion of work, all openings must be tightly closed so that the wallpaper does not peel off.
Any repair begins with acquiring the necessary building materials, from preparing tools and dismantling old finishes. The last position is associated with some difficulties, because peeling off, for example, old wallpaper from the walls is not as easy as it might seem at first glance. If they were well glued, then removing them can be a problem. But there are several ways to quickly carry out this operation.
Methods for removing wallpaper from walls
Before you start removing wallpaper from the walls, you need to take care of protecting the floor. It is best to lay a plastic film on it, which is attached to the baseboard with masking tape. After that, the wallpaper is moistened with warm water using a roller and given time to soak.
If there is a question quick removal, then it is better to use a special solution that penetrates the adhesive layer in minutes and dissolves it. The material begins to peel off on its own, all that remains is to collect it and throw it in the trash. It should be noted that such liquids do not contain solvents, so after removing the wallpaper there is no need to rinse the walls with water. Some areas will not peel off immediately even when exposed to solvent, so it is recommended to reapply the liquid and use spatulas.

- There is no need to wet the wallpaper too much; the water will begin to flow down the wall, and only a small amount will be absorbed. But a small amount of water will also not give a positive result. They will dry out quickly.
- It is necessary to moisten in small areas.
- If one area has dried out, you will have to moisten it again.
- Wallpaper strips must be torn off from the joints.
- When wetting, you need to turn off the electricity in the entire house (apartment).
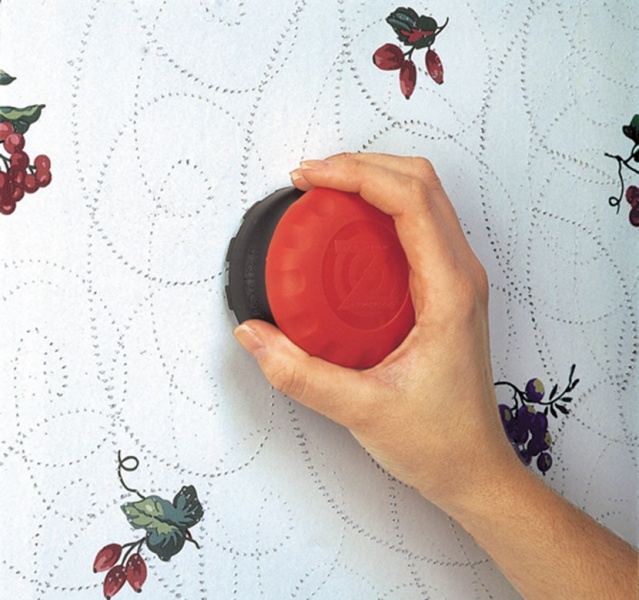
- After wetting, it is recommended to walk over the surface of the wall with a needle roller. Small holes will help water quickly penetrate under the finish into the adhesive layer.
- You can use the so-called wallpaper tiger, with the help of which not holes, but cuts will appear on the wallpaper.
Non-woven wallpaper is removed from walls differently, because it is based on synthetic fibers. It is they who create a waterproof layer on the surface. It needs to be destroyed, for which you can use the same wallpaper tiger, or you can get by with an ordinary sharp knife. You just need to make deep cuts. Next, use a foam roller to wet the wall.
Vinyl ones are removed from the walls in the same way as non-woven ones. The thing is that vinyl is a durable waterproof polymer film that is applied to paper base. We need to get rid of this film. By the way, after soaking vinyl wallpapers you need to start from the top and pull towards yourself. The film is durable, so it won't tear. The paper may peel off from it, which sometimes remains on the walls in patches. They must be re-moistened and removed using a spatula.

The most difficult thing is to remove washable wallpaper. As in previous cases, it is necessary to damage the polymer outer layer using any tools. Next, the surface is wetted with water. There is no need to wait long, you just have to try to tear them off the wall. If all else fails, you will have to use an iron. It is heated and the moistened wallpaper surface is smoothed with it. Thus, the adhesive layer is destroyed.
And one more recommendation, which concerns removing wallpaper from plasterboard surfaces. It should be noted that this process must be carried out very carefully, because the drywall itself is covered with a paper layer. There is no way to destroy it. Therefore, to quickly remove wallpaper you will need that special liquid. But even in this case, you can peel off the wallpaper by doing everything carefully.

Quick sticker method
It’s not easy to paste wallpaper on your own, and quickly at that. In order not to reduce the speed of the process itself, it is necessary to prepare well for it.
Firstly, before gluing the wallpaper, prepare the wall itself:
- It needs to be repaired: all defects must be repaired with putty.
- Level it using the same putty solution.
- Prime so that the surface has a high degree of adhesion.
- Apply markings using a plumb line or level.

Secondly, you need to prepare the required amount of wallpaper and glue, as well as all the necessary tools:
- roller for applying glue;
- roller for smoothing wallpaper after laying it on the walls;
- plastic spatula for the same needs;
- scissors or knife for cutting material into strips;
- sponge or rag to remove adhesive protruding beyond the wallpaper installed on the wall.
Now you can move on to the process itself, how to glue. To hang wallpaper efficiently, you need to trim it correctly.
Attention! The length of each wallpaper strip should be equal to the height of the wall being finished plus 5 cm on each side. The allowance is cut off after drying. Using the allowance, it becomes possible to shift the laid strip up or down, adjusting the patterns on the wallpaper.

Before gluing, on each strip with reverse side applied with a roller or brush adhesive composition. If it is necessary to glue non-woven or vinyl wallpaper, then the glue is applied to the wall. With them the process itself is much simpler. That is, take the strip, lay it on the wall, pressing the upper edge along the applied markings, and press down the upper part with your hand. After that, a rubber roller is taken into hand, which is used to level the material and squeeze out the air from under it. Gluing wallpaper in this way is not a problem for one person.
Pasting paper wallpaper
WITH paper wallpaper everything is much more complicated. They need to be treated with glue, then rolled correctly. It's done like this.
- The upper part of the strip folds two-thirds inward.
- Bottom one third.
- The strip folded in this way must now be rolled into a roll.

In this state, before gluing, the wallpaper should lie for about ten minutes so that the applied glue is well saturated in it. After which the roll unfolds, but the edges remain in the same state (folded). The strip is laid on left hand, and the right upper edge is turned away and applied to the wall at the top marking. By holding this glued edge, you can release the entire strip. Under its own weight, it will begin to straighten and lie exactly vertical. All that remains is to use your hands and a roller to straighten the material. The main thing here is that the edges of the wallpaper strip fit exactly according to the markings applied in advance.
Conclusion
Many people believe that fast is not always high quality. There is a lot of truth in this. But if we are talking about peeling and gluing wallpaper, then this can actually be done quickly without compromising the quality of the final result. Watch the video - how to properly glue wallpaper.