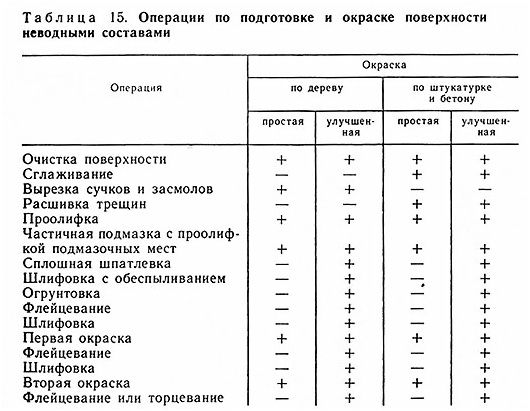
Any more or less significant repair is not complete without plastering and painting work. One of the most popular tools used for painting walls is a roller.
Without it, it is simply impossible to paint large areas, such as walls or ceilings, with high quality.
However, not everyone knows the technique of applying paint using this, at first glance, very simple tool. So how to paint walls with a roller correctly, so as not to spoil the wall at the very last stage of finishing work?
Most of us now take on such simple work rather than paying someone to do it. At first glance, it seems like the easiest thing in the world to pat on some paint, but getting it wrong can mean your wall looks uneven and has clearly visible marks from brush or roller strokes. Here's how to do it the first time.
As with any job, you want to make sure you get everything done. necessary preparation so you can just focus on the picture and nothing else. This means laying out furniture covers and floor coverings, using painter's tape on areas where you want to paint the edge, like cabinets and windows, and clean the walls of dust and grease to make sure the paint goes on easily.
 Among the undeniable advantages of this painting tool are:
- the ability to paint large areas with maximum speed;
- Ease of use. If necessary, you can attach an extension handle (“fishing rod”), allowing you to reach the most remote areas.
It also has its disadvantages:
While it may seem smart to buy cheap paint, choosing at least a mid-range product is generally more productive and safer when it comes to getting the results you want. The same goes for the roller and brush you plan to use - cheap brushes tend to leave stray hairs in paint coating and stop you from focusing on the work at hand when you're trying to select them. Rollers, if they are of poor quality, may absorb paint unevenly and make it difficult to obtain good coverage.
- the difficulty of painting corners and other hard-to-reach places;
- the need to select the most suitable type of roller for each paint composition.
But, nevertheless, the advantages of this tool are much more significant than the disadvantages. Otherwise, it would not be so popular among professional builders and finishers.
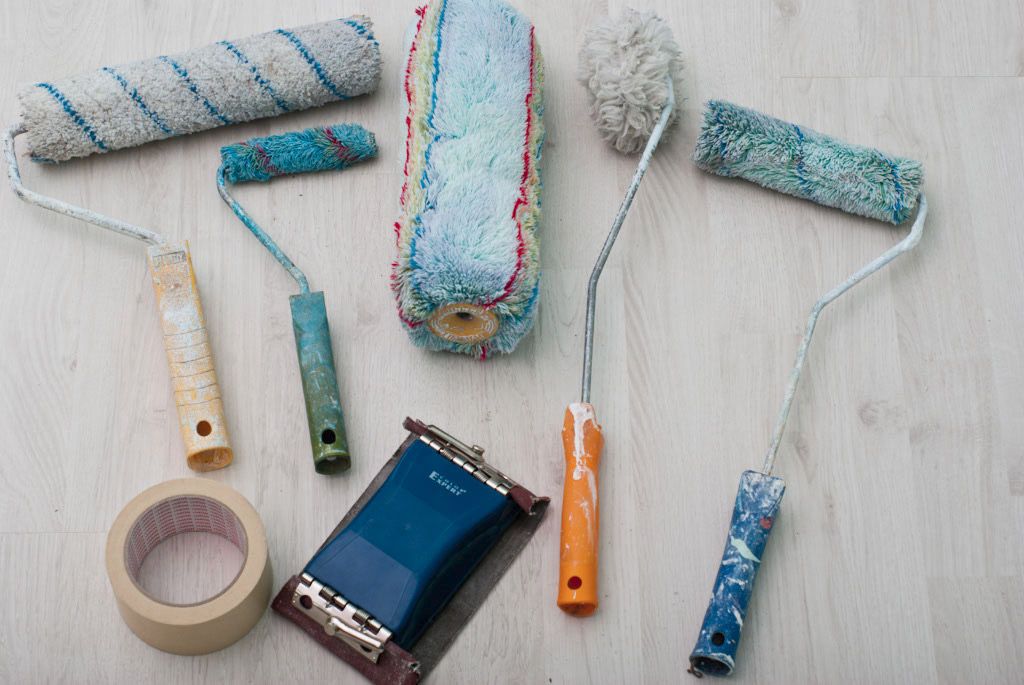
Roller selection
The quality of painting largely depends on the right choice tool. The rollers differ from each other in size and the material from which the “coat” is made - a soft ring around the rotating roller.
When you open the paint, stir it well and make sure you are still mixed. The paint can sit in stores for months on end and peel off a little, so you have to worry a little to make sure everything is in order. You need to do this using any paint, be it water or oil. Also, if you will need to use more than one tin of paint, then it would be wise to mix it all together before you start, as it is possible that there will be slight variations in color from different batches and you don't want your work was uneven.
Dimensions
 The larger the area, the wider the roller should be
 The choice of size depends on the area of the surface to be painted. The larger it is, the wider the tool you will need. Maximum size The width of the roller is 30 cm - it is used for applying the coloring composition to large, flat areas.
You can't see lines and patches if you don't have enough light or they can't be seen properly. If you've ever painted a wall at night and then come down in the morning to find stains everywhere, you'll know what we mean. If you really want to improve your chances of getting a professional finish, then incorporating paint conditioner into your mix is always a good idea.
You may not need a paint additive for every one of your decorating projects, but it is useful product, which can be found on the shelf and is a godsend if you find that you're not getting the coverage you need. This helps keep the edges as wet as your painting and produces a highly professional finish.
The smallest roller produced has a “coat” width of only 3 cm. It is used for painting hard-to-reach places: corners, joints, seams.
In terms of its purpose, it is similar to a paint brush and is used after the main areas have been painted with a large roller.
Between these two borderline values of 300 and 30 mm, there are several intermediate sizes, which are selected independently depending on the convenience and volume of work.
Finally, he pays to take his time and apply the paint even in strokes. Whether you use a roller or a brush, rushing too hard to finish the job can mean you don't cover certain areas properly and then have to do extra work to get the final result.
WITH regular sponge you can not only clean, but also paint your wall. Professional Wall Painting Tip: For the sponge technique, the wall paint should be really watery - before stroking, and then stir a lot of water under the paint. Since the thin color will not cover any stains, you must remove the wall first.
The tool is also divided into different types depending on the material from which it is made.
Foam rubber
 Foam rollers are intended for painting surfaces using water-dispersion compositions.
You should not work with foam rubber with emulsion paints: the paint is saturated with air and forms bubbles on the surface when applied.
Subsequently the wall is primed water paint- the primer does not have to be perfect. If the paint is slightly dry, the sponge is properly wetted and wrung out lightly. Then rub strokes to match the wall color using a sponge corner. White base color appears again in these places. Tip in sponge technology: Before reapplying the sponge, rinse it well with water - the color effects are even more pronounced.
Circular wiper technology
However, you can also fake your wall: in the second coating method, which is presented by professional masters Mocha Leifeld, you start off as with the first technique. The only difference: Instead of rubbing the charcoal sponge over the strokes of the wall paint, now rub the entire surface of the damp sponge over the lightly dried wall paint in small circular motions.
When they dry out and burst, they leave behind small round stains, which does not add aesthetics to the painted surface.
It is also not recommended to paint walls with a roller with a foam “coat”. The porous material absorbs too much paint, and when applying it to vertical surfaces, smudges inevitably occur. Eliminating such “traces” can take quite a long time.
It's best to wait about two to four minutes until the color is completely fresh to avoid rubbing the ink again. Thus, sponge technology creates excellent color sequences and discreet patterns! If you want to paint a wall as a couple, it helps if one of the walls is pre-painted and the other is sponged.
Wall Painting: Ideas, Examples and Guide
To put it another way: For foil technology, a regular ink roller is first coated with foil. Then carefully wrap the foil around the wall with paint and then flip it over the wall. The folds in the foil create interesting structures. For the winding technique, you should wear house gloves. With your hands, the flap is completely dipped in color, then lightly wrung out, wrapped and rolled with your palms against the wall. Pro Tips: Before you get serious and you paint the walls, test your chosen technique on a plate first.
Velours
Short-haired tools are most often used for working with oil-based and emulsion paints. With the help of velor, a uniform thin film is formed on the surface to be painted. This is achieved due to the fact that the velor “coat” takes a little paint and rolls it out in a thin layer.
However, what is a plus when working with emulsions is a minus when using other coloring compounds.
If you can't imagine the sponge techniques correctly, take a look at the video as it looks ready. If you want to paint your walls correctly, you should know a few tricks. This way, you can avoid beginner mistakes and end up looking forward to your freshly painted room.
Paint the Room: Prepare to Paint the Walls
Anyone having everything on hand at the right time makes the job easier without having to "improvise" in the middle of a painting job. The first thing to do is to enter a painting store or hardware store to stock yourself necessary utensils. My advice: If you print out these instructions to paint your rooms, you'll always have everything on hand.
Fur
 For embossed walls, choose long pile
 Such rollers are made from both natural sheepskin and artificial synthetic wool. Natural fur is more expensive than synthetic fur, but its service life is much longer.
Remove a Room: Buying Checklist
Wall paint for painting the wall. It is necessary to ensure that there are enough of them to square meters were painted. If you don't have the square footage of the walls and ceiling in mind, measure the space before and calculate the square footage of the surfaces to be painted.
If you don't want to clean your room with pure white, you can still tint the colors. Most art or hardware stores provide color charts that indicate the mixing ratio between the base color and the toning color.
The choice of pile length depends on the texture of the wall: the more textured it is, the longer it should be. Fur varieties are designed to work with almost any composition.
This versatility is their undoubted advantage over other types of rollers, but they also have their drawbacks. Over time, their “coat” begins to lose lint, which as a result sticks to the wall along with the paint.
Small tip: Don't skimp on wall paint, but be sure to purchase good color coverings. The cheapest offers are simply characterized by the fact that the wall paint is less pigmented, the color is worse. This is used for "pre-painting" for corners and edges. This greatly increases the range and does not require the ladder to be constantly repositioned during impact. Get the scooter, drip rail and telescopic rod.
Scooters with short hair are cheaper and suitable for flat surfaces. The telescopic bar you need needs to hit the ceiling - an alternative is to use a broom. The cover should be large enough to completely cover the furniture and floor before painting the walls. Since tarps are so cheap, it's better to worry about too much than too little.
Before work, the fur should be soaked in clean water for a couple of hours, and then dried thoroughly.
Polyamide thread
 The lint will not fall out of the polyamide roller
 In appearance, their working surface resembles a terry towel with thread “stamens” sticking out in all directions. They are made from fabrics that are stitched with threads in a special way.
As an alternative to cover tarps, you can also use old newsprint, which does a lot more work when you lay it out. Filler and plaster for holes in the wall. Optional: putty knife and plaster to remove old or peeling wall paints.
Varnish, thinner and floor brush. Additionally: varnish, thinner and floor brush. Possibly also sandpaper if the old varnish has cracks in the strips or does not adhere properly. When removing and screwing in lamps and sockets, it is useful to know if there is power to the cables. This can be easily checked with a current tester - before hitting the room.
Among the advantages of polyamide thread rollers is the absence of falling lint. They are easy to clean from paint and can last for quite a long time. The downside is that the threads tend to splatter paint, so you should work with them very carefully.
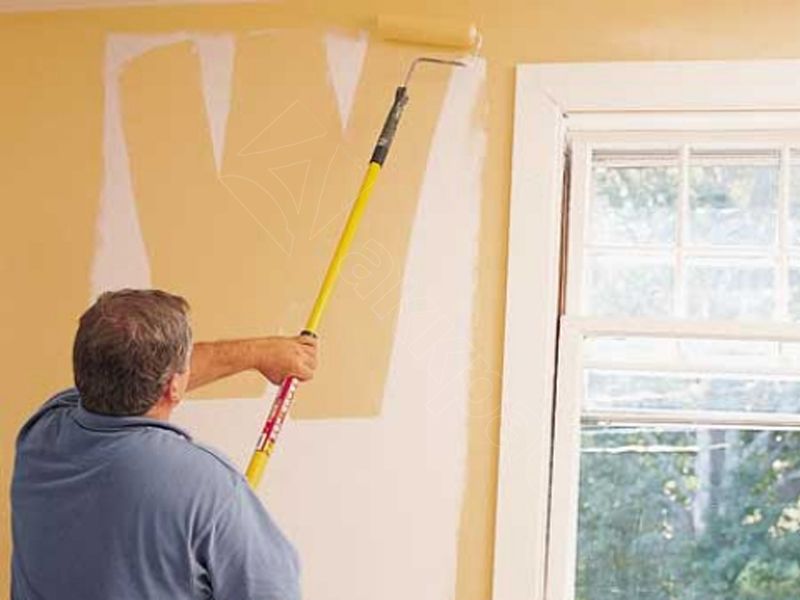
Painting a wall with a roller
Using the example of painting a wall, let's look at how to properly work with a roller.
Optional: A ladder or easel is useful for moving corners of a room. To paint the walls and ceiling with a scooter, you can choose whether you prefer a telescopic stand or a ladder - it goes at the same time. Rubber gloves for clean hands when cleaning.
My advice: You can save a lot of money by borrowing the items listed here from relatives or friends. If you clean your cookware thoroughly, you can use them for many years to come. Once you've completed the preliminary work, you can start painting the room.
Preparing for work
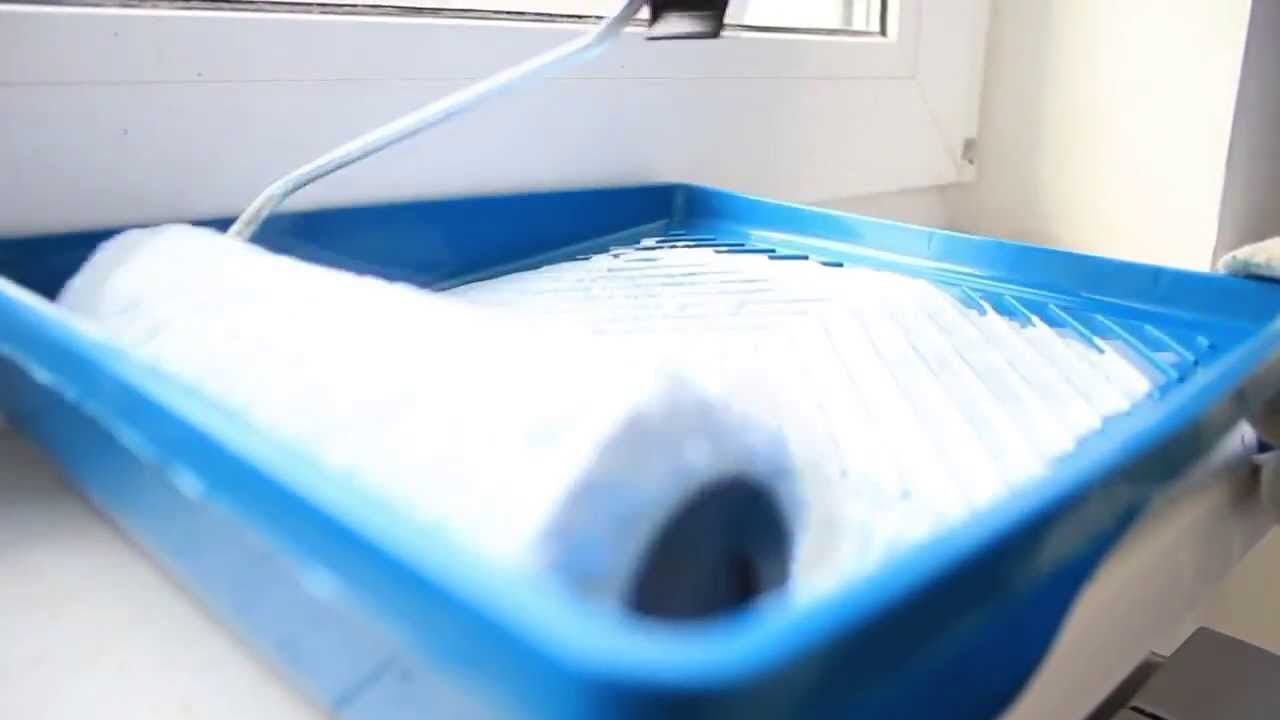
 The trough will allow you to distribute the paint evenly over the roller
 First of all, you should stock up on all the accessories that you will need for your work except the roller itself. This:
What to do when a room is painted?
Open the wall color and add the appropriate amount of tint. Carefully - White color can be painted even with a small amount of tinting color. Gently mix the color with a stick and do not add a tint of color until the color tone of the color bucket contains a uniform mixture.
Take a small piece of newspaper and apply the colored paint with a brush. Keep this piece of projection on the wall to see if the color desired color. Note: While the color is still wet, the color will become stronger and darker, so please wait until the swatch color is dry before choosing a color.
- Rolling trough. The required amount of paint is poured into it, and then the working part of the roller is dipped. The container has a special corrugated surface designed for rolling a roller over it. In this case, the paint is evenly distributed over the entire surface of the “coat”.
- Grout. A device in the form of a handle with a flat platform on which sandpaper is attached. Used for cleaning various surfaces.
- Masking tape and plastic film. Used to protect non-painted surfaces from accidental paint contact.
Before you paint the walls with a roller, you should prepare the room for work:
Once you have touched the color correctly or mixed the color you want, you can start painting the walls. Preliminary wall painting. Take an old plastic bowl and fill part of the wall with paint. With a small brush you can now paint in all the corners and edges that you can't reach with a roll.
Clean any parts of the room that you cannot reach with the roll before continuing with the roll. In the end you should only have large straight surfaces that you can roll out easily and quickly. Smoothing the walls with a roll.
- Take it out or move it to the side and cover the furniture with plastic wrap.
- Cover the floors along the walls with the same film, close the windows and doors with it.
- Turn off the power supply to the room and remove switches and sockets from the walls. The remaining holes with wires should be sealed with masking tape to prevent paint from getting into them.
- We grout with coarse sandpaper over the entire surface of the walls, removing various irregularities and roughness.
- We clean the surface from dust and dirt using a sponge and cleaning solution.
- Carefully prime the entire surface of the wall, preferably in two to three layers. Detailed instructions about coloring, see this video:
When choosing primer composition Special attention should be given its intended purpose. WITH technical specifications Use of primer can be found in the instructions on the packaging. For priming plastered walls, acrylic and water-based primer compositions are best suited.
Place the scraper grid in the wall paint bucket and submerge the roll. Once the roll is completely covered in paint, roll it over the stripping grid several times until it no longer drips. Start with the ceiling and then paint the wall "on the line" until it is completely painted and covered.
Basic rule: always move from top to bottom! If you had gone the other way around, you may have made splashes, runners, or "noses" on the walls during the final hit of the ceiling that you didn't notice or were too late. If you notice that the color doesn't fit properly, keep painting and wait until the whole thing looks dry. While the wall color is still wet, you can often see things from the background that cannot be seen when dry.
Painting work
 Roll the roller over the wall until it stops painting.
 Open the container with paint and mix it thoroughly using a mixer attachment attached to a drill. While in the store, cans of paint stand in one place for a long time, as a result of which a thick sediment collects at the bottom.
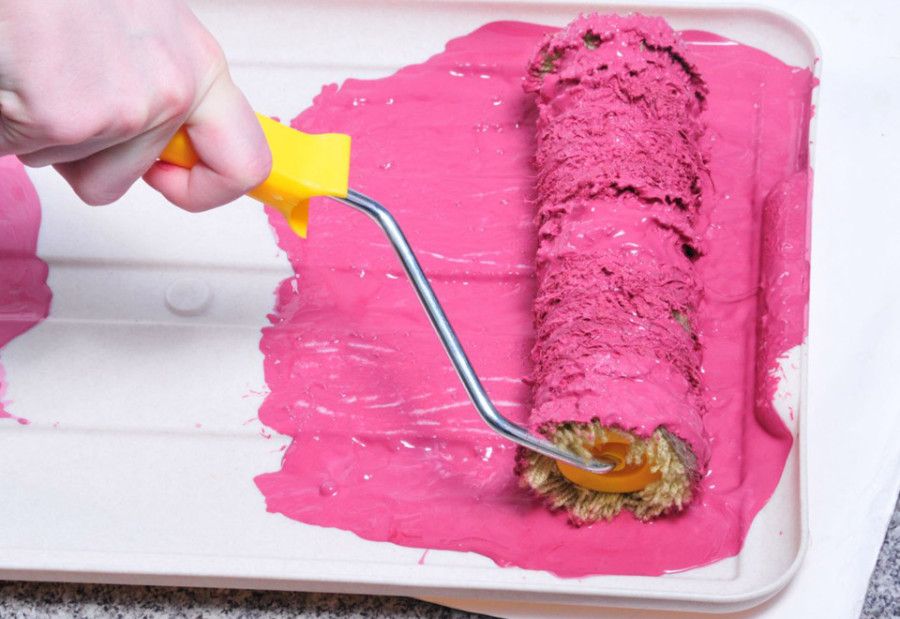
We pour paint into the tray of the rolling tray, but its level should not reach the axis of the roller wheel. We dip the tool into the rolling sheet and roll it a couple of times, so that the “coat” picks up as much paint as possible.
After this, we roll the roller along the rolling corrugated surface, pressing lightly on it. We continue to roll it until the entire “coat” is evenly saturated with the coloring composition, and the excess paint flows back into the pan.
This procedure allows you to apply paint to the wall in an even layer, and, at the same time, avoid smudges and splashing of paint drops.
Application technology
 Start coloring from the top corner
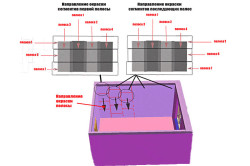
 When carrying out painting work, it is very important that the entire surface of the wall is evenly painted without gaps or streaks. This can be achieved by using the painting technology that professional painters use when working with large areas - dividing the surface into squares.
Let's consider the entire process of marking and applying the coloring composition in stages.
- Conventionally, we divide the entire wall area into squares with a side length equal to five widths work surface the roller you are working with.
- You should start the painting process from one of the upper corner squares, from the right or left - it is not so important and depends only on your choice.
- We visually divide the conditional square into five vertical stripes and, skipping the first strip, roll along the second.
- Next, skip the third and fourth stripes and paint over the outermost, fifth stripe.
- We move on to the missing stripes and paint over the 4th, 1st and 3rd stripes one by one.
- Apply the second layer of paint to the vertical stripes in reverse order: start from the 3rd lane, move to 1, 4, 5, ending with the 2nd.
Many may be surprised by such complex technology in a fairly simple matter. However, as experience shows, this technology, tested over the years, makes it possible to distribute the coloring composition most evenly over the entire surface of the square. For more information on how to avoid the striped effect, watch this video:
Apply the paint using movements from bottom to top and back. When the strip ends, the tool should be torn off the wall surface with a quick and sharp movement and move on to the next strip.
![]() After painting the top corner square, we proceed to the next one, located directly below it, repeating the whole process again.
After painting the top corner square, we proceed to the next one, located directly below it, repeating the whole process again.
In this case, you need to make sure that there are no unpainted joints between the squares.
When it's all over vertical stripe from the ceiling to the floor, move on to the next one, starting work also from the top square.
End of work
 Clean the roller after completing work
 Having finished the work, you should let the paint dry thoroughly, which usually takes from several hours to 1 - 2 days. The time for complete drying also depends on the temperature and humidity.
To speed up this process, you can open the vents or windows slightly during the warm season. This will also help the chemical odor of the enamels disappear as quickly as possible.
After the paint has dried, you can begin further repairs or bring the room back to its original form - remove protective film and tape, attach sockets and switches in place, rearrange furniture.
In order for the roller to serve you for a long time, after finishing painting it should be thoroughly cleaned. Watch the intricacies of cleaning the roller after painting in this video:
The “coat” should be washed immediately upon completion of work, without waiting for the paint to dry.
Water-soluble paints can be washed off with water. In this case, the “coat” is removed from the instrument, and after washing it is not wrung out, but simply hung out to dry. Oil enamels cleaned using organic solvents (white spirit, gasoline, acetone, etc.).
If you have decided to do home renovations with your own hands, the question will be relevant for you: “How to paint walls with a roller”? The most interesting task in renovation is painting the walls. You can use standard colors, or you can show your imagination: mix paints, make drawings or textured designs. In any case, it must be painted correctly, following the technology.
Painting walls has been the most popular type of decoration in any room for many years.
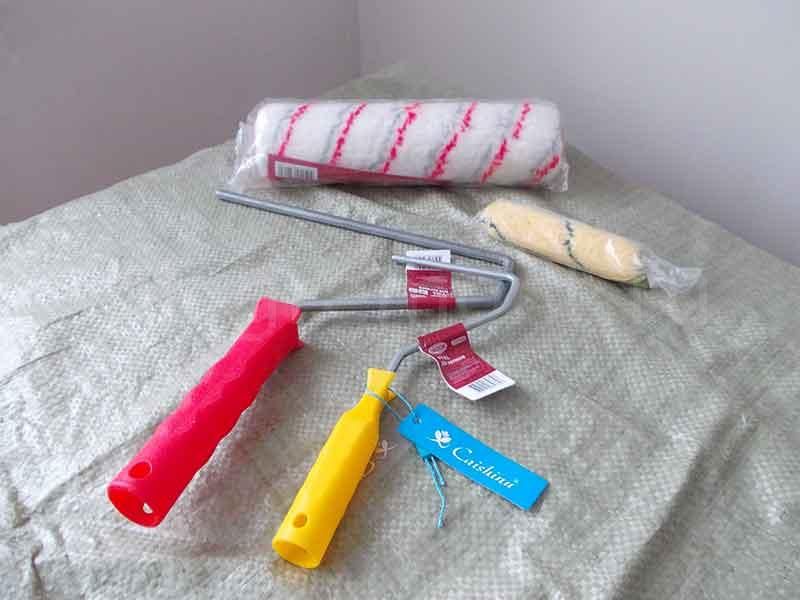
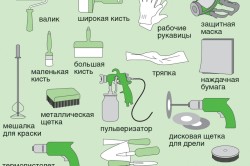
To paint walls with a roller you will need the following tools:
- roller corresponding to the type of paint;
- wide paint brush;
- eye protection glasses;
- headdress (most often a cap with a visor is used);
- protective clothing;
- paint for walls;
- adhesive tape and other devices that will protect unpainted objects.
Roller selection
Before you start repairing, you should decide which roller to paint the walls with. If you plan to paint a large area, it is better to go with a wide one (from 25 cm). For wooden surfaces A narrow roller (from 3 cm) is suitable. The main condition for choice is ease of use.
Foam-based rollers are used for water-dispersion paints, primers, and also for varnish. This type is not recommended for water-based emulsion, as small bubbles will remain on the surface when painting.
Velor rollers with short bristles are chosen for painting walls with emulsion and oil paints. In this case, the paint lies evenly on the wall, creating the feeling of a film. The main disadvantage of velor is its low absorbency, so the roller must be frequently dipped in paint.
Rollers from natural materials(sheepskin and fur) are much more expensive, but last longer than foam rubber or velor. They are suitable for oil and emulsion paints. If the wall has uneven surfaces, it is best to choose a tool with long hairs. The main disadvantage of fur rollers is their strong adhesion to the paint layer itself, which is why they are not used for painting with acrylic paint.
Thread rollers are popular; their brush surface resembles a towel. They are quite soft and comfortable to use. When working with them, the lint does not fall out and does not leave any marks on the wall. This is their main advantage.
How to paint walls with a roller?
Before painting the walls, you should lay the floor and prepare the surface in advance. Knowing the parameters of the room, it is quite easy to determine the required amount of paint. If the package is small, pour it into a plastic bucket: this will prevent the formation of marks and drips. When pouring, make sure that all jars are from the same batch. When all the paint has been poured, mix it using a construction mixer.
Pour a small amount of paint into a prepared container (this can be a construction tray). It is important that the main axis of the roller is not covered. To ensure that the tool absorbs the required amount of paint, rotate it back and forth. Movements should be uniform for better absorption.
The main secret in painting with a roller is the correct calculation of the absorbed paint for the selected area of the wall. To do this, you can draw a small square on the wall and paint it over. It is necessary to work with the roller until it stops painting. After this, divide the square into strips whose width will correspond to the width of the fur coat itself. After simple calculations, you can distribute the amount of paint you have in stock.
Any painting of walls with a roller should start from the top corner, right or left - it doesn’t matter. Skip the first strip and roll over the next one. Skip the third strip in the same way and only start painting on the fifth strip. Beginning with reverse side, that is, from the fourth stripe, paint towards the first remaining stripe. By following this method, you can evenly distribute the paint over the area of the drawn square. The number of stripes should remain unchanged in the future.
Then start painting the wall horizontally in the same manner. When the roller reaches the end of the strip, sharply tear it off the surface. Repainting the square begins from the opposite side.
To distribute the paint evenly, it is enough to paint the selected square twice.
If the paint container begins to empty, add leftover paint from the same batch.
Since the paint dries quite quickly, after a few minutes you can begin to paint the lower corner using the same pattern.
Rinse the roller with plain water when finished.
This simple procedure will allow you to use it repeatedly.
When painting walls, you can use several shades. One of them will be the main color (usually white or beige). It should be applied using a standard roller. The second color (yellow, orange, green) is applied using a fabric roller. A roller passing over the surface of the wall will not paint a section of the wall in some places. As a result, the wall will have a rich color with a light tint. This is unusual design solution for the walls will become a real decoration of the room.
You can use a fabric roller for both oil-based and water-based paint.
When mixed, you can achieve bright and varied colors. Don't be afraid to experiment!