Summary: How to make stickers with your own hands. Sticker at home. Creation of children's stickers on clothes. DIY T-shirt stickers. Decoration and appliques for clothes.
In this article we want to tell you how to make bright, fashionable, exclusive stickers for clothes with your own hands together with your children. To do this, you will need ordinary plastic bags with drawings and inscriptions, parchment paper and an iron.

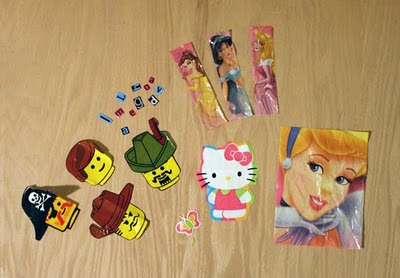
Making stickers on clothes at home is very simple. To do this, cut out the picture you like from the bag, place it on the clothes, place a sheet of parchment paper on top, and then press firmly with an iron. Hold for 10 seconds. Let the melted plastic cool, then carefully remove the paper.


Unfortunately, plain paper is not suitable for creating stickers using the method described above. The picture is soldered to the paper, not to the fabric. If you can't find parchment paper, try replacing it with baking paper. It is better to use beige rather than white baking paper. Also suitable for making stickers with your own hands are these paper cupcake tins. See photo below. Naturally, they must be clean.

If the clothing sticker you made is not soldered well enough, try the above operation again.
It's better to use pictures small size, no more than the working surface of the iron. In this case, you can press it and the paper layer with an iron at the same time.
You can use cut out letters to make inscriptions on T-shirts (T-shirts with inscriptions). This is a cool T-shirt you can make.

It’s also interesting to cut out some shapes yourself from plain bags different colors. When creating stickers, you can layer layers of plastic on top of each other to create images.


Required small parts complete the drawing with a permanent marker.

Using homemade stickers, you can decorate clothes, fill holes in clothes, hide stains on your favorite outfits and children's things if you can't remove stains from clothes.
A wide variety of stickers are sold in stores, but sometimes you need unique stickers with a specific inscription or image of a suitable size.
How to be in this case?
The first option is to order them from the nearest printing house or design studio.
The second is to do it at home with your own hands. In this article we will examine in detail several ways to make stickers yourself and at a low cost.
Making stickers with your own hands at home - step-by-step instructions
- Method 1 is the easiest: Sticker printed on self-adhesive paper.
Everything here is easy and clear: just buy special paper on a self-adhesive basis and print an image of a suitable size on it.
- Method 2: Sticker with a transparent background based on adhesive tape.
This simple method allows you to get a high-quality sticker that is not washed off with water and is very durable.
Make a sticker at home using tape as easy as pie.
All you need for this is a laser printer (an inkjet printer will not work!), plain paper, wide tape and a hair dryer.
The manufacturing technology is as follows:
- We print an image or text on a laser printer;
- Glue wide tape over the picture;
- Place the future sticker in a container with warm water;
- Under the tap (preferably with warm water), completely rinse off the soaked and sodden paper;
- Dry the sticky side of the sticker with a hairdryer;
- Glue onto a grease-free, dry surface and smooth out gently.
- Method 3: Self-adhesive stickers based on homemade glue.
This is a more labor-intensive method compared to the previous ones, since it is additionally necessary to prepare the glue.
For this technology you will need the following materials, tools and ingredients: Paper, printer (you can do without it if you draw a picture by hand), scissors, one bag of gelatin (12 grams), a teaspoon of sugar, a brush for applying glue.
The technology for making stickers is as follows:
- We print the picture on a printer or draw it by hand;
- Cut out the image along the contour;
- Prepare the glue. To do this, pour a bag of edible gelatin into a suitable container, add granulated sugar and pour in a small amount of boiling water, sufficient to dissolve the components. After a few hours, the mass will take on a gel-like shape - the glue is ready;
- Apply glue to the back of the future sticker and let the glue dry.
The sticker is ready! Now before gluing it is enough to moisten the sticky surface with your tongue or water and apply it to the desired place.
To make the sticker more resistant to moisture, you can stick transparent tape over the front side.
- Method 4: Stickers based on double-sided tape.
This is another easy way to make stickers.
All you need for this is a prepared picture (printed on a printer, drawn or cut out from a magazine) and wide double-sided tape.
To get a ready-to-use sticker, just stick the tape on the back side.
Now at any time you just need to remove it from the tape protective film, and the sticker can be glued to almost any surface - glass, plastic, wood, etc.
As with stickers without double-sided tape, you can use clear tape to protect the front side.
- Method 5: DIY vinyl sticker.
To make a vinyl sticker at home, you need to buy a film from Oracal or Avery (sold in hardware stores, available in different colors and shades).
A suitable image is applied to the film with a pencil and cut along the contour with scissors or a stationery knife.
Since the film has a self-adhesive base, in order to stick the sticker, it is enough to remove the protective layer from the back side.
- Method 6: Paper sticker made from transparent tape.
Such stickers cannot be used immediately, as they have a protective side. For them you will need: wide transparent tape, baking paper, a printed or hand-drawn image and scissors.
- We cut out the design with a margin of 2-3 mm from the edges.
- Cut a fragment from a sheet of baking paper slightly larger than the size of the drawing.
- We glue the tape onto the parchment; if the sticker is wider than one strip, use the tape end-to-end or overlapping.
- We place the drawing on tape with parchment and stick the tape on top, preferably at the joint.
- We cut out the future sticker with a margin of 5 mm around the edges.
- Now the sticker can be applied at any time.
VIDEO INSTRUCTION
Modern technologies make it possible to order almost any type of stickers and any complexity from the printing house. But what to do when there is no possibility of ordering in specialized establishments or you simply have a desire to try to create something with my own hands?
At home, it’s quite possible to make cute stickers using only enthusiasm and a little extra time.
Quick navigation through the article
Making a sticker
In order to make a sticker at home, you will need several sheets of plain paper (preferably A4, for working with a printer), scissors and glue:
- First of all, select the desired pattern or picture. Images made using a computer (Photoshop, Paint) are easier to edit or resize, although a hand-drawn drawing will look more original.
- We print the selected image on a sheet of paper or draw it ourselves.
- To apply to the desired surface, use regular glue.
It is worth noting that the glue should be selected based on the surface on which the image is applied (PVA, stationery or silicate). Also, for small-sized pictures, you can use double-sided tape (sold in almost any office supply store).
The only and main disadvantage of this method is that the sticker is highly dependent on environmental conditions (it does not tolerate moisture, it can quickly fade in the sun or lose the clarity of its contours).
Second way
One more, that's enough interesting option, is the use of adhesive tape based stickers. We will need several sheets of A4 paper on hand (we are experimenting), wide transparent tape and scissors.
- Selecting a picture. You can choose any image, but contrasting black and white drawings will look most beautiful.
- We print the desired image, having previously adjusted it on the computer to the size of the tape.
- Carefully glue a strip of tape onto our picture. It is better to do this on one side, gradually smoothing the surface with a plastic card or ruler. The main thing is not to leave any air bubbles under the tape.
- We cut out the picture covered with tape along the contours we need.
- We wet the cut out element in any way and slowly remove the soaked paper layers. It is better to do this with your fingers, since when using hard objects you can remove the adhesive layer of tape. The procedure must be continued until the contours unoccupied by image elements become transparent.
- We dry the resulting adhesive tape with the pattern applied to it and then glue it wherever we intended.
It will be useful to know that Adobe program Photoshop allows you to automatically resize an image according to specified parameters, which will be very convenient if you know the size of the tape strip. For large designs, you can use several strips of tape in a row.
Today, when stores have any goods, and printing houses offer the most wide range services, there is no urgent need to do something yourself. However, if you have a lot of ideas and want to create an interesting handmade product, you can make a sticker at home. You don't need expensive materials and tools - just a little time, desire and imagination.
Why are stickers needed?
Stickers are not just a fun hobby familiar from childhood. Such original details can be part of the decor. This applies mainly to the children's room, which such a design technique can transform in the shortest possible time. Stickers will become interesting design pencil cases, jewelry boxes, boxes with toys. This is a wonderful form of creativity for children, but adults should try their hand at it too. Adhesive applications can decorate clothes, musical instruments, liven up a boring lamp with a plain shade. They can be made from paper, film, fabric - the choice of options is huge. The main thing is to choose a harmonious option. In short, you are unlikely to find a more universal decorative technique.
Where do we start?
There are several ways, let's start with the simplest. First you need to choose a drawing. You can draw it yourself, by hand, or you can create it in computer program. Which option to choose is up to you. Handmade always unique, but with computer graphics then it's much easier to work. It is possible, however, to combine both techniques. To do this, you need to draw a sketch by hand, and then scan it and process it in a special program. You can print a drawing either on plain paper or on colored paper - this is a matter of taste and depends mainly on the style of the drawing. Copy the image using a photocopier. Stickers are cut out from a sheet and glued with the glue that is optimal for a particular surface - for example, PVA. Such stickers are easy to make, but they cannot be called high quality - they quickly fade in the sun and are not resistant to moisture. And if the drawing was made with ink or a gel pen, its contours may blur over time.
Alternative option
If you want to make small stickers, then the design is created in exactly the same way as in the first option. But we will glue it with tape. Moreover, one side of it will be glued to the back of the image, and the other - to the wall or other suitable surface.
Lamination
If you want to protect your drawing from moisture and sunlight, as well as from scratches and other mechanical damage, then the front surface must be laminated. To do this, you can take your drawing to the workshop. However, this can also be done at home. Transparent tape is used for this. The wider it is, the smoother the surface of the drawing will be. To ensure there are no wrinkles in the image, the tape is ironed with a ruler or plastic card. Thermal film is also suitable for laminating at home. It is sold at any stationery store and can simply be ironed - it will look neater than tape.
Self-adhesive paper and stencils
In stores you can find self-adhesive paper - plain or special decorative paper. The first drawing is applied in the most usual way - manually or using a printer. Decorative paper has a smooth, glossy surface, so ink and art paints are not suitable for this. If you want to draw on it, use special markers or gel pens. It is better to take markers for glass. In addition, Oracal decorative paper allows you to create stickers using the appliqué technique.
You can use stencils to create stickers. The design is stamped onto paper using a spray. This option is suitable for creating many identical stickers.
Decorating clothes
If you want to make a sticker on clothes, you will need other materials. You can cut out the picture you like from plastic bag and, using parchment paper as a base, attach the design to the fabric and iron it with an iron. Or apply the design to the polyethylene yourself. Using packages different color, you can make very interesting stickers using the applique technique. Just try to choose small drawings - large ones will look much worse.
In a house where there are children, there is a lot of money wasted. Either the kids need a new toy, or a book, or something else. In this article I would like to talk about how to do it at home, in order to save at least a little money and make the sticker exactly original.
Method 1
It would be easier, of course, to just buy a sticker in a store or order it from a printing house based on your own design. However, it's not that interesting. So, how to make a sticker at home? IN in this case you will need color or inkjet), as well as (it must match the printer). Now all that remains is to print out the selected design, cut the film along the contour and stick it to the required surface - a car, a laptop lid, etc.
Method 2

Method 3
The next way is how to make a sticker at home. To do this, you need to select a suitable design, print it or cut it out, and then glue it to the desired surface (necessarily previously degreased) using ordinary glue (PVA or silicate - depending on which surface the design will be glued to). The method is quite simple, but such stickers are short-lived, because they are not protected from moisture and can quickly fade in the sun. Using the same principle, you can plant drawings not on glue, and this is also a good option, but its disadvantages remain the same.
Method 4
The sticker can be prepared at home using a regular sticker. It is interesting that such a design will be glued specifically to clothing. To do this, you need to cut out the selected design from the bag, attach it to your pants or T-shirt, cover the top with parchment paper (you can use baking paper of any color) and iron it thoroughly with a hot iron. If the drawing does not stick the first time, the operation should be repeated. It is worth noting that small-sized designs will stick better, because the iron can easily go over them in one go.

Method 5
Now I would like to talk about how to make a vinyl sticker, but for this you will need the help of a printing house. First you need to prepare a layout. To do this, the selected drawing must be presented in vector form (you can do this yourself using the Corel program). If you don’t have such skills, the printing house workers will be happy to help. Next, the image is transferred to film. This can also be done in a printing house, but you can try to do it yourself. To do this, you need to purchase a special film and apply it to its surface with reverse side drawing. This will not be too difficult to do, since the specified material is divided into squares. Now the sticker needs to be attached to the desired surface. This is a rather difficult and time-consuming stage. You also need to stock up on mounting film for this. The design is applied to a dry, clean and flat surface, glued with mounting film on top, and smoothed with a squeegee. After this, the film is carefully removed. If any part has come off, it needs to be put back in place and again carefully stroked with a squeegee. That's it, the product is ready and already in place!