Celery is a favorite type of green for many. It is used to prepare a large number of salads and other dishes. It has a specific smell and taste, but at the same time the benefits of celery are great. The plant contains a large amount of vitamins that are necessary for the human body.
In order to always have fresh greens, you can try planting them in your garden. To do this, you need to know the rules of planting and growing, as well as a description of the varieties and characteristics of celery.
Many gardeners love to grow stalk or leaf celery, because of what he has rich aroma and an unusual taste that makes any dish unique. The big advantage is that this plant is quite unpretentious and can be grown in almost any type of soil.
Types of celery
Before you start growing celery, you need to consider in detail its main types:
- Sheet;
- Chereshkovy;
- Root.
The name of the species coincides with the main purpose of its cultivation.
 Impact leaf celery
provides green and succulent plants that have a very interesting taste. The leaves are large, the bushes grow quite large and spreading. The stems can be cut during the warm season and used for food both raw and as a raw material for preparing various dishes.
Impact leaf celery
provides green and succulent plants that have a very interesting taste. The leaves are large, the bushes grow quite large and spreading. The stems can be cut during the warm season and used for food both raw and as a raw material for preparing various dishes.
Petiole view- This favorite plant, which is mainly grown in dachas. It got its name because its petioles are the most valuable. They prefer to make soups or cocktails from them, simply grinding it in a blender.
Growing celery root , is necessary to provide gardeners with rhizomes. This species usually has small leaves and stems, but produces a large root late in the season. It is usually used to prepare various seasonings. Spicy rhizomes are added to the preparation of salads, hot dishes or used in preservation.
Celery varieties:
- Gentle;
- Kartuli;
- Cheerfulness;
- Zakhar;
- Cabin boy;
- Malachite;
- White feather;
- Maksim;
- Diamond;
- Apple.
Growing celery in the country
 In order for the plant to grow to the highest quality, it is necessary choose the right place and type of soil for planting. Sowing is best done in quiet places, protected from the wind and at the same time well lit. Slightly acidic soil and partial shade are well suited, then the qualities of the celery will change slightly, its leaves will become a little lighter and the aroma will become subtle. The less sunlight, the brighter and tastier the leaves and petioles grow.
Celery is cold-resistant plant, it tolerates frost well and can overwinter even with uncut stems, which do not spoil.
Initially after planting, the plant grows and develops very slowly. It depends on the fact that they usually sow small seeds that have a small percentage of germination. Therefore, many summer residents prefer to grow celery using seedlings.
Growing Leaf Celery
Seeds of this species They are quite small and must be prepared before sowing. The material must be soaked in a special weak solution of potassium permanganate and left for several hours. After this, the seeds are germinated on wet gauze for several days.
When everything is prepared, you will need a special soil mixture. This is a special composition of sand, leaves, humus and peat, in equal proportions.
It's best to sow at the very beginning of March in special small boxes that are kept in a room with a stable temperature of about twenty degrees, as soon as the shoots appear temperature regime reduced to fifteen degrees Celsius.
When the plant produces two true leaves, you need to pick. Transfer to open ground grown plants should be grown at the end of April or beginning of May at a distance of twenty centimeters from one another.
Growing Celery Root
 Due to the fact that the development of bushes of this type of celery takes a very long time, it is best to grow it only by seedlings.
Among the features of celery root are: double dive.
When growing a plant, you need to remember that you need to grow a large root. This means that the collection of leaves and stems from each bush should be minimal.
Caring for bushes of this species is no different from others. It is necessary to constantly loosen the soil, water and feed the plantings in a timely manner.
Collection of celery rhizomes must be done after preparing the plants for this. They tear off the side leaves and rake away the soil from the top of the fruit. This must be done fifteen to twenty days before collection. After this, the harvest is harvested, this should be done no later than the end of October. If harvested later, the root may no longer retain as many vitamins as before due to the fact that it is affected by cold temperatures.
Growing petiole celery
The plant must be grown following the rules. First of all, the seeds are sown, then they are planted, and then the seedlings are planted in open ground.
Before the last transfer it is necessary to prepare the place. Special shallow grooves are made into which the seedlings are planted. It is important that the apical bud is not covered with soil. Later, when the plant grows, it is necessary to carry out hilling.
Petiole celery grows for two years. In the first year, stems and leaves develop well, which are used for food purposes. In the second year, seeds are formed that will be used for propagation.
The petioles are collected before frost; they can be stored for a long time without spoiling their nutritional qualities.
Diseases and pests
 From time to time, celery can be overcome by pests and various diseases. To protect the plant, you need to follow the rules of agricultural technology.
The following can harm the plant:
- Bacterial spotting;
- Heart rot;
- Viral mosaic.
To protect celery, it is necessary to constantly thin out the beds. But also weed out the weeds located next to the bushes.
The following disease carriers are common:
- Scoops;
- Carrot fly larvae;
- Snails and slugs.
You can quickly get rid of all of them if you periodically spray the bushes and the soil next to them with a special solution.
Also in a good way prevention is mixed planting, for example, it is good to plant celery along with other herbaceous plants and vegetables.
How to harvest and store crops
Harvesting should be done as it ripens. This largely depends on the climate, best done from August to October. By doing this before frost sets in, we can preserve all the beneficial substances.
Celery is best stored dried or frozen. Fresh stems may lose taste qualities after a while.
Celery is a valuable food product that contains many useful substances. It is also a medicinal agent. The plant slows down aging, calms the nervous system, helps digestion work properly and has a good effect on the cardiovascular system.
Did you know? Celery is the best food for weight loss.
Description of petiole celery
 Petiole celery can be recognized by its large leaves on tall, fleshy petioles. They are the ones that are eaten. Celery is a biennial vegetable plant. It belongs to the Celery family; there are approximately 20 species of celery in the world. It is grown in the first year to obtain roots and greenery, and in the second year the plant forms a fruit with seeds and dies. Grows up petiole celery up to 1 meter in height in open ground.
Did you know? The plant was considered to bring happiness, and it was often hung in rooms along with onions and garlic.
Where is the best place to plant petiole celery, choosing a place in the garden
Dishes with fresh herbs, that is, with green onions, dill and other types herbs, are popular on the tables of any country in the world. The specific aroma and spicy taste of greens should not scare you, as they have great health benefits.
If you want to plant petiole celery in your garden, you need to know how to plant correctly and what care it needs to be provided.
Features of choosing lighting for petiole celery
You need to choose a place for celery that is sunny, but at the same time shaded. The optimal temperature for petiole celery is approximately 20 °C. In temperate climates, the plant can tolerate light frosts.
Temperature and humidity for a good harvest
 Root vegetables cannot withstand low temperatures, so it is better to harvest them before frost. For plant growth, you need to maintain soil moisture at 80% HB. Air humidity should be up to 95%.
Did you know? Some researchers believe that the love drink prepared for Tristan and Isolde consisted of 100 grams of celery juice, with the addition of 50 grams of apple juice and 50 grams of pear juice.
What soil should I plant celery in?
The soil for petiole celery must be fertile. It should be well loosened and drained, since the soil must retain moisture. The acidity should be neutral, but if the soil is acidic, you need to add lime before planting. Humus is also added to the soil.
In the fall, holes are prepared 25 cm deep and 35 cm wide. They are filled with compost and covered with earth.
Planting petiole celery
Before planting young plants in open ground, you need to prepare the planting site. Celery needs deep plowing. This is done to penetrate the roots.
You should also enter nitrogen fertilizers, since they contribute a bountiful harvest, approximately 80 kg/ha. Before planting in the ground, the seedlings are dried to harden them before frost, and then watered abundantly.
Planting celery in open ground
 The agricultural technology for growing celery in open ground is not complicated. The seedlings are transferred to permanent place. The depth of the holes should be about 10 cm. The apical bud is not covered with earth. After intensive growth hilling is carried out.
To get juicy green petioles and get rid of bitterness, you should petiole bleaching.Before harvesting (12 days), tie the petioles into one bunch and wrap with paper.
Petiole celery, planted as seedlings, does not differ from other types of celery in cultivation and care, except for bleaching and hilling.
Important! Do not plant celery near parsnips, as this will increase the risk of your plants being damaged by celery flies.
How to grow celery in seedlings
Sowing seeds for seedlings is carried out at the end of February. For quick germination, soak the seeds in water at room temperature for several days. After drying, proceed to sowing.
Before planting the plant in the ground, it is necessary to prepare petiole celery seedlings from seeds. You need to follow these steps: 
- Prepare containers or wooden boxes. They need to be filled with substrate.
- The soil should be slightly moistened, and then celery seeds should be placed evenly over the surface of the ground.
- The seedlings are pressed into the ground and the box is covered with glass or film. This creates a greenhouse effect.
After the first leaves appear, continue to follow the same regime. This must be done before transplanting petiole celery seedlings into open ground. We advise you to be patient, as it grows very slowly. Provide the care your celery needs and get a good harvest.
Did you know? Celery grows on all continents, except Antarctica, of course. And there, in principle, it can be grown in pots.
What you need to know about caring for petiole celery
Planting petiole celery is half the battle, then you need to provide the plant complete care to achieve maximum yield.
Thinning celery and soil care
 When planting celery seedlings, it happens that several seeds ripen in one hole. Since they interfere with each other, they should be thinned out. This can be done with your hands, removing side shoots and large or yellowed leaves.
Petiole celery also needs soil care as well as watering. This type of care involves weeding and loosening the soil under the celery. This allows the plant to receive the oxygen it needs.
After replanting the celery, the soil is covered with peat, mown grass or sawdust. Weeds should be removed, as should peelings. Do this between the rows. The furrows are loosened during growing season repeatedly.
How to water and how to fertilize petiole celery
Celery should be watered regularly, depending on weather conditions.
Important! The soil should always be moist, but do not allow water to stagnate in the holes.
25 liters of water are used per 1 m² per week. During hot summers, water the plant daily. This needs to be done at the root.
 Petiole celery requires constant feeding when grown. The first fertilizer is applied 20 days after planting the seedlings. Fertilizers must be mineral. For each square meter add 20 g ammonium nitrate and 15 g of superphosphate. You can also add potassium chloride.
Apply dry fertilizers before rain or watering. You can also make fertilizer in the form of composted grass, first diluting it with water (1:3 ratio). 3 weeks after feeding, do a second one, exactly the same as the first time.
For large root crops, eliminate nitrogen fertilizers and increase the amount of potassium fertilizers.
Did you know? A celery wreath was awarded to the Greeks who won the Nemean Games.
Harvesting petiole celery
Petiole celery gives a good harvest if you grow and care for it correctly.
 The collection of petioles begins in September or October. Petiole celery is dug up only when a large rosette has formed.
It is unlikely that anyone will dispute the usefulness of celery. This is the main product healthy eating, an inexhaustible well of useful microelements and vitamins, a nutritious product and a complete replacement for greens on the table. In order to get a good one in your garden healthy harvest, it is recommended to practice growing petiole celery seedlings from seeds.
There is simply no seedless method, since the long growing season - 3-5 months - excludes the possibility of sowing in open ground, even in the south. How to grow petiole celery, how to properly sow, care for, pick and plant in beds - in our article.
Celery varieties
In our country, the cultivation of petiole celery has not yet reached a large-scale level. This is due to the complexity of the plant’s agricultural technology, the peculiarities of planting and care, and the bleaching of rhizomes for further consumption.

Difficulties arise even at the stage of selecting seeds. It is not enough to just buy the first package you come across, but carefully choose among different varieties, sizes, ripening periods and even tastes.
Table for sowing petiole celery through seedlings:
|
Name |
Growing season, days |
Description of the variety |
|
Non-self-bleaching |
||
|
Petioles of medium thickness, height 42-45 cm |
||
|
Short petioles up to 25 cm, thick fleshy |
||
|
Male valor |
Thick fleshy petioles up to 50 cm long. Very juicy |
|
|
Medium height (30-38 cm), resistant to short-term frosts |
||
|
Medium height, curved shape, stores well |
||
|
Self-bleaching |
||
|
Thin curved half-meter stems |
||
|
Most early ripening variety with short but very tight petioles |
||
|
They are considered one of the most appetizing and fleshy species. The stem is tall, fleshy, tight, tolerates storage well |
Non-self-cleaning varieties require certain bleaching procedures, otherwise the petioles will be very hard, fibrous and practically unsuitable for food. But at the same time, the bleached core is surprisingly tasty, moderately crispy, tender and very nutritious.
Self-cleaning varieties are more convenient to grow, but they store worse, are more susceptible to diseases, and should be eaten immediately as they are collected.
Features of seed germination
- This deciduous crop classified as the most retarded, which is due to the high concentration essential oils in the seed. IN agriculture on an industrial scale they are etched with a solution of hydrochloric acid, and at home to obtain petiole celery seedlings in hot water(up to 60°C) soak the seeds in advance until the water cools down, after which they are washed warm water and dry until crumbly.
- Dry grains should never be sown; this delays the emergence of seedlings by more than a month. Before sowing, they are washed, checked for germination (see below), wrapped in toilet paper, moistened generously, wrapped in a bag and sent to a warm place, preferably on a radiator, but away from sunlight or artificial light.
The seeds should be completely submerged in water, not slightly moistened.
You can use another, simpler way to grow stalked celery seedlings - pour sawdust into a jar, pour water over them heavily, cover with a piece of gauze on top and lay out the seeds. The sawdust should just get stuck in the water, then each seed will swell well. This container is also placed on a radiator or other warm place, but so that the sun's rays can reach the jar.
VIDEO: Preparation planting material to crops
What should the soil be like?
It is advisable to use self-prepared soil, for which the following components are mixed:
- peat - 3 parts;
- turf soil - 3 parts;
- humus - 1 part;
- sand - 0.5 parts;
- wood ash- 0.5 parts.
All this is mixed, calcined in the oven for an hour at a temperature of 180-200°C, stirring occasionally. You can douse it with boiling water or a weak solution of potassium permanganate.
Disinfection of the land is mandatory before planting seeds for growing seedlings.
After the soil has been disinfected, it is left for one and a half to two weeks to restore favorable microflora. This necessary condition further growth of seedlings.

If it is not possible to prepare the soil yourself, you can buy universal soil at any agricultural store, which no longer requires preparatory measures.
It is advisable to choose one that is designed for growing cabbage.
Sowing
Sowing seeds for stalked celery seedlings begins in the second ten days of February and ends in mid-March, depending on the growing season of each variety.
There are 2 basic ways to sow seeds:
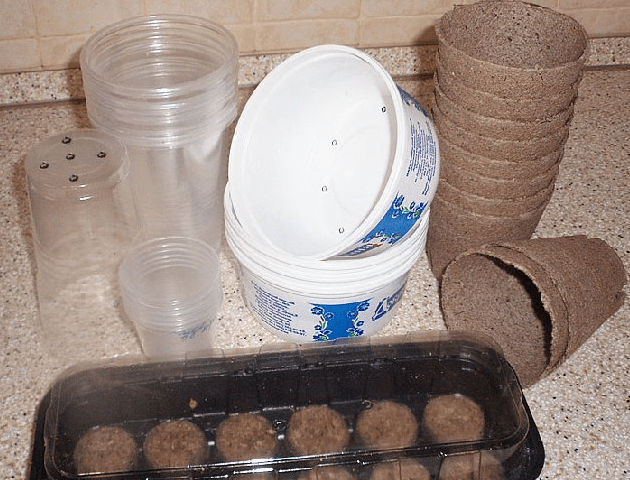
- in containers - a box, pots, cassettes, peat cups or tablets, etc.;
- in a container with snow;
- in diapers - in polyethylene or backing, rolled into a roll.
In container

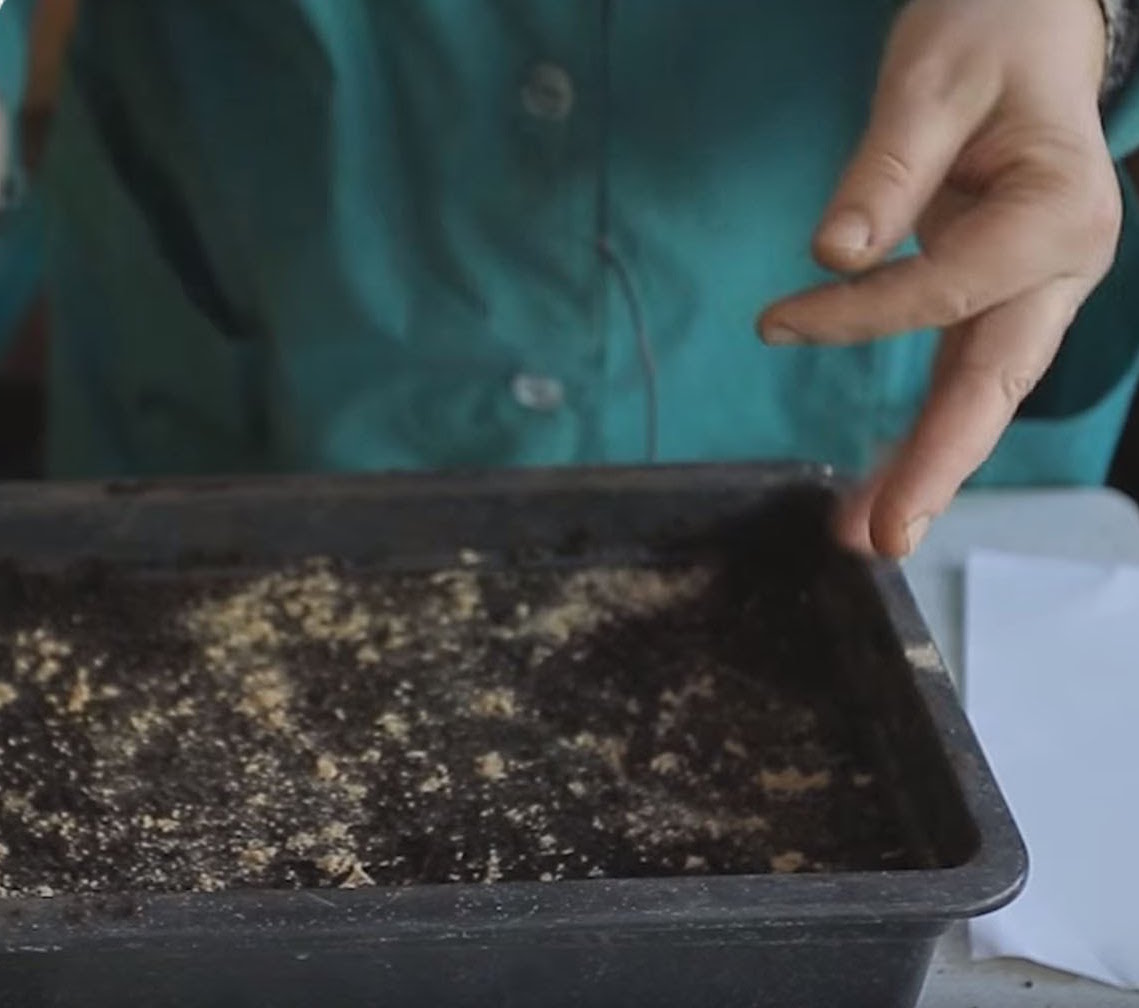
Pour a 5-10 cm layer of soil into the prepared containers and lightly water it with water. Make small paths with a pencil and lay out the seeds at a distance of 2 cm from each other, 5 cm between the grooves. There is no need to deepen the grains, just sprinkle them with soil and spray them generously again from a spray bottle.
In a container with snow
Everything is done the same as in the first case, but a layer of snow is placed on top, and seeds are placed on it. As the snow melts, it will “carry” them along with it, simultaneously saturating them with moisture.
In diapers
A very convenient method in which the plant roots remain intact. With this organization, it is convenient to pick and transplant into beds or open ground.
.png)
For this you will need:
- meter strips of substrate for laminate, 40 cm wide;
- soil - prepared or purchased;
- seed;
- elastic bands;
- deep plastic containers or buckets.
Work order:
- Spread a base on the table and place a layer of earth 3-4 cm thick on it.
- Lay out, retreating from the edge 3 cm, the first grain, make the first turn of the roll, lay out the second - second turn, etc. You should get a roll of soil with seeds.
- Secure it on three sides with an elastic band so that the structure does not fall apart.
- Install vertically in containers (do not confuse which is top and which is bottom).
- Water is poured into the bottom of the container and sprayed on top with a spray bottle.
This method saves space, makes it easier to care for and allows you to move plants without the risk of injury to the root tendrils.
Caring for seedlings at home
Basic care consists of timely watering and lighting.
- You need to water from a pan or by spraying. The second method is preferable.
- When the first loops of sprouts appear (usually after 30 days), the seedlings are moved under phytolamps or daylight.
- In the third week, the seedlings should be fed with liquid organic matter.
- After the appearance of the 3rd full leaf, picking into separate cups is allowed.

- 2 weeks before transferring them to the beds or greenhouse, the seedlings are hardened by taking them outside first for half an hour, and increasing them by another quarter of an hour every day.
- Before transplanting, water thoroughly and the next day you can begin the process itself.

Transfer to open beds
The recommended time for replanting grown petiole celery seedlings is the second ten days of May, when the soil has already completely warmed up. Using a hoe, make small furrows at a distance of 50 cm from each other, lay out the sprouts and sprinkle them with soil.
Be sure to water carefully so as not to wash out the roots, and mulch with hay, straw or mulch. The main thing is that the composition must retain moisture well.
A plant that does not receive enough water during the growing season is unsuitable for food.
In the future, the sprouts are cared for in the same way as other crops - timely watering, fertilizing with ready-made fertilizers, loosening and weeding.
Application of fertilizers - required condition harmonious growth of petiole celery seedlings. The first fertilizer is applied 15 days after planting, the second - when there is an abundance of green mass, the third - 40 days later, when the root begins to develop.
Non-self-cleaning varieties are planted in deeper trenches, into which soil is constantly added while the crop is growing. At this time, the process of cleansing the roots occurs, resulting in an unusually juicy and tender core.

Be sure to pinch the lateral root shoots 2-4 times during the growth process. This will allow you to form a root crop and get a good harvest.
The soil should always be moist, for which purpose the soil must be mulched. You don’t need to rake it to water it; just pour water on top so that it penetrates into the root zone.
If frost is approaching, the seedlings must be covered with acrylic, spunbond or cellophane. In autumn, when the temperature drops to -5°C at night, bushes are also covered.
Harvesting and storage
The first harvest is in mid-August in an attempt to determine the level of maturity. There is no need to harvest the entire crop at once if we are talking about personal farming. Self-peeling varieties are eaten immediately, while unpeeled varieties can be stored for up to a month.
To freeze, you can peel root vegetables or chop leaves, rinse, dry and put in dry bags, then put everything in the freezer.
VIDEO: Growing root and petiole celery for seedlings
Not every vegetable grower can grow celery, since not all gardeners know how to sow root celery for seedlings. Many, even experienced vegetable growers, could not wait good harvest this crop, because they did not figure out for themselves in advance how to properly grow root celery and how to plant petiole celery for seedlings.
What conditions are necessary for growing root celery?
 Harvesting celery in the fields
 The main problem in the process of growing this garden crops consists of long periods of ripening of root celery. Planting of root celery seedlings is carried out at the end of the last winter month, or in the first week of spring, as it prefers a mild, not frosty climate.

Sow directly into your soil personal plot This plant can only be grown in the southernmost regions of the Krasnodar and Stavropol Territories, Chechnya and Dagestan.
In order to harvest a good harvest of root celery in advance, you need to take care of the quality of the soil in the garden.

The garden plot prepared in the fall is dug up and added to the soil. organic fertilizers. In the spring, the bed is loosened again and fertilizers are applied.
The following components are good for this purpose:

- ash;

- infusion chicken manure, as well as any preparations intended to improve soil quality. Special means can be purchased at flower shops.
In other words, in order to sow celery for seedlings in 2018, preparatory work should have been done in the fall of the previous year.
 Celery planted in a garden bed
 Early plant varieties when grown in southern regions, you can plant directly in the garden bed, and when later cultures celery root, sowing for seedlings is required. One of the main conditions for obtaining a large quantity of high-quality harvest is the presence of high-quality seeds.

In order for the planting of root celery seedlings to be successful, all selected seeds are placed in a jar with clean, warm water and kept in it for 24 hours. Those seeds that float to the surface as a result of soaking are unsuitable for planting root celery seedlings. Sorted high-quality seeds are sown into the soil to a depth of 1 centimeter in a peat base.
Agronomic features when growing root celery

Knowing the rules for planting root celery for seedlings, the gardener can be sure that he knows how to plant petiole celery for seedlings.
Root celery is one of the crops that require special care and close attention from the vegetable grower; all the problems of growing this crop are related to its characteristics. The point is that the stage active growth and celery takes five months or more to ripen. Thus, in the northern regions this plant simply does not have time to ripen before the onset of cold weather.

Since the crop has too long a ripening period, and for this reason it is necessary to plant root celery as seedlings.
In order to grow a good harvest of this crop, you need to know how to sow root celery for seedlings.
Also, in order to ensure a good germination rate of root celery seeds, it is necessary to select high-quality seeds.
This is done like this:

- the purchased seeds are placed on moistened gauze; keep in a warm room for a week;

- Place in the refrigerator for a period of 10 days.

- After these manipulations, the seeds are placed in a jar of water, and those that float to the surface are removed.
Only those seeds that lie on the bottom are suitable for sowing seedlings.
How to properly prepare root and petiole celery seeds for sowing for seedlings
Sowing of seedlings is carried out towards the end of the last winter month, approximately two and a half months before planting root celery shoots in the soil. Seedlings begin to be planted with preliminary manipulations.

The seeds of the plant must be soaked in order to ensure accelerated germination.
The fact is that they do not wake up very actively, since the seeds contain a large amount of essential oils, which complicate the process of active swelling in the peat base. The seed may not germinate from three weeks to one month, especially in cases where the air in the room is too dry and the soil contains little moisture.
There are two main processing methods seed material petiole and root celery:

- In the first method, the seed is kept in oxygen-enriched water for a whole day. After this, they are treated in a weak pink solution of manganese for about 1 hour. All manipulations are carried out in a warm room.

At the last stage of preparation, the seed is washed in warm water, and then sow seedlings.
- In the second method, the seed material is kept in a weak manganese solution - Pink colour about an hour, then washed in warm boiled water.

After this, root celery seeds are soaked for 18 hours in any of the special preparations offered by specialty stores. Good feedback The product "Epina" has it. To create the product at the required concentration, you will need two drops of the product per 120 milliliters of water. All manipulations with seed material are carried out subject to availability room temperature. Only after the preparation has been carried out can seedlings be sown.
The manipulation plan for both seed treatment methods cannot be changed and must be strictly followed.

At the last stage preparatory work, the seeds are evenly scattered on the surface of a moistened cloth and left in a warm room for germination at a room temperature of at least 20 degrees C.
Only after this can seedlings be sown.
Planting root celery for seedlings
To sow celery for seedlings in 2018, the majority of gardeners use pots that are placed on window sills.

For this purpose, specially prepared nutrient soil, in which for 3 kg of peat, add 1 kg of humus mixed with sand.
Then add 250 grams of ash and a teaspoon of urea to the prepared mixture.
The sprouted seeds are thoroughly dried in the shade, after which root celery is planted as seedlings in boxes filled with moistened soil. You can first place the seeds on a strip toilet paper at an equal distance from one another. Gluing seed material to a strip of paper occurs due to a paste cooked in advance from flour.

There should be at least 3-4 cm between planted seeds.

The paper tape with seeds is sprinkled with a thin layer of sand, which is constantly moistened with a spray bottle as it dries. Sand is needed because seed germinates faster in the open air. Planting petiole celery for seedlings occurs in approximately the same way.
How to properly care for celery root seedlings

The container with the sown seeds is placed in warm room and covered with film material.

If the room is not well lit, then lighting fixtures are installed above the boxes with seeds.

From the moment of sowing to the germination of the first shoots, as a rule, it takes a little less than two weeks. As the soil dries, the sprouts are moistened with a spray bottle (the water should be at room temperature).
It is strictly forbidden to water plants at this stage of growth, because this will result in the appearance of a so-called “black leg” on the surface.

To ensure normal growth of seedlings, containers with seeds are kept at temperatures not lower than 22 degrees.

After the first shoots form, the film is removed, and the container with the crops is moved to the most sunny windowsill, while the temperature in the new place should be at least 16 degrees.
Features of picking

A month and a half after planting, celery grows inactively, increasing its volume very little. After one month from the moment of sowing, when the seedlings have 2-3 well-formed leaves. The seedlings are thinned out, leaving a distance of five centimeters between the leaves.
They also carry out plant transfers, suitable for this:

- peat pots;

- disposable cups;

- special boxes for crops, greenhouses, greenhouses.
The required soil density for growing seedlings must be at least ten centimeters.
Important. During the picking process, the plant is immersed in the prepared soil mixture up to half, without exposing it root system, such an error can cause slow development.

When transferring the shoots to the greenhouse, they are placed at a distance of six centimeters, with 7 to 8 cm left between the rows. The transplanted plants are carefully watered and covered with moistened paper for two days.
The most suitable temperature for ensuring rapid rooting of plants after picking is fifteen degrees, and at night it can drop to 11 degrees.
Feeding and watering plants
Caring for growing sprouts includes loosening the soil, watering and fertilizing. For the first time, feeding is carried out twelve days after the picking procedure.

For this purpose, a nutrient mixture is used, for the preparation of which take one teaspoon of nitrophoska per bucket of water.
Water, spending 1 tablespoon of solution per 1-2 plants.
If the leaves of the plant look too weak, then it is fed with urea at intervals of two weeks. To avoid damaging plant leaves with chemicals, they are washed with warm water after fertilizing.

A week before transferring the crop shoots to a place of permanent growth in open ground, the plants begin to harden. To do this, they are taken out into the air, first for the whole day, and then at night.

Seedlings are planted in the garden after five developed leaves appear. This happens approximately 60 days after planting petiole celery seedlings. Five days before the seedlings are moved into the ground, the plants are taken out into the air; before this, they are actively watered for two hours.

A few hours before planting petiole celery, the sprouts are well watered with warm water so that the soil is well soaked.
The suitable time for planting root celery in garden beds is from late April to mid-May. Planting time depends on the climatic conditions of the region. In the southern regions, during warm weather, celery can be replanted earlier.
Planted before plants have better productivity compared to those that were planted in the ground later. Planting too early can result in too many flower stalks.
Seedlings that have managed to grow up to 15 cm in height and have 4-5 developed leaves take root well and produce a good harvest.
Weak, poorly developed shoots will not produce a good harvest.
Sowing petiole celery for seedlings

Sowing petiole celery for seedlings and caring for this crop remains the same as when growing root and leaf celery.
Planting of petiole celery for seedlings is carried out at the end of February at the beginning of March. Why is the soil mixture pre-prepared?
To sow petiole celery for seedlings, the seeds are processed and germinated. After this, you can plant petiole celery as seedlings.
Only the process of fertilizing must be carried out taking into account several rules. The plant loves good watering and loose soil.

At the same time, you should not allow too active flooding of the soil, as this will lead to rotting of the root system. To avoid drying out the soil needs to be mulched.
Fertilizers are applied to the soil every two weeks. For this purpose, it is best to use organic mixtures, such as an infusion of chicken manure or nettle.
Sowing petiole celery for seedlings, like sowing root celery, requires special skills and knowledge from the vegetable grower. However, if you follow the basic rules for preparing seeds and selecting them, feed and water the plants in a timely manner, then the effort spent will lead to an excellent result. The main thing when planting celery is to take into account the ripening time of the plant.
Thus, planting root celery as seedlings and further caring for this plant should be done extremely carefully, adhering to all growing rules.
Many people dream about summer cottage, where you can relax in the summer, retire to nature, admiring the beauty and breathing clean air without emissions. Often in dreams there is also a small garden where you can grow vegetables, beans and herbs. But not everyone knows that you can grow petiole celery yourself and enjoy its taste in various prepared dishes.
Description and main characteristics
Celery is one of the most useful plants. Herbalists consider this plant an integral component necessary to maintain healthy image life. Often included in weight loss products and recipes.
This herbaceous plant has a number of useful properties, contains a large amount of vitamins and minerals. It also has a subtle but rich taste. For its beneficial qualities, this plant is valued by lovers of delicious food all over the world. More recently, celery was grown only for medicine, but today it is present in many gourmet dishes.
The range of effects of this plant on human body very wide.
The root crop is enriched with the following features:
- raises tone;
- able to increase mental and physical performance;
- brings appetite back to normal;
- relieves pain;
- is a diuretic.
Varieties of root vegetables
This plant has several varieties. They touch external structure. There are three types of celery:
- sheet;
- root;
- petiole.
This plant can complement any dish favorably without losing its useful qualities when cooking. Fortunately, celery is one of the dietary products and does not harm the figure.
Cultivation of stem celery occurs for the sake of juicy petioles-stems. Currently, the petioles are white or green. The difference in colors does not refer to varieties of varieties - the same species can be different color. The coloring is influenced by growing methods. Eg, White color appears if celery is hilled by placing the stems deep in the soil.
As a rule, celery is planted in the garden in May, towards the end; in warm areas you can start planting it already in the middle of the month. By the time the seedlings are transplanted into open ground, the sprouts should be 5-7 cm high. It is important to ensure that the sprouts are not just long, but strong and alive.
White varieties of celery are planted in holes on a bed with a distance of 25x25 cm. If the choice fell on non-self-bleaching varieties, then a trench is suitable for planting, in which case the marking should be 30 cm between seedlings.
It is necessary to plant the plant deep in the trench, then, as they say, experienced gardeners, when ripe, white stems will form. If the planting took place in a regular bed and the stem grows green, then it is necessary to carry out a number of measures a month before harvesting.
The fact is that the color of the stem of petiole celery depends on the level of illumination; a white tint appears in the root vegetable if it grows in a dark place. Therefore, around September, when the celery grows 30 cm, you need to:
- gather the leaves up into a bunch and tie them loosely with soft tape;
- wrap the stem itself in wrapping material (from the soil itself to the leaves);
- secure the wrapper with twine or tape;
- leave for 3 weeks, then dig up and free from fixing materials.
The celery is ready to be scooped up. Anything that will not be immediately consumed as food should be buried in moistened sand in a cool place - you will get a good fertilizer.
Various unnecessary thick paper can be used to preserve for the winter. Also suitable plastic bottles or pipes, as well as Penofol and straw. You need to fill the bottles/pipes with small sawdust or dry leaves.