From time immemorial, baths have been extremely popular in Rus', and recently these buildings have begun to experience a rebirth associated with the boom in individual housing construction. Almost every summer cottage or adjacent to country house The owners are setting up a bathhouse in the area. And many of them do not shy away from building a sauna stove with their own hands. If you plan and build the stove correctly according to our instructions, it will fill the bathhouse with a special atmosphere of health and vigor.
Preparatory work
Many owners of summer cottages and suburban real estate currently, having minimal construction skills, build bathhouses on their own and install sauna stoves with their own hands. You just have to be patient and get the drawings of the sauna stove. After all, by making a sauna stove yourself, you can save a lot of money, because you won’t have to buy expensive materials and bring any special equipment to the bathhouse.
As a rule, the stove in a steam room is positioned in such a way that one part of the building is responsible for heating the steam room, and the back part maintains the level of warmth in the relaxation area and dressing room. As for the selection of material for this building, it is quite possible to use those remnants that were preserved after the main construction. Of course, materials can be purchased.

The work will progress much faster if you prepare all the tools in advance. To the right of the stove, place trowels, a bucket of mortar, a hammer and a level; to the left of the stove, place a bucket of water, an emery wheel, a trash bin, a dustpan, a pencil, a square, pliers and a sheet of instructions.
Before starting laying, check the correct placement of the future structure. For this purpose, lay out the first row of masonry and the first row of the chimney dry. After this, lower a plumb line to the corners of the chimney from the ceiling to ensure there is enough space to accommodate the fire stop.
Cladding of walls and partitions
If internal partitions the bathhouse is made of flammable material, you should following works. Sew up the opening under the firebox and the section of the wall where this opening is made and which is located behind the body of the sauna stove with asbestos cardboard and place a sheet of metal on top of it, which is at least 4 millimeters thick. The minimum distance from the furnace body to partitions and walls that are not protected by asbestos and sheet metal can be 320 millimeters, protected by sheathing - about 260 millimeters.

A stone stove in a Russian bathhouse itself is a rather heavy structure, so to build it it is necessary to strengthen the base, that is, you should build a foundation for the sauna stove. The corner of the steam room where the device will be located must be insulated and strengthened, since in winter there will be a large temperature range in this place, which can lead to the formation of cracks in the building.
Furnace foundation
First you need to dig a pit, which has a depth of about 0.7 meters. Cover the bottom of the pit with 15 centimeters of sand. Then soak the sand with water and pour broken bricks and crushed stone on top. Next, make formwork in the pit and create a reinforced frame. Fill everything with a layer of concrete on top so that 15 centimeters remain to the surface. The formwork must be dismantled, applying tar in several layers on the sides, and fill the remaining space with coarse sand.

The last layers of the foundation are two pieces of roofing felt, which are equal in area. They are performing waterproofing material. By creating such waterproofing reinforced concrete foundation will remain cold even in summer time. When the foundation of the sauna stove is ready, you need to check its horizontalness. Using mortar and intermediate row bricks, you can eliminate any flaws that may arise. After this, you can begin building a brick stove in a bathhouse with your own hands.
Material selection
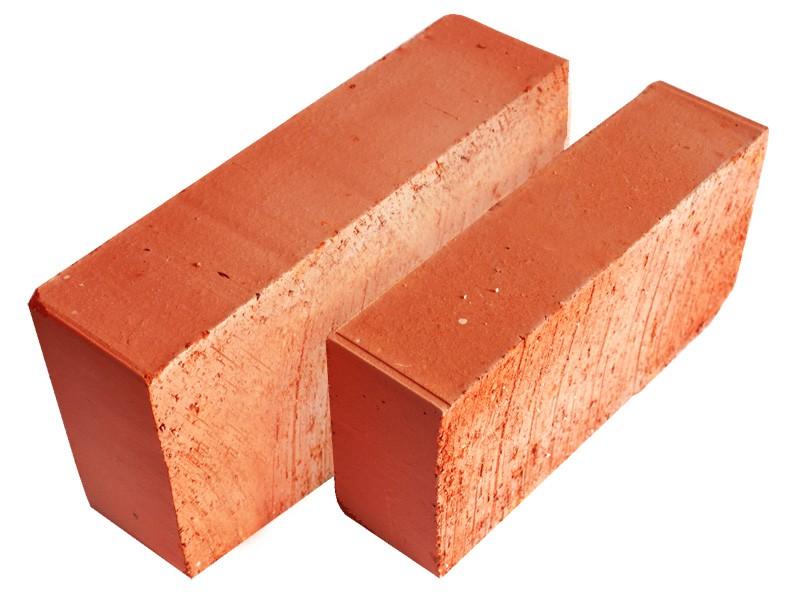
In order for the structure to be reliable and strong, the furnace masonry must be made of high-quality brick. The size of such material is often 250 by 120 by 65 mm. But if you choose a low-quality brick with these dimensions, then with its help you will not be able to lay out a square of 770x770 mm, observing the required thickness of the seams (maximum 10 mm).
It is customary to prepare the solution after laying out the first row dry. Clay for the solution should be mined from a depth of half a meter. Take a suitable container and soak the clay in it for several days. It is easier to use material from the ditch if it is wet, since in this state it can be easily broken into pieces. But it is difficult to process dry clay and you often have to use a tool.

Only clean sand, without algae and impurities, is suitable for the solution, so first sift it and clear it of debris. Only after this can sand be poured into the solution. To use, you should avoid river sand, since its grains are round in shape. Mountain sand grains are more suitable because they have uneven sharp edges, which contribute to better adhesion.
When all the components of the solution are ready, knead the clay using a special tool - a paddle, add water to it and stir well with a hammer until the mixture looks like thick sour cream. Add sand to this mixture. To check the readiness of the solution, use a dry and clean stick and dip it into the mixture. If, after dipping, a layer of clay solution of approximately 2 millimeters remains on the stick, then the solution is suitable for use. If there is less solution left on the stick, then add clay, if more, add sand.
Masonry 1 - 7 rows
Make the first brick laying on a waterproofing bitumen pad that is placed on the foundation. At the same time, wet the bricks with water. Then check the corners, which should be strictly straight, and the “order” - carefully measure the edges, because with any gap smoke will enter the room.
Lay the second row in such a way that each new brick is placed at the junction of the lower two. The same should be done in the following rows. It is customary to install a blower door in the third row. Reinforce it with galvanized wire or strips cut from steel sheet. By the way, professionals advise using steel strips because they are easier to fasten.

In the fourth row, lay a well for ash and install grates for the air duct, making centimeter-long indentations in each direction in the bricks with intervals to expand the grate. Round the back wall under the grate with broken brick.
The masonry of the sixth row includes the installation of the door for the blower, and the installation of the seventh row includes the installation of the furnace door and grate. It is customary to equip sauna stoves with your own hands using cast iron doors. They are considered today the most durable and fire-resistant of all existing ones.
Masonry 8 - 23 rows
Make the eighth row with a partition from which the chimney duct will exit. In a similar way, bricks should be laid up to the fourteenth row, on which the channels should be installed. Make an opening in the front wall for a container that will hold hot water. Position it in such a way that it is in contact with the channels and rests vertically on the walls of the masonry.

Lay the fifteenth row with halves of bricks, placing them at an angle to form the base for the dividing wall. Make three more rows of the future sauna stove similar to the first rows.
On the nineteenth row, install a door through which steam will subsequently be removed. Lay thin strips of metal, which you then fasten together in the twentieth and twenty-first rows. At this stage, close the steam door frame and place hot water container, which then needs to be “wrapped” with brick fragments. Start installing the pipe on the twenty-third row, its length depends on the height of the bath.
Chimney channel
When installing a chimney for a sauna stove, you should take into account the structural parameters: if the homemade brick stove for a sauna turns out to be massive, then make the pipe rather large. The thickness of its walls should be at least half a brick. Make a section of the smoke passages of a similar size.

The fewer bends a chimney has, the better - the chimney should ideally be completely straight and have no bends. The minimum length of the smoke channel is 5 meters, the length should be calculated from the level of the grate: the diameter of the chimney must fully correspond to the diameter of the exit from the sauna stove. Equip the chimney with a damper.
Masonry quality control
An important factor in performance sauna stoves the smoothness of their inner walls appears. Make sure that the bricks have smooth and intact edges facing inward. If there are hewn edges or chips, this will quickly cause the destruction of the brick. Do not lubricate the internal surfaces with clay, since after drying it will clog the chimney and peel off.

To achieve maximum smoothness, you need to carefully lay the bricks. Every five rows, wipe the inner surface with a cloth that has been previously moistened in a clay solution. This will ensure that scratches and small gouges on the brick walls are repaired.
Drying the sauna stove
After laying the sauna stove, the structure must be dried before using it directly. There are two drying methods: natural and forced. The first, of course, is preferable, but it requires time. Keep the finished masonry in free air access for fifteen days. Excess moisture evaporate, the oven will dry evenly, cracks will not form.
If you choose the second path, then heat the stove with paper and wood chips until it heats up. Requirements that must be met during the first fire: good draft, which is manifested in the absence of smoke; if the thickness of the walls of the building is more than 1/4 brick, then the surface of the furnace should not have a temperature of more than 90 degrees; uniform heating of the oven.

Run several fires in a gentle mode. Repeat the process until the sauna stove is completely dry. The combustion should be low-intensity and slow. It is best to use wooden logs as fuel. Place them in batches of no more than 2 kilograms. After heating for a short time, wait until the stove in the bathhouse has cooled down, and then heat it again.
Such actions must be carried out in the morning and in the evenings for 3-4 days, after which you can increase the degree of heating of the oven. During the drying process, all windows, latches and doors open. The duration of drying the stove in the bath depends on the time of year. During the warm season, when the air humidity is high enough, it lasts about 8 days. After drying the stove, you need to carefully inspect it, cover up the cracks that have formed and rub it well. Only now the self-made sauna stove is ready for use!
Plastering the oven surface
After laying, the sauna stove can be plastered. Although such a procedure is not mandatory. However, plastering significantly improves the appearance of the structure and protects the room from fire. For this purpose, you can use a clay solution with the addition of gypsum or asbestos. To strengthen the plaster on the walls of the sauna stove, you can add a little salt to the solution. In addition, fairly high-quality mixtures of clay and sand are available for sale.
First, wait for the oven to dry. Do not forget to prepare the oven wall before work: clean it of mortar and clear the seams to a depth of one centimeter. Some owners spread plaster on the constructed metal mesh, which is attached to the wall with wire and tied.

Before plastering, it is customary to heat the stove. The solution is applied in a double layer to the wall, previously moistened with water. The consistency of the first layer is made similar to sour cream, the second layer is thicker. The layer thickness is usually 6-8 millimeters, in some places it can increase to 10 millimeters. After you have applied the solution, the surface should be rubbed and leveled. Whitewash should be applied to the plastered surface.
To decorate plastered walls there is a rustication. Rusts are small grooves that are applied directly to the surface. On a layer of plaster that is 10-12 millimeters thick, cut out rustications after marking the future design. After cutting, the recesses are painted one color, the rest - another.
Furnace painting
First remove roughness on the walls of the sauna stove by moistening and rubbing the surface with brick. You can paint walls using adhesive paint. You can also whitewash the walls with lime milk and salt. Whitewashing can be done slaked lime, which is diluted in water, with the addition of blue.

You can purchase lime paint for painting the stove. For 2.5 kilograms of lime dough, take a bucket of water. Add glue, salt solution and 50 grams of drying oil to the liquid. Then mix thoroughly and filter. For multi-colored patterns, red lead, ultramarine, ocher and blancfix are used.
It is not recommended to use drying oil because it burns out when exposed to high temperatures, spreading a pungent odor. Organosilicon paint is used to paint the metal elements of the stove - the doors of the ash pan and the firebox.
Cladding with glazed tiles
The tile acts as an additional obstacle to the entry of smoke into the room if there are minor defects in the masonry, but it is used infrequently, because such finishing is a labor-intensive process. Suitable for cladding are heat-resistant tiles that have a glazed surface.

In the photo of the sauna stove you can see that the base of the tiles has notches to ensure better adhesion to the mortar. Before laying, you need to select tiles according to shades and colors. Since it is not possible to attach the tiles to the heating wall of the oven using a single solution, additional fastening devices have found their use.
Aluminum strips with holes are usually inserted into vertical seams. Attached to these strips aluminum profile and corners that hold the tiles in place. The tiles are then laid on the mortar, starting from the bottom.
Stove cladding tiles
They are called tiles ceramic tiles, which can be used to line walls, fireplaces and sauna stoves. Similar tiles with reverse side has a special pump device that looks like a mini-container. It is with the help of the rumpa that the tiles are attached to the bricks on the stove.
Depending on the front surface, there are smooth, majolica, relief and unglazed terracotta tiles or tiles that are covered with glaze. All tiles are made by hand from plastic pottery clay or in a wooden form and fired in a kiln at a temperature of about 1150 degrees Celsius.
Tiling today is considered one of the most hygienic, popular and beautiful ways sauna stove finishing. A stove lined in this way is very easy to care for. During the cladding process, the masonry seams are well overlapped, and this prevents flue gases from entering the bathhouse.
Follow our instructions unconditionally, and you can build a sauna stove on your own. You should first prepare drawings of the structure and find out about the price of the sauna stove. After everything is finished construction works, it’s worth starting the stove fire. And only after this can you start plastering, painting or covering the stove with glazed tiles and tiles.
Despite the fact that a brick oven takes longer to warm up, it is able to provide more uniform heating of the steam room and the absence of “cold zones”. Experienced steamers claim that it is comfortable to be in such a room even at high temperatures.
Brick kilns are quite complex devices, and their laying requires special skills. You can do it yourself, but only if you strictly follow the laying scheme (order) and know certain subtleties.
Do you need a foundation?
Such a structure will have significant weight, so a solid foundation must be built before installing it. Some experts argue that if the building is built on a solid foundation, a separate construction for the furnace is not required. However, in swampy areas or in northern regions, where due to temperature changes even carefully compacted soil will “play”, it is better to provide separate foundation.It is undesirable to cut load-bearing beams and logs for its construction, rafters and floor beams for the removal of the chimney, so it is better to choose a place for the stove before the construction of the building begins.
Important! Such a foundation should not be tied to the main one, since due to the large temperature difference when heated, the expansion coefficient will be too large. The distance between the main and furnace foundations should be at least half a meter.
Foundation for a sauna stove
Construction of the foundation for the furnace
Pit depth is determined based on the properties of the soil: with high density, 20-50 cm is enough, in loose soils it goes deeper by 50-100 cm. Its width should be a brick larger than the base of the stove. Before laying begins, sand is poured onto the bottom, which is thoroughly poured with water to compact it, then crushed stone or broken brick is laid and compacted tightly.Important! Cement-sand mortar It completely hardens and gains strength for at least a week, so you should not build a heavy stove until it is completely dry.
The surface of the foundation should not reach the floor level to the height of two bricks. 2 layers are placed on the finished base waterproofing: roofing felt impregnated with tar mastic or roofing felt treated with bitumen solution. The gaps between the foundation and the floor are filled with sand and compacted.
The foundation can also be made of solid brick or rubble (large building stone of irregular shape), which are laid on a base filled with cement mortar. The penultimate row of the brick foundation is also covered with a layer of waterproofing.

Laying the foundation

Start of masonry
What is order?
In order called detailed diagram masonry, indicating the order of placement of bricks in each row. For work, you should choose the order of the stove corresponding to the size of the steam room. For example, if the heater is located above the firebox, to ensure maximum heating, the firebox is made at least 0.5 m. For a steam room volume of up to 12 square meters. m and a 40 liter water tank, the size of the heater with dry steam will be 0.77 × 0.5 m. The height of the firebox should be about 0.5 m.In the absence of proper experience, it is better not to change the scheme. If the room is non-standard, and any changes are still required, it is better to show the adjusted order to an experienced specialist.
The masonry diagram in any drawings always starts from the zero row. It is necessary to bring the foundation to the floor level. It is not difficult to determine the height of the future structure: in the diagram, each division is 10 cm and is equal to the average height of the brick.
The two pictures below show an example of a brick oven with a water tank and its arrangement. The diagram shows that the bricks are laid in different ways: with a spoon (on their side) or with a bed (the wide part) down.

Stove-heater with tank

Arrangement of a heater with a tank located at the top
Sand-clay solution
Cement does not tolerate exposure well high temperatures, so it is not used for the oven. Masonry is made using a solution of clay, mined at a sufficient depth without impurities of earth and other foreign inclusions, and sand.
Start of masonry
Before starting work, the clay should stand in water for several days and soften. Before combining with sand, it is thoroughly mixed with water to the consistency of thick, thick sour cream. The remaining lumps can be broken up using a construction mixer or a drill with a special attachment.
To prevent pebbles and small stones from getting into the narrow seams, the sand is carefully sifted. To lay refractory bricks, clay and sand are mixed in proportion 1:2. To prevent the solution from drying out, the batch is prepared in small portions. The solution should be slightly rough, as elastic as possible and should lie without tears.
But the fat content of clay varies, and the fatter it is, the more sand should be in the solution. That is why experienced stove makers check the viscosity by shaking it from a stick or trowel.
The normal thickness of the layer remaining after shaking is 2 mm. If it is less, clay is added. If the consistency of the solution resembles plasticine, and after shaking, more than 3 mm of solution remains, more sand should be added to the mixture.
Brick selection
If you plan to fire with coal or gas, high-quality refractory bricks with frost resistance of up to 25 cycles are used for the work. For a wood-burning stove, it is better to use its refractory (Gzhel type) variety. Hollow and silicate types are not used, as they quickly collapse under the influence of high temperatures.Sometimes, in order to save money, only the firebox is laid out with refractory (clamotte) bricks, and the rest of the furnace is covered with ordinary silicate bricks. But, since their coefficient of thermal expansion is different, you should not combine them in a harness.
You can check the quality of a brick by simply tapping it with any hard object. If there is no defect, the sound will not be dull, but ringing, “metallic”. Products with visible cracks, foreign inclusions or excessive porosity should not be used. High-quality fireclay bricks have a rich yellowish (sand) tint, while unfired bricks have a pale and dull color.

Fireclay brick
Furnace laying
Before laying, to improve adhesion and prevent dehydration of the mortar, the brick is soaked in water for several minutes until bubbles are released. Fireclay bricks can only be immersed in water briefly to remove dust.The first row of bricks should be laid dry on the foundation without using a sand-clay mixture. During subsequent laying, the thickness of the mortar layer should be 3-6 mm. The layer and the bonded part of the brick are coated with the solution. At the selected place, you should move it slightly, and then, tapping with a trowel, press it tightly.

Bricklaying
To strengthen the structure, bricks are laid with offset next row by 30-50% and overlap the joint. When working, you will definitely need halves and quarters. To prevent cracks from forming, cutting It is better to do this using a grinder equipped with a diamond blade.

Laying halves and parts of bricks
In the places adjacent to the bricks, the door is insulated with asbestos, 4 strong wires or strips of galvanized sheet are screwed to it using bolts and washers, which will be laid in the seams of the masonry. To achieve density according to the size of the wire, grooves are cut in the bricks.

Door installation

Door installation
To ensure better heating, bath stones are placed on a steel or cast iron grate. The fewer there are, the drier the steam will be in the room. In a Russian bath, the weight of stones is at least 50-60, in a sauna - 30 kg.
in order to ideally select bricks in size, each row of them is first placed dry without mortar, the excess length is carefully trimmed, the bricks are numbered, and then assembled in a row already with mortar;a stove laid out unevenly will not last long, so even the slightest deviations should not be allowed: after laying each row, it is better to check the horizontal and vertical using a level; the accuracy of the angles is additionally determined using plumb lines or a corner;
In order for the grate and doors to last as long as possible, it is better to choose not steel, but more refractory cast iron;
V wood stove the grate and the door are located at the same level; when heating with coal, the grate should be 20 cm below the firebox;
when laying the grate, be sure to leave gaps for thermal expansion; To do this, if necessary, the brick is cut to the required size;

Grate installation
A small ventilation slot should be provided above the door, which will protect it from overheating, or the bricks should be cut in this place with a wedge;
to ensure better air flow and complete combustion of fuel, grate bars are laid only along the blower channel;
halves and quarters are best used in the top rows;
To prevent the clay from cracking over time, the oven can be reinforced with clay and a steel mesh; the fastening wire for it is already provided in the masonry.
Construction of pipes and chimneys
Iron chimneys have a serious drawback: when temperature changes, condensation forms on them, which “attracts” soot, so it is better to build them from brick.Important! Only whole bricks are placed in the chimney. Due to the risk of them falling out, the use of halves and cracked parts is unacceptable. The chimney wall must be perfectly flat. Otherwise, lumps of soot will accumulate in the corners, and the shaft will quickly become clogged. It is advisable to round off the protrusions along the entire smoke path.
When installing a chimney, several rules must be followed:
Hailom called the system of passages connecting the chamber with fuel and the chimney; the size of its lower part depends on the width of the firebox and on average is 3/4 of a brick; its cross-sectional area should be about 60-65% of the total area of the chimney;
all places where smoke passes should be immediately cleaned and the remaining solution should be completely removed;
it is unacceptable to narrow the chimney channel - it must be the same along its entire length; in addition, its cross-section cannot be less than the cross-section of the hail, and its total length from the edge of the pipe to the grate is at least 5 m;

Chimney laying
When laying a chimney and firebox, it is better to place the bricks with the most burned side facing the fire and smoke;
if the chimney is too short the smoke will not have time to cool down, and the heat will simply fly away into the chimney;
to protect against fire where it passes through the ceiling, the pipe is additionally lined with brick and wrapped in heat-resistant material;

Finishing the junction of the pipe to the ceiling
The height of the pipe after the roof ridge must be at least 0.5 m;
so that damage can be easily determined, the pipe is whitened with lime mortar: in this case, the places of smoke leakage can be easily identified by traces of soot.
Test firing of the stove
It is believed that a stove that is perfectly dried before the first lighting will last longer, so it is better to leave it for a couple of weeks with the doors open until it is completely dry. If there is no rain, the pipe valve is also left open. The room itself should also be ventilated these days.Test kindling is carried out with a small amount (about 500 g) of paper. This is done in order to determine the presence of draft and remove residual moisture from the oven. The blower should be completely open at this moment. After this, the oven is left for another day.
Advice. If it is damp outside, the fire may not burn well the first time. In this case, in order to “push” the air upward, you can burn a newspaper rolled into a tube in the upper cleaning door or view.
Subsequent kindling with wood chips and a small amount of firewood should be carried out carefully. The maximum amount of fuel can be added only after several kindlings. An ideally built stove does not smoke and heats up evenly. You can determine the degree of heating by touching different parts of its surface with your hand. A brick oven should also cool evenly.
The density of the masonry and the absence of cracks are determined by burning materials that produce a lot of smoke in the smoke channel. If cracks are found through which smoke will pass, they are covered with a solution.

Smoke movement pattern
The modern revival of interest in the bath business is associated with a stunning discovery by doctors, who claim that the secret of the Russian, and at the same time the Finnish bath, has been revealed. The result of this popularization of the steam room was a self-made sauna stove. This is due to the fact that modern market is still unable to fully satisfy consumer demand for sauna stoves, as well as with an unreasonably high price for these units. In addition, Finnish and Russian baths are a place not only for washing, but also for complex health and hygiene procedures that completely restore the energy potential of the soul and body. Conditions created on serial production, do not allow us to provide for a combination of specific local factors, and therefore, professional bath connoisseurs often prefer to design a bath unit on their own rather than purchase a factory one, manufactured according to impersonal standards.
Metal sauna stove: relevance of the topic
Since time immemorial, metal stoves have been well-known competitors to traditional brick units, which is important not only for private houses, but also for baths. This is due to their undeniable advantages, such as fast heating and relative ease of installation, which is especially important for those who plan to make them themselves. Along with high thermal conductivity and excellent aesthetic characteristics, if you use a metal stove irrationally or fail to comply with all the nuances when making it yourself, you must not forget about the risk of fire. In this regard, it is important to follow all the nuances and make a sauna stove in accordance with the instructions proposed by our specialists. You can familiarize yourself with it by reading this article.
Modern metal furnaces: design features
The simplest homemade model metal furnace- the so-called “potbelly stove”, consisting of a box equipped with a door and a pipe. Their disadvantage is that, despite the relatively low thermal output, their fuel demand is extremely high. Because of this, they have long been considered an irrelevant relic of the past.
As for modern metal stoves, they belong to a higher safety class. They are made from sheet iron, the thickness of which does not exceed 4-5 mm. In addition, they are equipped with a specialized thermal chamber designed for stone backfill. Often, their design capabilities allow you to equip an additional water tank, the volume of which reaches 70 liters. To ensure uniform heating of the air in the furnace, as well as to reduce its fire hazard, the metal furnace is lined with refractory bricks.
Important! By giving preference to modern metal stoves, you will save yourself from constructing a high-strength foundation. In this case, it will be sufficient to make a large-sized base, which can be a cement slab, to increase the efficiency of the finished tiles, sheet metal or fire brick.

Photos of metal sauna stoves


Types of metal sauna stoves
Design features: 3 types of sauna stoves
If you study numerous drawings of metal sauna stoves, you can come to the conclusion that, from a constructive point of view, there are several types of sauna stoves:
- Sauna stoves with a closed design, due to their compactness, are preferred to be installed in small baths family type. To increase the heat capacity, these structures are built with red refractory bricks inside and out. The bricks are fixed using metal fasteners. A grate for stones is installed in the middle part of the oven;
- Sauna stoves with open design are characterized by the presence of a smaller tank, while their heater is open. In this regard, by installing an open-type stove in the steam room, you will ensure faster heating of the room. To increase the heat capacity of such a furnace, the stones are covered with a galvanized lid;
- Combined sauna stoves, the design of which includes a firebox equipped with two valves, a grate and a blower, two pipes (10 and 14 cm in diameter), in which there are four holes for a pipe and a bypass elbow. The manufacture of such furnaces is carried out from steel sheets 3-5 mm thick;

Fuel type: 3 types of sauna stoves
Depending on the type of fuel used, there are also several types of sauna stoves:
- Wood stoves- the earliest type of metal sauna stoves with the appropriate characteristics. They require a large amount of fuel and, at the same time, require constant and careful care. However, there are also connoisseurs of such stoves who prefer to wait slowly until they heat up, but then fully enjoy the aromatic warmth of a real fire;
- Electric ovens- another type of metal sauna stoves. They consist of a metal body equipped with a heating element and heat-insulating elements;
- Gas metal stoves for baths- the most reliable and modern furnace units. They are iron structures equipped with a thermostat designed to regulate power. You also don’t have to worry about the safety of the structure, since it implies the presence safety device, instantly triggered in the event of gas attenuation.

Metal sauna stoves: advantages and disadvantages
Since there are two main types of sauna stoves: brick and metal, we will consider the main characteristics of the latter and their advantages over stationary brick stoves. Firstly, as already noted, unlike stationary brick kilns, metal units are more mobile and compact option, therefore, they are ideal for installation in small spaces. As for the manufacture of homemade stoves, it is absolutely not necessary to install them at the installation site; you can produce it in any place convenient for you and subsequently move it to the installation site. There are two main types of metal furnace designs:

Hot type oven- an option ideal for installation in bathhouses for occasional use, for example, in the country. Despite the fact that it warms up quickly, it is not recommended for use in bathhouses for permanent use, since when using such a stove, it is very easy to overheat the room, which is due to the impossibility of controlling its temperature;
Cold oven- ideal for installation in heated rooms. They, like the previous option, warm up quickly, but the possibility of overheating is eliminated, since it is equipped with a temperature control system. It is almost impossible to get burned on such a stove, since the temperature of its walls rarely exceeds 50 degrees.

Advantages of metal sauna stoves
To summarize, we note the following advantages:
- The small size and mobility of the design make such a stove indispensable in small bathhouses;
- There is no need to pre-install a massive foundation; it is enough to equip a lightweight version of the foundation, which greatly facilitates the installation of a sauna stove;
- Features of the operating principle. Unlike brick units, metal stoves burn constantly, and therefore it is impossible to go to the bathhouse without first heating the stove;
- Low price. Unlike a brick stove, a metal stove is easy to manufacture and does not require additional costs. Finding diagrams of metal sauna stoves is also not difficult - a huge number of drawings can be found on the Internet and specialized magazines.

Disadvantages of metal sauna stoves
- Rapid cooling due to inability to accumulate heat. In this regard, it is necessary to constantly maintain combustion of fuel in such furnaces;
- Inability to heat large rooms;
- To prevent the development of heat stroke while staying in the room, it is necessary to install double walls while maintaining an air gap between them;
- Due to the fact that the fire safety of a metal stove is significantly lower than that of a brick stove, it is necessary to provide enhanced protection for the inner lining of the stove.
Shape of the sauna stove: what to pay attention to?
Despite the fact that at first glance it seems that the shape of the furnace is an unimportant parameter, the performance of the unit and the ease of its operation depend on it. The most common furnaces are cylindrical, horizontal and shaped, but rectangular units are most convenient to use.

This is due to the presence of corner zones in them, which almost never become red-hot. In this regard, it is widely believed that such a frame “retains” the shape of the stove. In addition, the shape of the stove determines the rationality and uniformity of heating of the stove, since the maximum heating of one element helps to reduce the heating of the wall located next to the combustion zone, which contributes to the uniform heating of the room and the balance of heat flows. In addition, the mechanical stability of the structure depends on proper heating. This is not difficult to trace, for example, round and cylindrical furnaces are less resistant to heat, and therefore their walls are more dense and reinforced. The high stability of a rectangular oven is due to the presence of cold corners. However, over time, loss of shape cannot be avoided - this is a proven fact.

Making a metal stove for a bath: searching for possible options
Over the many years of using metal sauna stoves, many options for making them yourself have been proposed. One of the simplest options is to make a metal stove from an iron barrel, during which the lid and bottom of the barrel are removed to form a cylinder. Half of the resulting cylinder is filled with bricks placed on edge, on which a grate is subsequently installed. The resulting free space is filled two-thirds with stones, after which a chimney is installed and the homemade stove is covered with a lid. However, despite the ease of manufacture, this option is considered one of the most inconvenient to use.

If your bathhouse has a fairly small area, you can make a compact stove-heater from sheet steel, the inner surface of which is lined with brick. The dimensions of a metal sauna stove are quite modest and correspond to the heated area. It is enough to lay the walls of the firebox in half a brick, and the chimney in a quarter. This oven is not only easy to manufacture, but also extremely convenient to use, as it does not require large quantity fuel and warms up in a relatively short period of time.
There is another option for making a heater stove, which does not require the use of bricks. This method is also easy to implement and not too expensive from a financial point of view. As for the appearance, it is quite aesthetic. This design can easily cope with heating the dressing room, sink and the steam room itself.

Making a metal stove with your own hands: step-by-step instructions
Required materials and tools
- Sheet steel with a thickness of 8 mm;
- Metal pipe, the wall thickness of which reaches 10 mm, and the diameter - 500-600 mm;
- A rod whose thickness is 10 mm;
- Grate;
- Latches and doors for the firebox, heater and blower. When self-made doors, you only need latches;
- Water tap;
- About 2 meters of pipe, 90 cm of which will be needed for the firebox, 60 for the tank, and the remaining 50 cm for the manufacture of minor parts;
- The tools you will need are a grinder and a welding machine.


Furnace unit manufacturing manual
At this stage you will need a large piece of pipe.
Important! The manufactured design assumes the presence of a closed heater, and if you need to splash water into it, you need to open the door slightly.
First of all, a blower is cut out in the pipe, the dimensions of which are 50 and 200 mm. On the inside of the pipe above the hole, fastenings for the grate are welded - this will require a metal plate equipped with eyes. The grate can be purchased at any hardware or specialty store.

Next, we begin making the firebox. For it you need to make a hole measuring 250 by 200 mm. The fastenings necessary for installing the heater rods, the diameter of which must be at least one centimeter, are welded on top. They can also be replaced with grates designed for round ovens, which can be purchased there.
A hole is made on the opposite side of the heater into which water is poured. Next, the heater is filled with stone, for example, soapstone, diabase. The use of mica-containing stones, flint and granite is excluded.

A hole is made in the cover intended for the unit for the chimney pipe, after which the pipe itself is installed. Despite the fact that the installation of the sauna stove can be considered almost complete, experts advise additionally installing a water tank.
To do this, the remaining, previously unclaimed piece of pipe is welded onto the heater, and a water tap is welded into the lower part of it. During operation of the furnace, smoke passing through the pipe will gradually heat it up, but it will not boil. Finally, it is necessary to make a lid intended for the heating tank. According to the diameter of the pipe used, prepare a cap and cut it in half. In the first half, it is necessary to cut a hole for the chimney, after which it is welded to the tank. During installation, the second half must be equipped with hinges and a handle, so that the free part of the lid remains removable.

Installing a sauna stove: what to pay attention to?
- The installation of a sauna stove must be taken care of at the stage of construction of the sauna and a shallow foundation must be laid in place of the future stove. Subsequently, a double row of bricks is laid on it and a stove is installed. To increase fire safety homemade stove, you must strictly follow the rules for their installation. They are as follows:
- The shortest distance from the wall to the stove should be at least one meter. In addition, experts recommend using additional protection and installing foil on the wall closest to the stove, equipped with a layer of insulation, which will allow timely prevention of overheating of the wood and its subsequent fire;

- The insulation of the chimney should not be neglected. To do this, it is recommended to make it from a sandwich pipe, between the outer and inner casing of which there is a heat-insulating layer;
- If the design of your furnace involves the removal of combustion products through a pipe made of metal, a ceiling-passage assembly will be installed at the junction of the ceiling and the pipe.
Upon completion of installation, the stove can be faced with brick, which will not only add aesthetics appearance stove, but will also prevent burns. In addition, in this case, a closer location of the stove to the wall is allowed.

We hope that we were able to convince you that making a metal sauna stove is not such a difficult undertaking, and by using this guide, you can avoid difficulties in the process of making it. We don't deny that this design- is not the only way to make a sauna stove, but it is the easiest to install and convenient to use.
Self-construction of a sauna stove is not the easiest, but it is a completely feasible undertaking that requires thorough preparation and a thoughtful approach. By reading the information below, you will learn about important nuances designing a sauna stove, and also consider the key stages of constructing a brick structure.
A sauna stove can have different dimensions, selected primarily in accordance with the area of the room served. The most common stoves are built with a base measuring 890x1020 mm (3.5x4 bricks) or 1020x1290 mm (4x5 bricks) and a height excluding the chimney of 168 cm or 210 cm, respectively. The second option is better suited for steam rooms with increased ceiling height.
The most preferable option for a brick stove for a bath is a model with a water circuit (a tank for heating water). It makes no sense to present many projects - they are almost identical, only the location of the tank for heating water changes. The most popular options are a brick stove with a bottom tank and a brick stove for a bath with top installation containers.
The following images show diagrams of a brick oven with a bottom-mounted water tank.

Schemes of a brick oven with a bottom-mounted water tank

Schemes of a brick oven with a bottom placement of the water tank (order)
The following images clearly demonstrate the design of a brick stove for a bathhouse with the tank placed at the top.


Making the project safe: basic principles
Before you begin to study further information on arranging a sauna stove, you need to consider and remember the key safety provisions, violation of which can lead to extremely adverse consequences.
Traditionally, the oven is built near the wall opposite to the shelves in the steam room. The stove design must be created in such a way that a minimum distance of 30-40 centimeters is maintained between the heating parts of the finished unit and everything that supports combustion. If special protection is installed, for example, made of asbestos cardboard, this figure can be reduced to 15-20 cm.

 Using a heat insulator in the construction of a furnace - an example

A gap must be maintained between the smoke exhaust pipe and the floor/roof elements and those in contact with it, which is subsequently filled with fireproof material. Asbestos is most often used for protection. From above, the mentioned gap with insulation is closed with a steel shaped plate.


For additional protection, the area of the floor in front of the stove firebox is covered metal sheet about 10 mm thick. It will protect the flooring material from fire if coals fall out of the firebox.


The standard option for placing a stove in the bath space is shown in the following image. Here you can see the order of organizing the water circuit, which can be taken as a basis if the supply warm water will be provided by the stove unit, as well as the features of connecting and exhausting the chimney.

What to build a stove from?
Set for self-construction brick sauna stove includes the following items:
- brick;
- clay for preparing masonry mortar (sand will also be needed);
- container for preparing the solution;
- tools for marking (pencil, rope, square, tape measure, etc.) and masonry (trowel, pick, mallet, etc.);
- materials for insulation (roofing felt, asbestos);
- elements for the manufacture of a water tank and a chimney pipe (if they are planned self-assembly, but much more profitable in terms of time and labor costs is the purchase of ready-made units).
The issue of choosing bricks for masonry deserves special attention. The strength of this material, first of all, should be higher than that of ordinary white or red brick. Ideal option is fireclay brick with the highest fire-resistant properties.

By key operational characteristics brick based fireclay clay noticeably superior to its closest “brothers”, but costs much more. In view of this, in order to keep the final costs of constructing a sauna stove within reasonable limits, fireclay bricks are used for laying areas exposed to the most intense heating.

In places that heat up to more modest levels, it is advisable to use solid red brick, designed to perform the work in question.
For example, such bricks can be used to lay outer walls, smoke ducts, and various decorative elements and so on.

Important! Distinguish corpulent ceramic brick possible by marking in the form of the letter “M” and accompanying numbers indicating the value of the maximum load per 1 cm2. For laying a brick oven, you should use a material of at least M-150 grade.
Distinguish real quality kiln brick possible based on 3 key characteristics.

Video - Choosing bricks for laying a stove
What mortar should I use for masonry?
The laying of brick sauna stoves is traditionally done using clay mortar. It is best if the type of clay used as the basis for the brick used is used for its preparation, i.e. red or fireclay. IN in this case brick and masonry will give the same thermal expansion during the heating process, which will ensure the longest possible life of the finished building.
Helpful advice! It has been established that the thinner the masonry joint is made, the higher the resulting quality of the stove. However, this issue also needs to be approached wisely: ideal masonry is obtained with a joint thickness of 0.5 cm. Reducing the value below the mentioned indicator will contribute to a noticeable reduction in the service life of the stove.
In addition to clay, sand is included in the solution. It must first be sifted so that the solution ends up with material containing grains of sand no larger than 1-1.5 mm in size. The millimeter value is the most preferred. It is also important that the sand does not have silty inclusions and is of a uniform color. For sifting, use sieves of appropriate fractions.
Separate requirements apply to water, which is also used in the process of preparing masonry mortar. First of all, it must be clean, contain the minimum possible amount of mineral inclusions, and not have a musty smell. Laying 100 bricks takes about 15-20 liters of water.

Before preparing the solution, the clay must be placed in any suitable container (for example, a large basin), crushed and filled with clean water in such an amount that the result is the maximum homogeneous mass, not too thick and not very runny. Mix the solution thoroughly, dissolving any lumps that have formed. Leave the mixture of clay and water for a day, then strain and rub the resulting lumps through a sieve.
Sand is added to the prepared solution last. On average, water is added per bucket liter jar sand, but this moment must be carefully controlled, because the amount of river sand in the solution directly affects the fat content of the latter. In addition, the required amount of sand may vary depending on the initial fat content of the clay. If the masonry mixture is too greasy, the stove may simply collapse during operation. A thin (non-greasy) mortar will not allow achieving the required quality of adhesion of bricks, as a result of which the scenario already discussed will be repeated.
There are several simple ways to determine the fat content of clay in artisanal conditions.

Take 500 g of clay and mix it with water. It is best to knead by hand until you obtain a mixture that has a uniform consistency and does not stick to your hands.
Important! For laying a sauna stove, you can only use a solution of medium fat content.
Roll the previously prepared mixture into a ball the size of a small apple. Place the molded product on any flat, hard surface and gently press it with a board. Press down slowly enough to fix the formation of cracks.
If the clay ball has broken apart without cracking, the clay is non-greasy. The appearance of a crack half the size of the diameter indicates that the fat content of the clay is too high. In the case of a solution of normal fat content, the crack will take approximately 0.2 the diameter of the clay ball.


Preparing a stove solution - tips
Video - Preparation of mortar for laying a stove
Sequence of construction of a sauna stove
Regardless of the chosen configuration of a brick sauna stove, the procedure for its construction remains identical for all situations: from the foundation to the installation of a smoke exhaust pipe and finishing. In the following table you can find important information about each stage of the event in question.
Table. The procedure for constructing a sauna stove
| Work stage | Description |
|---|---|
| There are several types of foundations for sauna stoves. You are offered the most optimal and popular option. Do the following: - mark the area for the future foundation by driving pegs in the corners and along the perimeter of the foundation being built, and stretching a rope between them to make it easier to navigate. Select the dimensions of the platform in accordance with the design dimensions of the furnace base; - dig a pit with a depth of about 60 cm. At the same time, expand the lower 10-15 cm in relation to the main part of the pit by 5-10 cm in each direction. After concreting, such a platform below will provide higher resistance of the entire structure to ground movements; - fill the lower expanded part of the pit with sand and compact it, spilling it with water for better compaction; - pour a 10-centimeter layer of crushed stone or broken brick on top of the sand and compact it as well; - mount the formwork along the contours of the pit. To assemble it use wooden boards and screws; - lay reinforcing mesh in the pit. To assemble it, it is optimal to use steel rods with a diameter of 1-1.2 cm. The rods are tied into a mesh with 15x15 cm cells. At intersections, the reinforcement is fastened with knitting wire or special modern fasteners, which is more convenient. An approximately 5-centimeter gap is maintained between the walls of the pit and the reinforcing mesh. A similar gap must be maintained between the bottom of the pit and the reinforcing mesh. The most convenient way to do this is with the help of special clamps-stands; - pour into the pit concrete mortar, prepared from 1 share of cement (from M400), 3 shares of clean sand, 4-5 shares of crushed stone and water in an amount corresponding to approximately half the mass of cement. Concrete is poured in a uniform layer to such a height that the pouring does not reach the ground surface on the site by approximately 150 mm. Be sure to level the “top” of the fill; - let the filling sit for 3-5 days (preferably 7-10) to gain strength and dismantle the formwork. Fill the resulting voids with compacted fine gravel; - cover the frozen concrete area with molten bitumen and lay a layer of roofing material on top, carefully leveling it and pressing it against the binder. Then repeat the procedure again. The resulting two-layer waterproofing will provide reliable protection brick kiln from ground moisture. The previously mentioned 15-centimeter gap between the upper edge of the foundation and the ground surface will be leveled using a starting continuous row of bricks. |
| Detailed recommendations for carrying out this stage were given earlier. |
| The laying of the sauna stove is carried out in accordance with a previously prepared order - the main component of the design of the unit in question. The step-by-step procedure for constructing a brick kiln will be discussed further in the corresponding section. Arrangement additional elements(in this case it is a chimney, since the water tank will be proposed to be built-in) depends on the characteristics of a particular project and is considered individually in each case. |
| A fully lined oven cannot be immediately put into permanent operation: the device must be given time to dry. During the drying period, the doors and windows in the room should be open - the oven will dry faster. 4-5 days after completing the laying of the stove, you can start heating it with small wood chips for a maximum of 10-15 minutes daily. The combustion is carried out once a day. Protruding condensation indicates that the unit has not yet completely dried. |
| At the request of the owner, it can be performed finishing. There are quite a lot of options. The most popular are the following: - tiling (clinker, majolica, terracotta or marble). One of the most popular options. It is characterized by relatively low cost and ease of implementation; - brick cladding; - stone finishing. Porcelain tiles, granite, marble or coil tiles work well; - plastering. A truly Russian method, which is also the most elementary and budget-friendly; - tiling. A labor-intensive finishing method that allows you to obtain truly unique design compositions. |


Video - Construction of a sauna stove
Sauna stove project: step-by-step order
As an example, we will consider the procedure for constructing a stove equipped with a built-in water tank. The dimensions of the structure at the base are quite impressive - 1020x1290 mm (corresponding to a laying of 4x5 bricks), height - 2100 mm. If desired, the owner can change the dimensions in accordance with the conditions and characteristics of the steam room being equipped. The design image of the structure under construction is presented below.

A stove with the specified design dimensions will make it possible to provide a space of up to 10-14 m2 with temperature readings of about 45-50 degrees during washing and up to 100 degrees and higher during steaming. One firebox of such a stove will be enough for up to 10-12 visitors to comfortably take a steam bath and thoroughly wash themselves. The volume of the built-in tank (visible on the right side in the diagram above) is about 180 liters.
To improve the quality of heating and place stones above the fuel chamber of the furnace, pipes in the amount of 6 pieces (visible next to the water tank) with a diameter of 50 mm are laid. The length of the pipes to be laid specifically for this project is 1050 mm. The installed pipes become very hot during the operation of the furnace and continue to transmit thermal energy for some time even after the combustion is completed.
Above the stones there is a double door. Through the opening it closes, water flows onto the laid cobblestones, resulting in the formation of steam.
Let's proceed directly to studying the design order.
Table. Arranging a brick sauna stove
| Work stage | Description |
|---|---|
| As noted, it is made solid and does not have any significant features. The diagram for laying the bricks itself is shown in the image. |
| At this stage, the formation of the ash chamber begins (dimensions and location are shown in the image) and the corresponding door is installed (highlighted in red in the diagram). Important! The dimensions of the hole intended for installing the door must be 5 mm larger than the dimensions of the mounted frame on each side. Securing this, as well as other doors in the oven, is done as follows: - an asbestos cord is inserted into the prepared hole and covered with masonry mortar. A cord with a diameter of 0.5 cm will be sufficient; - on 4 sides the door frame is equipped with lobes - wire, pre-twisted from 3-4 rods 10-12 cm long. 10-centimeter pieces of wire with a diameter of about 0.5 cm are attached to the ends; - the prepared structure is inserted into the hole along the masonry and fixed with mortar. The wire embedded in the masonry ensures reliable and high-quality fixation of the door. |
| The laying of the ash chamber continues. |
| The base of the firebox is made of refractory brick (yellow in the diagram) and 2 grates are installed. The gratings are installed in grooves specially cut for this purpose. |
| The formation of the fuel chamber itself begins. The chamber is completely lined with refractory bricks. |
| The fuel chamber door is installed. |
| Laying of the fuel chamber continues. |
| The actions are similar to the 7th row. |
| The combustion chamber door is closed. |
| Quarters of refractory bricks are laid at each side wall. Openings are formed between the bricks, the dimensions of which should allow the installation of the previously mentioned pipes. At the same stage, in the places indicated in the diagram, a place is prepared for installing a water tank. |
| On the same row, the previously mentioned pipes are laid in the spaces between the quarters of the refractory brick. The easiest way to seal holes around pipes is with basalt cardboard. |
| Also on the 10th row, a water tank is installed. |
| In this and the following images, the water tank is not shown to make the masonry features easier to see, although the tank should be present. The previously laid pipes are covered with ordinary (not fireclay) bricks. |
| The furnace mass rises higher. |
| Similar to the previous one. |
| Similar to the previous one. |
| Similar to the previous one. |
| Similar to the previous one. |
| Similar to the previous one. |
| Similar to the previous one. |
| Similar to the previous one. The water tank is visible in this image. The allocated space above the pipes is filled with cobblestones. |
| 2 strips of steel are laid above the water tank (the placement and dimensional relationship can be assessed in the diagram) so that it can be covered with brick. |
| The water tank is closed. The designated space is left free. In the future, water will flow onto the cobblestones through this opening. |
| The construction of the furnace array continues, similar to the previous row. |
| Similar to the previous one. |
| Similar to the previous one. |
| Similar to the previous one. |
| The laying is carried out similarly to the previous row. The diagram is shown with a door installed for the opening through which water will flow. In general, the installation of this door had to be done earlier - when laying the row indicated by red lines. The door was not shown in the diagram so that the principle of masonry could be better understood. To cover the door, 2 steel strips are laid on top - the technique is already familiar to you from the previous stages of the work. |
| The door is blocked. Preparations begin to cover the furnace. The space to be covered is quite large. To successfully cope with this stage of work, it will be necessary to lay 2 steel strips. The thickness of the strips is quite large - about 1 cm. To lay them, recesses are cut out in the bricks (marked in the diagram). It is advisable to place basalt cardboard spacers under the strips. |
| The mentioned strips are laid with 1-2 mm gaps (marked in the diagram), thanks to which the thermal expansion of the metal will be compensated during operation of the furnace. |
| The furnace is being closed. At this stage, you need to leave a hole for installing the chimney pipe (marked in the image). A seat is made on the hole for installing a smoke damper, which is also visible in the diagram. |
| At the same stage, the smoke damper is installed. |
| The installation of the furnace ceiling continues. |
| Similar to the previous one. |
| The formation of the smoke exhaust pipe begins. |
| The formation of the pipe continues. Next, the masonry is carried out in a similar sequence until the pipe reaches the design height (determined individually, in accordance with the characteristics of a particular room). |


The masonry is complete. The principle of operation of such a furnace is extremely simple: when fuel burns, hot gases heat the walls of the furnace and a water boiler installed inside the structure, pass through laid pipes and a stone backfill placed on top of them, and then go into the smoke exhaust pipe.


Video – Brick sauna stoves projects
To set up a steam room, a brick sauna stove with periodic heating on wood is most often used. This heating device it is most convenient and you can build it yourself, with at least basic mason skills. We will talk about such construction below, and also watch the video in this article on this topic.
About stoves and construction
Types of sauna stoves

- There are four main types of sauna stoves: “white”, “gray”, “black” and with a stove. The “black-style” stove does not have a chimney and when it is fired, all the soot remains in the room. Currently such devices are not used.
- A structure made “in gray” has a chimney, but, nevertheless, soot also settles on the bricks during the combustion process. Therefore, to use the steam room, you need to wait until the wood is completely burned.
- The most common types are brick kilns“white”, they leave no smoke or soot at all, but some of the models can warm up for up to 12 hours, although they retain heat much longer. Such models are heated through metal plate, on which stones are placed.
- Sometimes they assemble such a structure with their own hands: the tank and stones are placed on cast iron plates that are not completely closed - then the room is heated much faster. The tank is lined with bricks on three sides to maintain the water temperature.
What brick do you need?

- If you decide to build, the best option There will be fire-resistant fireclay bricks, but there is not always enough money for it. Therefore, such designs can be combined using also. Using quality material the stove does not require additional lining.

- When building a furnace in such cases, brick grades from M-75 to M-150 with frost resistance are used up to 25 cycles. When choosing a material, you should check whether it has cracks, foreign inclusions, and so on - such specimens are not suitable for construction. It is also possible to use double sand-lime brick M 150.
Advice. The quality of the brick can be checked by simply tapping it with the handle of a trowel. If there are no flaws, then the sound will be ringing, metallic, and if there are any, the sound will be muffled.
Furnace drawings

- The construction of brick sauna stoves is a rather complex structure that requires precise execution of various nuances. That is why the drawing must show each of the rows in detail and, if necessary, there must be explanations.

- In the diagram, individual parts are indicated by strokes and dividing lines so that you can imagine how many pieces are needed to lay a particular row. All roundings and undercuts on the stones, shown in the diagram, are made using a grinder.
Foundation

- The depth of the foundation should be from 50 to 70 cm– everything will depend on the possible freezing of the soil, so you will have to adjust this value yourself. But the components will still be the same - a layer of sand, approximately 10-15 cm, is poured onto the base and watered generously for shrinkage. Then crushed stone, gravel or even construction waste (broken bricks and old knocked down plaster) are poured onto it and all this is compacted, but you need to leave about 30 cm for pouring the cement mortar.
- You need to lay it on crushed stone or other bedding waterproofing– usually roofing felt is used for this, but thick cellophane film can also be used. After this, flush with the floor, cement mortar is poured, which can be made from cement and sand (1/4), but instead of sand you can use screenings of crushed stone (1/6), then the base will be more durable. Also, roofing felt is laid on top of the foundation in order to eliminate any contact of the brick with dampness, because this will destroy it.
Advice. In order to prevent the foundation from subsiding, its base, that is, the bedding, must be made in an area slightly larger than the filler part. To do this, formwork is installed on the crushed stone, each side of the perimeter of which will be 10 cm less than the backfill.
Construction of the furnace

- For the construction of the stove, the instructions provide two types of mortar – cement-sand and clay-sand. The cement mixture is made from grade 400 or 500 with the appropriate addition of sand -1/4 or 1/5. The consistency should resemble liquid semolina porridge and slide freely from the trowel.
- For clay and sand, the ratio is slightly different and here one part is allocated to clay, and 2.5 parts is allocated to sand. You should mix very carefully, because the clay is very viscous and lumps are difficult to break up, which will interfere with the masonry in the future. Ready mix should slide freely from the trowel, leaving only small strokes on its surface - this consistency is most suitable for work.
Construction of the furnace

- As a rule, first of all, a continuous row of bricks is laid out according to the shape of the furnace - you can call it zero. Such a base must strictly correspond to the shape of the order along the outer contour and have angles exactly corresponding to 90⁰. Of course, the brick itself has rectangular shape, but in order to avoid a failure, check the diagonals - their difference should not exceed 2-3 mm.

- The thickness of the seams between stones should not exceed 3-5 mm, and for this you need a high-quality solution, without lumps and debris, then the joint will be easy to adjust according to the right size. When laying each row, a whole brick must cover the joint on the bottom row, and in this case, a spoon dressing is most appropriate. After laying the first row, you should switch to clay mortar.

- On the third row, an ash pan door is installed and for their durable installation, galvanized wire is attached to them, as can be seen in the photo, and the top brick is trimmed for a tighter installation.

- Many craftsmen also advise cutting a brick over the door with a wedge, because the metal gets very hot and this design is the most durable. Instead of wire, you can use galvanized sheet. Before installing the fourth row, it is imperative to check the masonry with a building level or plumb line, since the arrangement of the ash pit and grate begins from here.

- In the sixth row, the blower door is installed, and in the seventh row, to install the grate, you need to cut recesses into 1-1.5 cm, moreover, so that the grate has some play after installation, because the expansion of metal and brick when heated is different (metal expands more) and for this a reserve is needed. Most often, such elements (doors, grate) are made of cast iron, as the most refractory element for furnace equipment.
- Starting from the eighth row, the masonry is done with a partition and this continues until the fourteenth row, into which channels are installed. An opening is made in the front part of the wall where the water boiler is installed.
- The fifteenth row is laid in half a brick - the halves are installed at an angle to each other (for the base of the dividing wall), and then the next three rows are installed using a spoon bandage.
- In the nineteenth row, a door is installed to allow steam to enter the steam room, and the twentieth and twenty-first rows should be fastened with strips such as U-shaped hangers or wire. After this, the installation of the exhaust pipe begins, and its height will depend on the height of the bathhouse itself.
- Upon completion of the process.
Advice. The exhaust pipe must rise above the roof of the bathhouse by at least 0.5 m. The chimney should be coated with lime or cement mortar that is not afraid of condensation.

Conclusion
You can make a brick oven yourself, the main thing is that you strictly follow the diagram given in this article or any other. And the price of the structure will depend on the quality of the material. That is, be sure to use only fireclay bricks for the firebox, and it is best to install the doors from cast iron.