All plaster mixtures for external use must meet two main criteria: have high strength and durability. In most cases, plastered building facades are subsequently covered with various finishing materials. But there are also options for using plaster as a finishing coating. In such cases, they can be manufactured according to special recipes, allowing you to obtain the original appearance façade walls without additional finishing.

Currently manufacturers building materials offer developers a huge range of dry plaster mixtures, they have the opportunity to choose the most best option. Due to innovative additives, the mixtures have excellent performance indicators, can be used on all types of buildings, etc. But they all have two drawbacks.

Depending on the condition of the walls, the thickness of the plaster layer can exceed 3 cm, which significantly increases the need for materials. This is another reason not to use purchased materials.
Professionals consider it advisable to use store-bought mixtures only in a few cases:
Types of plaster mixtures for exterior work
Composition of plaster mixtures for external works selected taking into account their specific place of use. We will talk about the most commonly used cement-based materials. But there are cases when restoration of ancient buildings is carried out, in old times original mixtures were used, which are almost never used today. They do not have high performance by modern standards, but knowledge of the recipe can be useful. In this regard, we will try to provide the maximum list of materials.
| Compound | Characteristics and use |
|---|---|
| To plaster external surfaces, you need to take three parts sand to one part M400 cement. Depending on the condition of the surfaces, the amount of sand can be slightly increased or decreased. If the walls are very uneven and it is necessary to apply a lot of plaster in several layers, then for the first one you should make a “fat” mortar, and for the finishing one, slightly reduce the amount of cement. The “fat” solution has improved adhesion to the wall, which will eliminate the likelihood of peeling, and the “lean” mass produces fewer cracks during the hardening of the thick layer. To prepare decorative solutions, you can add stone chips, mineral dyes and special fillers to the mixture. We will tell you how to do this a little below. The cement mortar is suitable for universal use. |
| The composition includes three parts sand and one part each cement and lime. Due to the presence of lime, fungi and mosses do not grow on the surface of the walls, the solution has a bactericidal effect. The lime is preliminarily slaked. Such compositions are used in Eastern Europe both for external and interior works. In terms of physical characteristics, it is slightly inferior to cement-sand mixtures, but in terms of performance it surpasses them. In addition, due to the use of lime, the cost of the material is reduced. |
| Currently, it is used very rarely for exterior work and mainly for the restoration of old buildings in some southern regions our country. To reduce thermal conductivity, chopped straw is added to the solution. |


Regardless of the composition, there are several general recommendations for all mixtures.
How to prepare decorative cement plaster mixture by hand
If you want to prepare multi-colored plaster with the addition of mineral dyes, then you must definitely buy white cement. True, if a 50 kg bag of regular bag costs around 200 rubles, then the price of white is about 500 rubles for the same bag.

Practical advice. There is a way to make the recipe for making colored plaster even cheaper. Do not add dyes, but select the color by using different sands. Depending on the location of the quarry, it can range from white to yellow or grayish. Accordingly, the plaster will be the same color. By the way, sand never fades; in terms of color stability, even the most expensive mineral dyes cannot compare with it. Of course, you need white cement.

As an example, we will consider the option of manually preparing “bark beetle” type plaster. For finishing facade walls this is one of the most acceptable and beautiful options.

Texture of bark beetle plaster
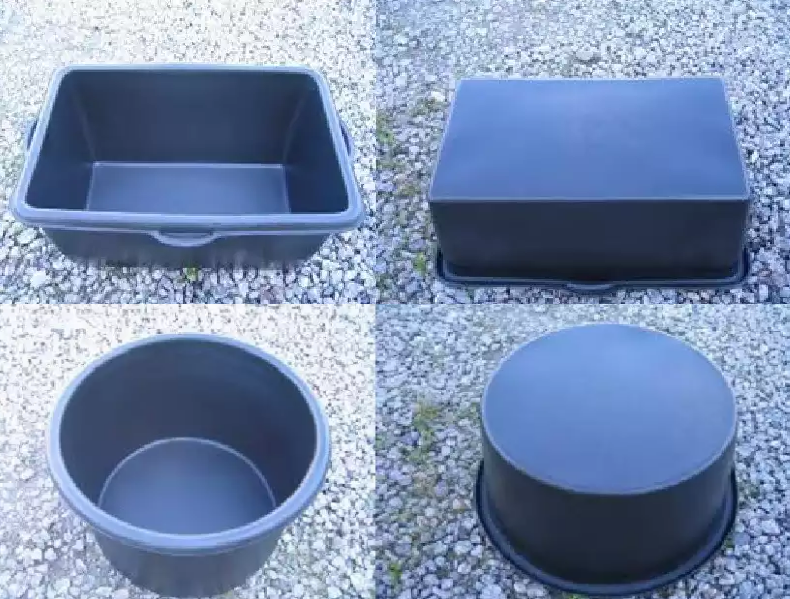
Step 1. Prepare a place and tools for kneading. You can do the mixing on a ready-made, even concrete base; if you don’t have one, then use pieces sheet iron. To work you will need a shovel and a container for water.
Step 2. Prepare your materials. Due to the fact that we are making bark beetle plaster, there is no need to sift the sand. The solution is prepared in the following proportions: cement - one part, sand - three parts, stone chips - one part.

If you need a lot of solution for work, then store the materials in close proximity to the mixing site.
Step 3. Throw sand onto the pile, add stone chips and cement on top. Nobody measures material with buckets, consider shovels. To knead, you need to have shovels.
Practical advice. Organize properly workplace, this will make the kneading process much faster and easier. It is better to throw a bag of cement onto a large pile of sand, cut the package in half with a shovel and take it directly from the halves of the bag. Don't worry that it will wake up a little, then pick it up along with the sand.
Keep in mind that one 50 kg bag of cement yields approximately 0.25 m3 of mortar. One bag contains approximately 15 medium scoops. This knowledge will make it easier for you to make calculations when mixing the solution. This means that for a bag of cement you need to take approximately 45 shovels of sand and 10-15 shovels of stone chips. It is quite difficult to prepare such a large batch by hand; practitioners recommend using half a bag of cement at a time. The amount of sand and crumbs decreases proportionally.
With water it’s a little more complicated; its volume largely depends on the moisture content of the sand. If you have it on open area and gets caught in the rain, the amount of water may decrease by a third. It is impossible to give exact recommendations; determine the need as you prepare the batch. To begin with, pour about 4 buckets into half a bag of cement, then you will get your bearings as you work.
Step 4. Throw a bunch of material first into one place, and then back to the center of the site. If its size does not allow you to transfer the entire amount at once, then divide it into two parts. During throwing, the components are not mixed very thoroughly, but this is not a problem. Subsequently, the ingredients are placed evenly throughout the entire volume.
Step 5. Make a hole in the middle of the pile; it should be quite large. Make sure that there is always a shaft of dry mortar around; it does not allow water to leak out during mixing.

Step 6. Pour water into the hole and start kneading.

To do this, gradually mix the dry mixture with water in small portions and tip over with a shovel. Move in a circle, the dimensions of the protective shaft should always be approximately the same along the entire perimeter of the hole. Sand and cement can be taken both from the middle of the hole and from the edges. The main thing is not to make a hole through which water will escape. If the solution is thick, add a little water.

Step 7 When the dry mixture becomes small, speed up the mixing pace. Cover areas with a very liquid solution with dry sand and mix immediately.
You should not achieve 100% homogeneity; additional mixing will occur while adding the solution to the container before plastering and during plastering of the surfaces.
Practical advice. In order to find out exactly how much stone chips you need, it is recommended to do a small test batch. Then plaster a small section of the wall with the mortar and make a pattern. If there are not enough “bark beetle moves,” add crumbs.
How to make a “warm” solution
This material has been very popular recently due to the desire of home owners to lower heat losses. To reduce thermal conductivity, not ordinary sand, but perlite filler should be added to the solution.

For one part of cement you can give 5 parts of filler; if you need to make the mass more durable, then increase the amount of cement. Water, as always, is added as needed.
Important. When working with dry perlite, you must use protective masks. Many builders ignore this requirement, but in vain.
Step 1. Measure out the required amount of perlite. This is quite an expensive material, do not overspend. It is recommended to first find out the entire volume needed for one batch and prepare one large container for it. Next, make a small hole in the plastic bag and carefully fill it. Avoid excessive dusting and keep the bag as low as possible above the container.
Step 2. Turn on the concrete mixer and pour in water.

It is advisable to first measure its quantity. The fact is that this filler absorbs much more water than sand. If you need to cook a large number of solution, then all proportions of ingredients for one batch must be remembered and not experimented every time.
Step 3. Add a special soaping resin to the water; if it is not available, then liquid soap will do at the rate of approximately 100–150 ml per concrete mixer with a volume of 0.25 m3. Dilute the soap a little with water, you need to foam it. Approximately 2.5 buckets of water are needed. Do not pour any more, otherwise the perlite will rise to the top and not get wet.

Practical advice. Never pour completely dry perlite into a concrete mixer; first wet it in the container. To do this, pour water into it, add perlite and stir with a shovel until it becomes mushy. The mass is considered ready after the perlite stops producing dust when stirred.
Step 4. Throw wet perlite into a concrete mixer; if it sticks to the walls, then add water.


Only a little, otherwise problems will arise later - adding perlite will not remove the excess. The fact is that dry perlite will float on top and will not be able to absorb moisture. You will have to mix it by hand again and only then add it to the mixer.

Step 5. Once the perlite has become homogeneous, begin adding cement. Sprinkle it in small portions, do not allow the formation of balls. It is very difficult to get rid of them later. If the solution is planned to be used for plastering some wall surfaces, then increase the amount of cement. Constantly monitor the consistency and add water as needed.

Practice shows that, despite all efforts, it is not possible to completely avoid the sticking of perlite and cement on the walls of the concrete mixer. You need to stop the concrete mixer, carefully clean the walls of the adhering material with a trowel and mix it a little with the finished material inside the barrel.
Step 6. At the last stage of preparing the mixture, add sand. As the concrete mixer fills, increase its tilt angle. Keep in mind that the greater the angle of inclination, the worse the mixing process.

If the mixture sticks to the walls again, you need to periodically stop the mixer and clean its walls. There are situations when the mass in the middle of the mixer volume is normal, but on the sides it is liquid. Stop the mechanism, select two or three buckets of mass from the middle, tilt the mixer and turn it on again. In this position, the mass mixes better. Everything is fine - add the removed mass again, tilt the mixer and turn on the engine.

It is more difficult to prepare such a solution than an ordinary cement-sand solution; you need to understand this and not be afraid of the first difficulties. Some professionals advise adding to the solution slaked lime, we consider this an optional condition. The fact is that perlite itself inhibits the development of microflora and no additional ingredients are required. But the final decision is yours. If you have the desire and opportunity, add lime.
Where is it better to make the mixture, in a concrete mixer or a mortar mixer?
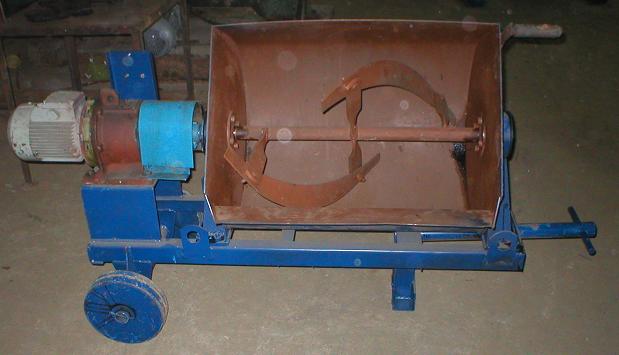
First, we need to tell you how a mortar mixer differs from a concrete mixer.

The main element is a rotating drum, to the walls of which blades are welded.

Advantages– versatility. You can prepare concrete and sand mortars in a concrete mixer.
Flaw– the quality of mixing does not always meet the required parameters. To improve, the process has to be significantly lengthened. Another disadvantage of the concrete mixer. During the preparation of the solution, as the container is filled, it must be constantly raised (reduce the angle of inclination), and the operating principle of the unit is such that the greater the angle of inclination, the better the solution is mixed. Accordingly, if you need to prepare a lot of mortar in one batch, then the concrete mixer must be periodically partially emptied, the angle increased and the remaining mortar mixed. This takes energy and time. Mortar mixers do not have this disadvantage.
Mortar mixer

The body has the shape of a circle and stands motionless. The blades rotate inside the body. The advantage is excellent mixing quality, lumps of cement and sand are completely broken up. Disadvantage: You cannot prepare concrete in a mortar mixer. The fact is that large fractions of crushed stone fall into the gap between the rotating blades and the stationary bottom. The mechanism jams, which causes the electric motor to burn out.
Water is first poured into all mechanisms, and only then dry materials are added.
Cement should only be poured into water or a very liquid solution. If you don’t do this, the balls will roll into the concrete mixer, and it’s almost impossible to completely break them. This does not apply to the mortar mixer; it does not create such problems.
After finishing work, be sure to thoroughly wash the units. It is strictly forbidden to beat off the hardened solution with a sledgehammer or crowbar. During such procedures, irregularities appear on the body, and an increased amount of mass will then accumulate in them. Negative processes are developing increasingly.
Video - How to quickly wash a concrete mixer
When connecting equipment, be sure to follow PUE requirements, you work in constant contact with water, which greatly increases the risk of electric shock.
Never attempt to clean the agitator surfaces while they are rotating; doing so can cause serious injury.

We have told only two recipes for preparing mixtures for outdoor use. If you master them, then any changes in the recipe and technology will not pose any difficulties.
Video - Preparation of plaster mortar manually
Facade plaster helps give your home an aesthetic appearance. Exterior concrete finishing adorns the walls of the building from various materials, provides protection from weather conditions such as snow, rain, wind and solar ultraviolet radiation. Today we offer a wide range of mixtures with different application technologies for cladding all types of masonry materials.
External plaster concrete walls endowed with:
- sanitary and technical parameters, due to which they obtain even and smooth wall surfaces with reduced dust formation and easier cleaning from dirt;
- protective and structural functions that make it possible to provide external walls with the proper level of protection from the harmful effects of dampness and aggressive environments, increased resistance to heat transfer, and reduced sound conductivity;
- decorative properties that make it possible to give a special texture to the external facade, to provide bright color surfaces. To do this, the composition varies the amount of fillers and binders, additives and pigments are used.
Advantages and disadvantages
The advantages of external plasters include:
- Possibility of selecting the optimal plaster mixture for a quality finish. Product range different composition allows you to choose material based on size, type wall material, design project plans.
- Creation of a moisture-proof, vapor-permeable layer. The plaster breathes without obstructing natural circulation air, so moisture accumulates in the walls. This advantage allows the creation of multilayer coatings.
- Possibility of obtaining a perfectly smooth and even surface.
- The ability to add relief to the finish.
- Suitable for cladding not only brick or stone masonry.
- Availability of insulated plaster mixtures coated with mineral wool or polystyrene foam.
- Laying the plaster mixture does not require preparation or leveling of the walls. Plaster compounds are used to seal seams, defects in masonry, protruding parts of the reinforcement frame, cracks, depressions, etc.
- Working with the mixture is quick and convenient.
- Low cost. Modern finishing materials (tiles, siding) for finishing wall cladding are more expensive than the process of external plastering of the facade.
- Ensuring high fire resistance.
- Durability. This advantage is relevant only when choosing high-quality plaster material and observing the nuances of application technology.
Facade plaster mixtures also have some disadvantages:
- It requires knowledge and experience in applying the topcoat to achieve a truly high-quality exterior coating.
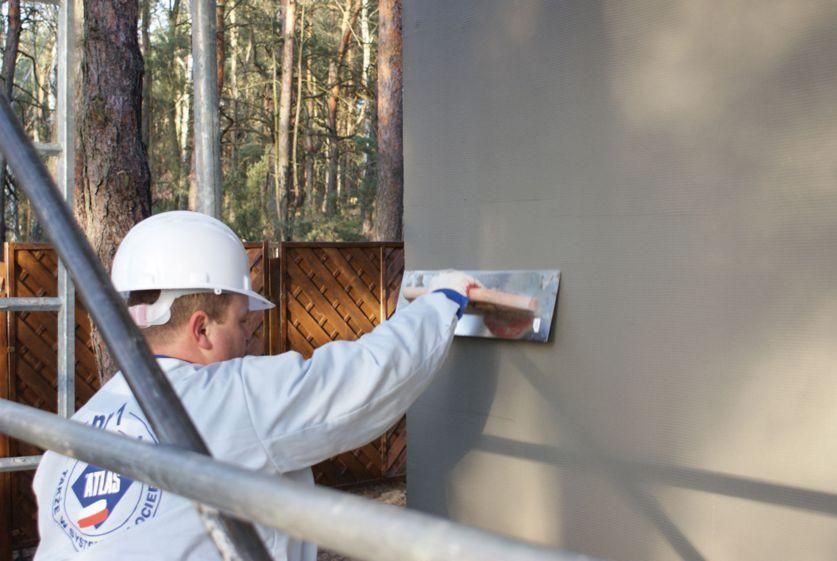
- Multi-stage and labor-intensive implementation of facing work. The worker needs to properly dilute or prepare the plaster material, prepare the scaffolding, correctly divide the wall into sections for plastering, and properly level the surface treated with plaster.
- A large amount of waste when mistakes are made, which entails additional costs.
- You should work in sunny weather at average air temperatures. Precipitation in the form of snow or rain is undesirable, which can lead to peeling of the plaster due to high humidity air.
Groups of plaster compositions
 The goal of the process is to create a smooth, ideal surface.
 There are three main groups of plasters:
- Classic plaster mixtures, which are intended for leveling surfaces for further finishing (painting, puttying, varnishing). They are endowed with high and specific protective properties, for example, when facing block wall materials such as aerated concrete, brick, etc. The most common is cement plaster.
- Decorative plaster products used as finishing walls With their help, the masonry takes on a finished look. Plaster is used to decorate facades to create relief or colored surfaces. They differ in more complex application technology.
- Specific plasters designed to create a heat-insulating or shielding layer on walls. With their help, additional protection is provided from low temperatures, high humidity, noise, etc. The compositions are recommended to be applied under decorative plaster.
Types of finishing mixtures
Offered on the market big choice external coatings on concrete. Conventional classification divides them into cement-sand and decorative plasters. Detailed description subspecies are presented below.
Mineral
They are most often used due to their low cost. Available in the form of dry plaster compositions. Prepared directly on the construction site. It is enough to dilute them with the required amount of water, according to the instructions on the package.
Mineral mixtures are applicable to finishing walls made of different materials: stone, brick, block products. The plaster is applied even on wooden surfaces after preliminary rough processing. For self-preparation, you will need a high grade of Portland cement and filler, which is selected according to the final requirements.
Cement-based compositions with sand or lime filler are popular.
- Peculiarities:
- low price;
- high strength qualities, adhesion, vapor permeability, frost resistance;
low water absorption.
- Disadvantages include:
- lack of color variety;
low elasticity, which over time leads to shrinkage cracking.
 Acrylic
 Acrylic structural plaster for external and internal use.
Acrylic mixtures are applied only to smooth surfaces. Due to its high elasticity, the minimum thickness of the facing layer is sufficient. The finished coating is wear-resistant. Suitable for finishing vapor-tight structures with polystyrene foam and polyurethane foam insulation.
However, the compositions are characterized by high cost, flammability, and low vapor permeability. Dust and dirt quickly settle on the plaster, which is why over time the facade loses its external aesthetics.
Silicone
This type of plasters has the highest performance parameters, increased elasticity, so the materials are easy to work with. Plaster compositions have the ability to maintain integrity during large shrinkages of the house, which makes it possible to create a high-quality outer layer when finishing gas silicate and foam block walls, which shrink significantly in the first year of operation, but require protection from rain and snow.
- Features of the surface of silicone plasters:
- repels dust;
- washes off quickly;
- retains color for a long time; suitable for finishing ground floors
, buildings near the sea due to its high water resistance and resistance to sea salt.
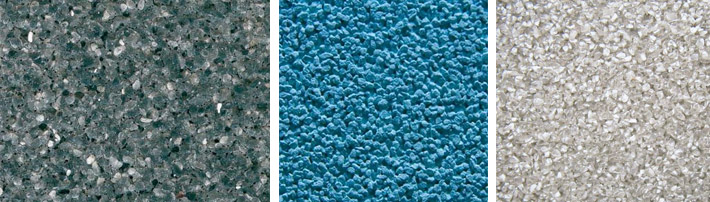
 Silicate
 Silicate plaster in blue tones.
- Silicate compositions are made from liquid potassium glass as a binder. The filler is: stone chips and/or sand, pigments, water, modifying additives. Is different:
- high moisture and wind protection;
- durability; high quality
- decorative finishing;
- good adhesion to concrete, silicate, aerated concrete;
- fire resistance;
- vapor permeability;
- tint variety of palette;
possibility of finishing with silicate paints.
The only drawback is the high price.
- Criterias of choice Persistence. Has the highest durability. This coating lasts up to 25 years. Silicate and silicone - 20 years, and external cement - 10 years. Highest resistance to atmospheric influences shows silicone and acrylic plaster. Mineral and silicate mixtures require the inclusion of antifungal and antiseptic additives in their compositions.
- Texture. Smooth and even surfaces are more likely to crack due to high internal stresses. Rough walls are more durable and allow you to mask defects in the outer surface.
- Color. The durability of the color finish depends on the uniform distribution of paint or pigment in the outer layer, the antistatic properties of the plaster, the ability to repel dust, and resistance to UV rays. The most resistant in this regard is silicone plaster.
Table of operational parameters of external plaster for facade decoration

Finishing technology
The process of plastering may differ in nuances, depending on what type of surface is being plastered. Main technological stages:
- Surface preparation. Old finishing materials are removed, large cracks and potholes are sealed with cement plaster, bulges more than 1 cm thick are cut off, the concrete is cleaned of dust, the facade is divided into equal working areas.
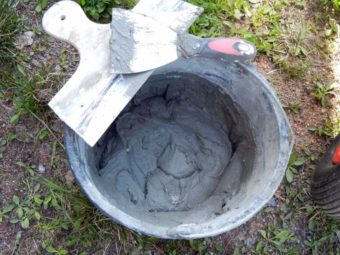
- Kneading Store-bought mixtures are prepared according to the instructions by diluting with water to a sticky consistency that adheres well to the wall.
- Finishing work. The surface is pre-primed. When plastering with cement-sand compositions, the wall is wetted with water. A trowel, spatula and others are used for work. available tools. When the layer thickness is over 2 cm, it is recommended to use special mesh for plaster.
- Grout. During intermediate grouting, excess mortar is cut off. The waste can be used when mixing the next portion of the mixture. Finished walls rubbed with plastic or wooden trowels.
Examples of manufacturers
Top popular mixtures:
- German mixtures Caparol, Ceresit, Knauf are known for their high quality and medium price range. Produced in Eastern Europe and the CIS countries without loss of performance characteristics.
- Polish products Atlas, German mixtures Kreisel, Austrian materials Baumit, Ukrainian plastering compositions Polimin are distinguished by reliability and quality. Used for external and internal cladding of any surfaces.
- Russian Bolaris, Volma, Osnovit and Kazakh Synergy compounds are distinguished by mediocre performance. They occupy the lowest price segment.
Conclusion
To obtain a high-quality and durable coating, experience and knowledge of the nuances of the application process are required. Work is simplified when using branded products.
The optimal selection of plaster mixture for exterior finishing of facades allows you to obtain a wear-resistant decorative coating.
Facade plasters are very popular for exterior finishing of residential buildings, industrial facilities and public buildings. The coating is not only aesthetically pleasing, but also durable. This combination of practicality and beauty, as well as a huge variety of design options, make plaster solutions very in demand.

Plaster must not only withstand all the vagaries of nature with dignity, but also reliably protect walls and external insulation from their harmful effects. Hence the basic requirements:
1. Hydrophobicity - should not be destroyed by moisture or absorb it.
2. Insulating properties - participates in maintaining heat in the house and partially prevents the penetration of noise.
3. Frost resistance - compositions that can easily withstand at least 30 freeze-thaw cycles are suitable for exterior finishing.
4. Plasticity – primarily hides wall unevenness and other defects.
5. Adhesive properties - in order for the coating not to peel off from the base, it must adhere well to the surface.
The advantages of plastering compositions for external work include the possibility of application to insulated facades, thereby providing reliable protection thermal insulation materials. The main disadvantage of façade finishing is, oddly enough, its unpredictability. The final result will depend not only on the quality of the solution, but also on many other factors: preparation of the base, chosen technology, weather conditions during work, knowledge and experience of the master.

Classification by purpose
Depending on what goals need to be achieved with the help of plaster, it is conditionally divided into two groups:
- Starter - performs the functions of a rough leveling compound, used for sealing seams, cracks and chips. To obtain a flat and smooth surface, fillers of the smallest fractions are used in starting solutions.
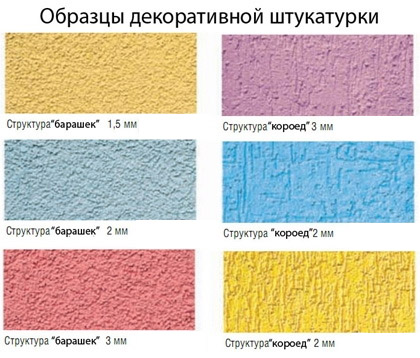
- Finish – is an external coating that performs both protective and decorative functions. The most popular in this category is the textured Bark Beetle, and the most economical is the traditional Fur Coat.
Most solutions can act in both roles simultaneously. But to reduce costs facade finishing It is better to buy two different mixtures, choosing them from the line of one manufacturer.

Varieties
Depending on the binder taken as a basis, several types are distinguished:
1. Mineral.
It is made of cement, which provides the façade coating with excellent performance characteristics: strength, waterproof and durable. Since cement mixtures do not have sufficient plasticity, various plasticizers are added to them for working with external surfaces.
The cement mortar can penetrate quite deeply into the thickness of the base, especially if the first layer is applied by spraying. This property allows it not only to be securely held on the wall, but also to further strengthen it.
Mineral facade plasters for exterior use have good air permeability, which is extremely important for buildings made of “breathable” materials. They also compare favorably in price - despite the high consumption (18-20 kg/m2), the cost of cement mortar is much less than polymer compositions.
The disadvantages include only a meager selection of shades, so to obtain decorative covering You will also need to purchase a decent amount of silicate paint. Durability is relatively short - only 10 years, during which cracks will still appear on the surface of the finish.
Today's best façade mineral mixtures are produced by:
- Bolars based on white cement.
- Ceresit sets the tone in production cement mortars with bark beetle effect.
- Knauf - for some time now the company has also joined the production of compositions for exterior finishing (Unterputz and fiber-reinforced Sockelputz).

2. Acrylic.
Very elastic plaster based on water-soluble polymer resins, which has good resistance to temperature changes and UV rays. Special biocidal additives are also introduced that prevent the growth of mold fungi and microorganisms on the façade. You can buy it in the form of a ready-to-use composition in the product line of Ceresit, Weber and other well-known companies.
The service life is at least 15 years, but under normal operating conditions it easily increases to 25. This is a very reliable coating, not subject to cracks and has high mechanical strength. It is electrostatic and attracts dust, but maintenance does not cause any special problems, since dirt sticks but is not absorbed - it is simply washed off with water, and the bark beetle is removed from the texture with a soft brush.

Sometimes problems arise during the application of acrylic solution, as it sets immediately. After a break in work on the border, the plaster painted in the mass will differ in color. Therefore, you need to do everything quickly, completely covering the surface of the wall from corner to corner.
![]()
3. Silicate.
Made from liquid glass– effective waterproofing material. At the same time, silicate facade plasters “breathe” freely, but have average ductility. The latter property of a silicate solution, when hardened, often leads to the appearance of microcracks on the surface.
Like mineral silicate mixture additionally strengthens the base, but this occurs due to the chemical reactions of potassium glass. Therefore, it is excellent for walls made of fragile materials (aerated concrete, silicate blocks or shell rock).
An unpleasant property is that the color changes when wet, although the shade is restored as it dries. They are also quite capricious in application. To work, you will need a special silicate primer, as well as the ability to plaster quickly and efficiently, since the solution does not “live” for long.
4. Silicone.
The most expensive and practical. These are good universal mixtures for external and internal work, as they have excellent performance characteristics, a wide palette of light-resistant colors and are completely safe. Another plus is that it’s easy to apply, so you can do everything yourself, saving on the services of specialists.
The main advantages of silicone coatings include their antistatic and dirt-repellent properties. And the viscous base allows not only the plaster itself to reliably adhere to load-bearing wall, but also to retain aggregate particles of any size. That is why it is most often found in the form of a decorative structural composition such as Bark Beetle or Lamb.
Silicone plaster is not only very expensive in itself, it will also require an equally expensive primer on the same basis. But the resulting coating will faithfully last for decades without losing its original appearance.
These compounds must have maximum resistance to all adverse events environment, since they are the first to receive a “blow” from the outside. She is also required to be visually attractive. For such a coating, complex solutions are prepared with various fillers, giving an original texture. But the most luxurious effects are obtained when relief patterns are applied to a smooth surface.
Since plaster is expensive, it is necessary to reduce its consumption to a minimum. To do this, the walls are leveled to perfect smoothness using cheaper starting mixture. After this, the decorative composition is applied in a thin layer - about 5 mm.

Characteristics of mixtures
| Bolars | Weber | Baumit | Ceresit | |
| Type | mineral | acrylic | silicate | silicone |
| Consumption per layer 1 mm, kg/m2 | 1,4 – 1,6 | 2,4 – 3,1 | 2,5 – 3,9 | 2,4 – 3,9 |
| Thickness, mm | 2 – 20 | by grain size | ||
| Adhesion of solution, MPa | >0,5 | >0,7 | >0,3 | >0,3 |
| Operating temperature, °C | -40 – +60 | -50 – +75 | -50 – +70 | -50 – +70 |
| Frost resistance, cycles | 50 | 50 | 100 | 100 |
| Package weight, kg | 25 | 25 | 25 | 20 |
| Price, rubles | 205 | 21 70 | 3 100 | 5 240 |
For walls made of lightweight building materials with very high vapor permeability, exterior decoration home plaster should have the same high performance. Therefore, buildings made of gas silicate blocks and cellular concrete are best faced with silicate solutions.
Pebble or structural compounds with a “lamb” effect are best used on surfaces that are destined to last for a very long time without refinishing. The reason is that the designated “set and forget” types of coating last for decades, and dismantling them is long and difficult.
Not all plaster mixtures can boast of color fastness, so before choosing plaster, it is worth considering the location of the house. On facades exposed to sunlight, light shades are used. Too dark surfaces in such conditions will absorb better thermal energy, will quickly lose their original attractiveness and may even crack.
For old buildings that require external restoration of walls, silicate solutions are best suited. But if funds allow, you can also use silicone ones.
If fine-grained plaster is required, it is better to avoid cement compositions. It is easier to find a suitable option in the assortment of acrylic mixtures.
In order for the facade of the house to be complete, it is not at all necessary to use expensive finishing materials, such as natural stone, brick or Japanese fiber cement panels. Quite a worthy option for budget finishing can become cement plaster. Using the material, it will be possible not only to create an aesthetic appearance of the structure, but also to improve its heat and sound insulation properties, ensuring reliable protection from external irritants.
The cement on which the mixtures are made is a mass of clinker and gypsum. It is the clinker that is responsible for adhesion and rapid drying of the solution.
Cement mixture for exterior use can be presented in two types:
- cement-sand;
- cement-lime.
The main difference between the solutions is their composition. If in the first case these are classic ingredients, then in the second - with the addition of lime that enhances the effect.
Cement-sand mortar - characteristics and features
Cement-sand facade mixture leads the market for budget plasters due to its excellent strength and durability. The material is moisture-resistant, suitable for finishing the surfaces of facades of houses located in conditions of high humidity.
The base of the mixture is cement marked from M150 to M 500. The numbers indicate the amount of pressure that the plaster can withstand with a volume of 1 cubic centimeter.
Most often, mixtures marked M 300 and higher are used for exterior work.
In addition to cement, the plaster contains quarry sand, which directly affects the performance characteristics of the solution. In addition to quarry sand, river sand can often act as a filler. Each manufacturer has its own proportions of using ingredients, which may vary depending on the characteristics of the latter.
To plaster layer turned out to be reliable and neat, it is important that the grains of sand included in the solution are the same size - medium. Too fine sand can lead to the formation of cracks in the coating, so solutions containing it are only suitable for finishing coating to achieve a “glossy” effect. Whereas large grains of sand will not leave the opportunity to form a truly flat surface, therefore they are suitable for rough exterior work.
In addition to the components listed above, the composition of the plaster for facade works additives may be included to improve the plasticity of the material. These can be all kinds of polymer powders, as well as copolymers. Their inclusion in the composition makes it possible to improve the following qualities of the mixture:
- strength;
- elasticity;
- impact resistance;
- flexibility;
- adhesion;
- resistance to low temperatures;
- wear resistance.
It should also be noted that the right additives can improve the resistance of the plaster mixture to moisture. Cement-sand facade plaster has several subtypes and can be:
- simple;
- improved;
- elite.
Simple plaster for exterior use is applied in two layers, does not require installation of beacons or covering. The mixture is suitable for rough finishing in cases where the main goal is to level the surface and remove cracks and gouges.
Improved plaster for exterior use is applied in three layers, with the finishing coated with a special trowel. This type of plaster is one of the most popular, as it allows you to create a perfectly flat and smooth surface.
Elite plaster is applied over the beacons in five layers with a finishing coat for exterior work that requires the best quality.
Cement-lime mortar: characteristics and nuances of use
Unlike the cement-sand mixture, plaster for exterior use with the addition of lime has an increased mass. If you plan to independently prepare the solution at home, it is recommended to slak the lime before use and keep it in this state for at least a week so that no swelling occurs on the wall during external work. A truly high-quality mixture demonstrates not only improved strength characteristics, but also excellent vapor permeability, allowing the walls of the house to “breathe.”

Traditionally, the solution includes, in addition to sand and slaked lime, Portland cement, as well as polypropylene fiber with additives that retain moisture penetration. The mixture is applied both manually and mechanically. Both dry plaster, which requires preparation, and a ready-to-apply solution are available for purchase.
The main advantages of the solution for facade work include the following:
- versatility (used for finishing surfaces of various types);
- high adhesion;
- resistance to the formation of mold and fungi;
- plastic;
- the ability to use the solution a long time after preparation;
- vapor permeability;
- wear resistance.
The disadvantages of the solution include relatively low rates of reduction in compressive strength plus an inflated cost compared to cement-sand mixtures.
Making cement-based plaster with your own hands
The basis of any cement plaster is a binder and filler, which are sand, cement, as well as clay or lime. To prepare the solution yourself, you need to dilute the dry mixture with water, bringing it to the desired consistency.
Most often, the composition is prepared at home by mixing cement with sand in a ratio of 1:3. To improve ductility ready mixture You can add PVA glue to it, approximately 50 ml per 10 liters of solution.

To make a cement-lime mortar at home, you should add lime dough to the mixture, which is easy to prepare with your own hands. It is recommended to prepare the dough outside, given that large-scale heat generation cannot be avoided during the lime slaking process.
Preparing lime dough is simple. Lump lime is placed in a metal container, filled with water at a ratio of 1:2, then filtered through a sieve and allowed to stand for 1-2 weeks. Add dry ingredients to the finished dough; if the consistency requires it, add more water.
Cement façade plaster based on lime is not stored as long as sand plaster in its finished form, so it is better to prepare it exactly as long as it is planned for use.
How to carry out plastering with cement compositions?
Before moving on to exterior work, you should prepare the base: clean, remove old coatings, grease or oil stains, if any. It is important that the walls of the facade are strong and do not crumble. As soon as the wall surface is ready, you can proceed to treating it with plaster. To do this, you can use a spatula and also a grater and grater at the finishing stage.
Plastering begins by applying several layers of the mixture to the wall:
- splash;
- soil;
- covers.
The first layer is applied using a special ladle, from which the solution is sprayed onto the surface of the wall, leveling it according to the rule. If concrete walls are being processed, a spray of 4-5 mm thick will be sufficient; for finishing a brick base, the layer thickness should be increased to 7 mm, and for wooden facades– reduced to 1 cm.
It is important to remember that concrete bases do not have special adhesion to cement plasters, so it will be necessary to add glue to the composition in the proportion indicated above. At the spraying stage, you can also attach a reinforcing façade wall to the walls.
The primer is the so-called base layer, which is applied with a mixture thicker than the first time. A trowel can be used to distribute the solution over the base. After the entire facade has been plastered, you can leave it for adhesion, after which the bumps and pits can be removed as a rule.
The final layer - covering is carried out with a solution that is the most liquid in consistency, compared to the previous two. The leveled layer will need to be moistened with water and then treated with a grater.
Plaster for external use has a decorative appearance and full-depth coloring. It not only gives a unique decorative look facade, but also protects it from the harmful effects of precipitation, solar radiation and cold. A comfortable environment is maintained inside the house and noise penetrates into the home much less. For plastering external walls, materials with wide range use and highly specialized, such as barite anti-radiation plaster.
We plaster the wall ourselves
Color design and façade protection by plastering with decorative materials
The wet façade was traditionally painted in various tones with colored whitewash. The cladding quickly began to peel and fade in the sun. A friend of mine built a house and was interested in the types of plasters currently used to protect and decorate the facade. I told him that plaster for exterior use is divided into:
- leveling;
- decorative.

External polymer leveling plaster is designed to smooth out unevenness and create a layer of thermal insulation. Base materials: cement and sand. Lime and gypsum are hygroscopic and can be added as plasticizers in small proportions - up to 10%. To improve qualities, various components are used, including fibers and ground stone.
The exception is thermal insulation and barite plaster. They have a special composition and are created for specific purposes.
Decorative mixtures are used as facade and interior plaster. They are decorated by adding crushed stones of various sizes and include mineral fillers. To create a textured surface, the technology of plastering and finishing is followed. The tonality of the mixture is created in various ways:
- adding dye in the manufacture of ready-made liquid formulations;
- the shade is done on tinting machines;
- dye is poured into dry mixtures during ripening before the last mixing;
- Painting is done after the plaster has hardened.
Almost all materials for the facade, especially external plaster, have low thermal conductivity, high vapor permeability and moisture resistance. Large selection from different manufacturers. Some of them absorb noise. The barite mixture extinguishes X-ray radiation and radiation similar in spectrum.
Leveling compounds are needed to create a foundation and comfort.

Plaster is used:
- for leveling walls for finishing;
- insulation;
- protection of insulation in a wet facade;
- creating a base for cladding.
There are special dry mixtures aimed at enhancing sound insulation and barite, anti-X-ray. Facade materials are frost and moisture resistant, but require additional protection. Universal warm plaster for interior work it can be used in damp rooms and outside as heat-insulating and moisture-resistant.
To apply material with high thermal insulation values, it is not necessary special technology plastering works. Plaster acquires its qualities thanks to fillers:
- quartz sand with closed air cells - foam glass;
- sawdust can be added to the cement mixture when making it yourself;
- vermiculite – increased in volume due to the use high temperatures mica;
- expanded polystyrene is a widely used material, added by manufacturers and independently to dry mixtures;
- By heating obsidian above 1100 0, manufacturers obtain its expanded substance - perlite and add it to mixtures during their manufacture.
I left the choice to my friend. Let his house decide what types of plaster to buy. Budget materials have their drawbacks. Expanded polystyrene burns, releasing toxic substances. Perlite and vermiculite are hygroscopic and plaster of external walls with its additives requires good protection from moisture. Sawdust is environmentally friendly, but thermal insulation plastering requires the application of a thick layer and the mandatory implementation of waterproofing cladding on the facade.
Thermal insulating plaster for external use forms a textured surface due to additives. Color finishing is limited to the application of silicone or acrylic paint. A polymer mixture is also used.
Rare, with narrow applications, barite plasters are also used for private houses

There are special types of plasters with enhanced properties according to a certain factor. Barite and other dry mixtures containing barium sulfate are designed to protect against X-rays and other radiation similar in wavelength. Manufacturers mainly make mixtures for specific orders. On store shelves you can find certain types of plaster with protective properties against radiation.
The choice depends on the degree of protection and the required hardening speed. Various types of X-ray protection plaster are cheaper and more convenient than lead boards. The material has specifications ordinary leveling plaster:
- vapor permeable;
- moisture resistant;
- thermal insulation.
To protect against barium dust, the surface is coated with paint or a mineral mixture is applied.
Technology for obtaining a beautiful facade

To insulate the house and give the facade originality, they are used different kinds plastering works. Dry mixtures and ready-made plaster used for exterior work are used.
1.Preparing the surface for finishing. The walls are cleaned of dust and old finishing materials are removed.
2. The curvature is measured for proper plastering of walls and corners.
3. A thermal insulation layer is installed.
4. Leveling material from a cement or other mixture is applied.
5. To perform high-quality plastering, the wall is primed, moistened with water, or a rough surface is created.
6. Colored silicone, acrylic or mineral is applied decorative plaster or painting is done.

Dry mixtures are mainly used as external leveling solutions. You can partially make them yourself. Thermal insulating plaster for application instead of mineral wool, is effective with a large number of components and is better to buy ready-made. My friend opted for foam glass insulation. The solution does not require special skills for application. The relatively small specific gravity does not create a load on the foundation. Dry mixtures are easy to stir and harden quickly.
Optimal temperature for facade work and application of any type of polymer finishing material within 5 - 20 degrees Celsius. There are special frost-resistant materials for northern regions.
To properly plaster external walls, carefully read the instructions on the packaging and follow them.
Materials that combine vapor permeability, decorativeness and high wear resistance

Manual plastering of external walls
For decorative cladding polymer plaster is used to protect external walls different types. It differs in the connecting component:
- silicone;
- mineral;
- silicate;
- acrylic.
My choice is a silicone exterior finish. The high cost is fully compensated by the quality of the material. It is plastic, easy to apply to various surfaces, except wood. You can easily add decorative filler in the form of sand or stone chips to it yourself and get a textured surface. Silicone compounds have a large selection of colors and can be additionally painted.
Mineral mixtures contain Portland cement and slaked lime. They fit well on leveling compounds, drywall and slabs with wood waste. The surface is the hardest and most abrasion resistant. Textured surface created with stencils and figured rollers. The small selection of colors is compensated by dyeing. A particularly beautiful surface is obtained when silicate paint is applied to a mineral base.
For outdoor work, I often use bark beetle composition. The pattern is created by solid fractions using a grater. Coloring emphasizes the unusual texture.
Universal plaster used in the interior and facade
