When starting a kitchen renovation, do you dream of a finish that can quickly tidy up uneven walls or ceilings? And so that the color matches perfectly overall design, the strength and naturalness were at their best, and even a non-professional could do the installation? Then you should pay attention to MDF panels for the kitchen - yes, this material is no longer new to the construction market, but it is undoubtedly worthy of praise for high quality, and close attention from home craftsmen for ease of installation.
One of important advantages MDF is environmentally friendly, not inferior even to solid wood. However, this is not surprising, because the production of fiberboard itself medium density implies the use only natural materials– for their production, very fine wood waste is used, without inclusions of debris, roots and knots. A mass of tiny sawdust is heated and pressed. During the heating process, a natural binding component is released - lignin, due to which a wood board is formed with the following characteristics:
- moisture resistance - moisture does not penetrate into the dense structure of MDF as quickly as into a more porous chipboard;
- high mechanical strength, not inferior even to natural wood or furniture board;
- heat resistance (although it cannot withstand direct fire, it will not dry out from the hot sun or heat from the stove);
- insulation properties - MDF perfectly absorbs noise and retains heat;
- spectacular appearance to implement interesting design solutions.
Diagonal laying of MDF wall panels
Thanks to these parameters, it became possible to use MDF panels for finishing walls in rooms with high humidity and temperature.
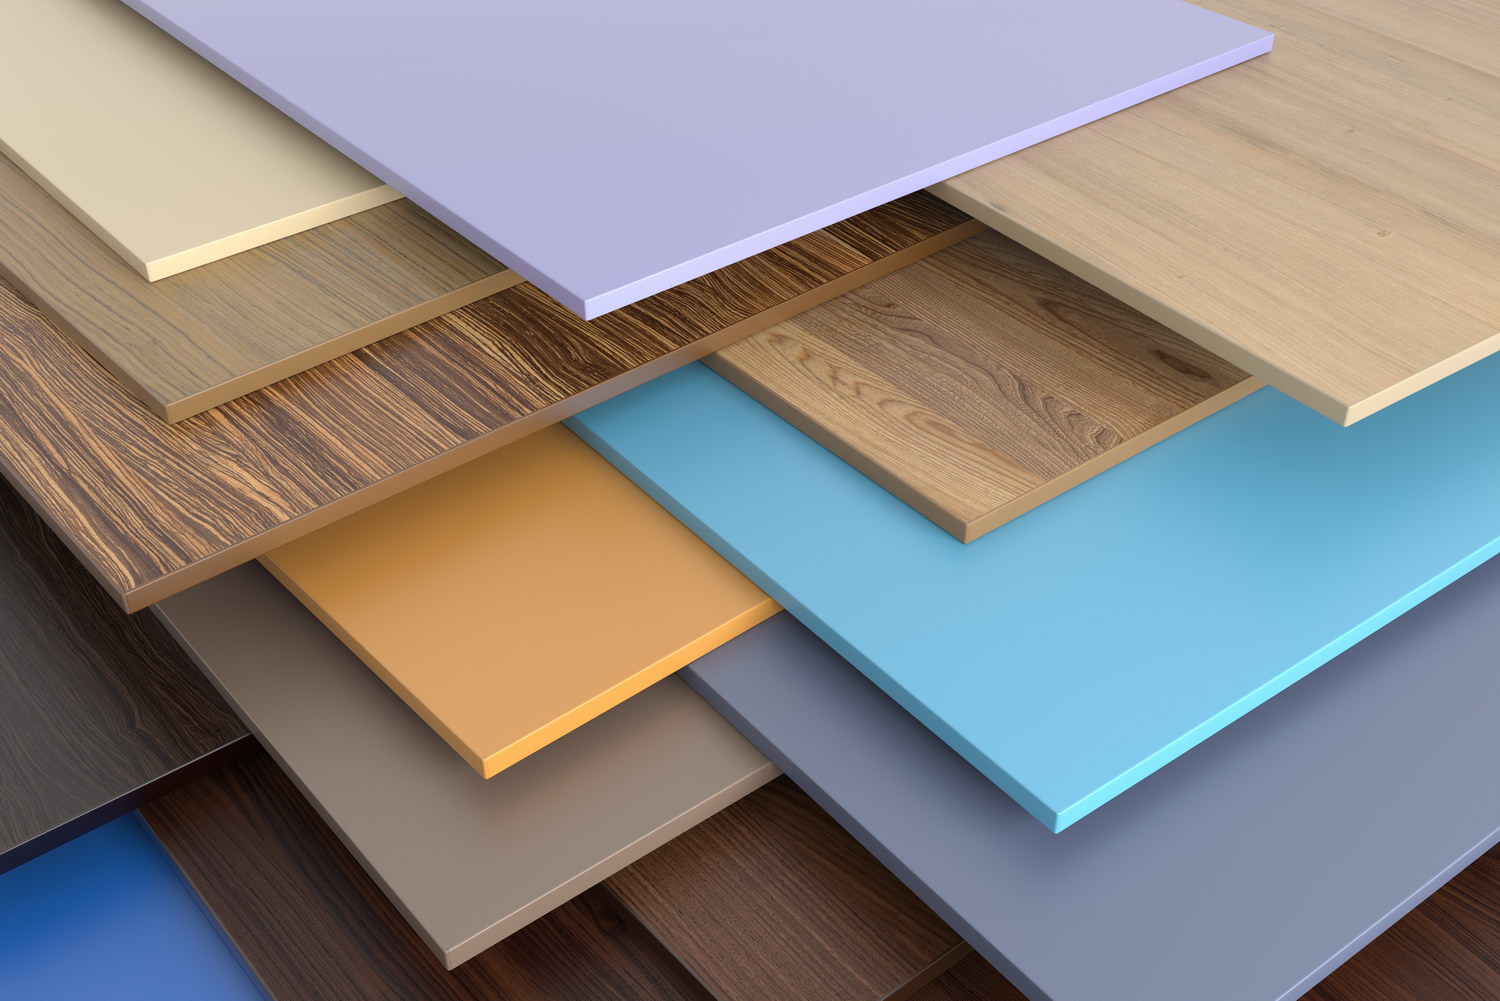
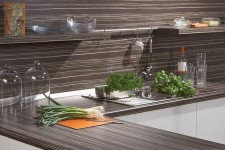
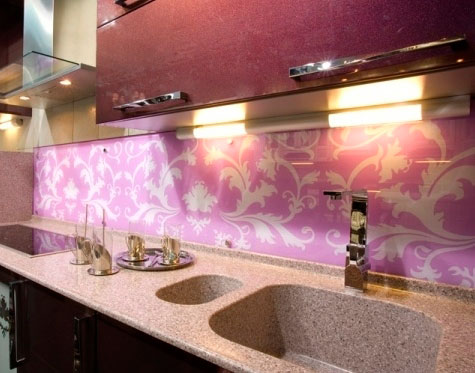
MDF panels can be selected to suit any interior design
Of course, it was not without its drawbacks. MDF, to one degree or another, has most of the disadvantages of natural wood - it cannot be classified as a fireproof finish, and even with prolonged contact with water, no increased density will protect the wood from deformation. But improve performance characteristics material, including resistance to damage by fungus and putrefactive microorganisms, will be helped by external coating with paints and varnishes, veneer, melamine or PVC film, plastic or acrylic shell.

Another weak point of all wood boards– ends that remain unprotected when adjusting to size. Therefore, you have to process the joints manually or use special profiles to protect the edges from moisture penetration.

Kitchen finishing wall panels MDF using profiles
On a note! MDF coated with pressed wood is considered the most resistant to surface damage. high pressure plastic, environmentally friendly - with natural veneer lining, and the most spectacular - with photo printing.

Photo printing on plastic lining of MDF panels
Classification of MDF panels
For the manufacture of the material, plates of wood fiber boards are used, which can be conveniently adjusted to the size of the surface. It is much easier to choose ready-made MDF wall panels for the kitchen, depending on the area of the cladding.
Based on shape and size, panels can be divided into the following groups:
- Lining or lath - rectangular planks various widths(150-900 by 2400-4000 mm) with special “locks” on long sidewalls, used for full or partial coverage of walls and ceilings.
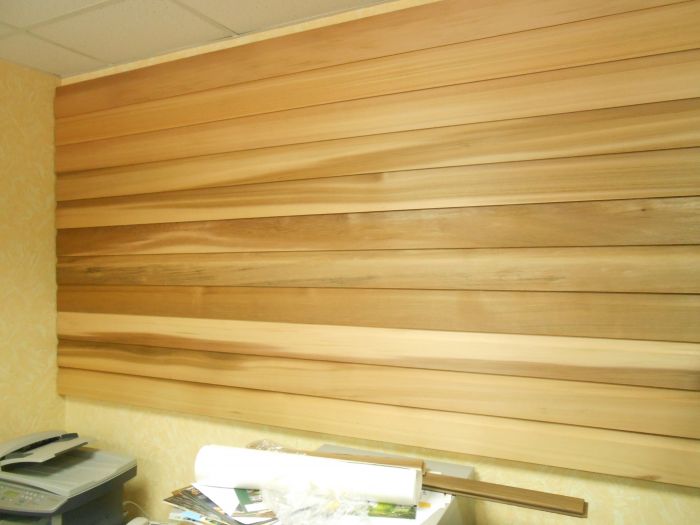
Long lining is convenient for finishing large areas
- Tiles are square or rectangular wide panels with a side of 290-950 mm, mainly used for wall cladding or kitchen apron cladding.


Square fragments also look good on the ceiling
- A slab (sheet) is the largest material in area, which is cut according to the parameters required by the customer. Dimensions are selected in the range from 1040 to 2800 mm for the most seamless wall covering.

In addition, MDF wall panels for the kitchen differ in thickness.
- The thinnest (5-9 mm) are convenient due to their low weight and ease of installation, but cannot boast of sufficient strength, so they are most often used in the manufacture of furniture facades, but can also be used to cover ceilings in the kitchen.
- Medium thickness (10-18 mm) is the main material for wall cladding (as well as making doors or furniture frames). They are quite strong, but their thickness will have a slight impact on the usable space of the premises.
- Thick (19-38 mm) – the most durable, mainly used in furniture production, but can also be used for covering large areas that require additional insulation.
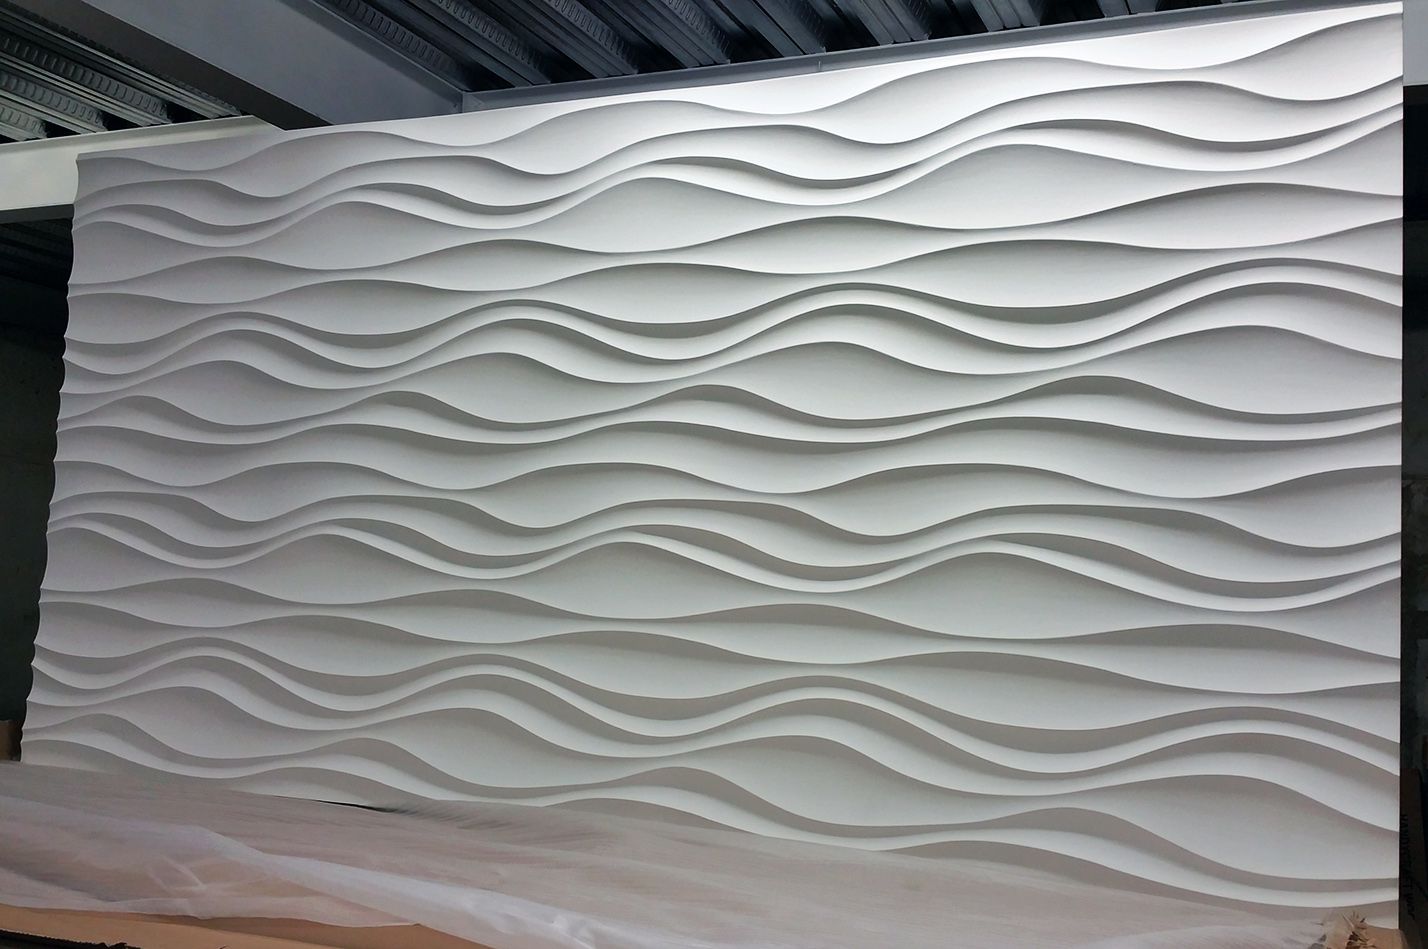
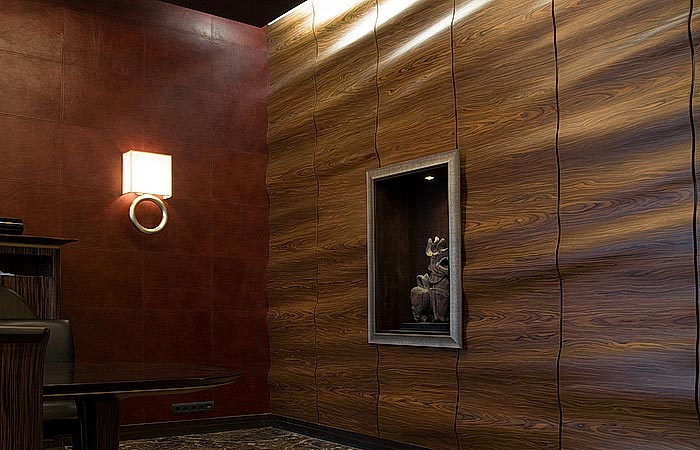
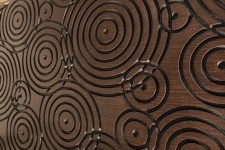
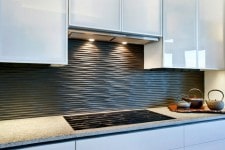
And finally, MDF wall panels for the kitchen can be divided according to texture into smooth and textured. A smooth surface (especially with a glossy finish) visually enlarges the room, which is especially important for small kitchens. But on a textured cladding with a pronounced relief, various defects are much less visible, and it looks more unusual and impressive.

Relief finishing materials based on MDF
Interesting! Anyone who wants to practice the art of design can try themselves in selecting combinations different colors or textures, as well as in non-standard (for example, diagonal) installation of MDF boards. If you are not confident in your skills, use ready-made offers with original design, for example, materials with a 3D effect.
Optical illusions using 3D technologies
Options for covering the kitchen with MDF panels
If you decide to use MDF panels when decorating your kitchen, it is important to determine the area of their coverage. Actually, there are two options - complete cladding of all surfaces (which is quite rare) or fragmentary cladding of walls, ceilings or sections thereof. We propose to consider several zones in which this material will serve as both functional protection and spectacular decoration interior
Full cladding - pros and cons
At first glance it seems that the best option finishing the kitchen with MDF panels – complete replacement everyone facing materials decorative wooden plates. But the result obtained rarely lives up to expectations. To implement this idea, you will need a really spacious room with a high ceiling, otherwise a small kitchen with such decor can turn into something like a wooden box.
Of course, you can use your imagination and try to create original color combinations, play with the texture of embossed and smooth materials, or perform installation with non-standard installation. For example, choose square slabs for the floor, multi-colored lining for the walls, and line the ceiling with seamless panels. But it’s still better to leave this option for the kitchen in the country or in country house.

Full kitchen refurbishment spacious house
MDF cladding of walls, floors and ceilings
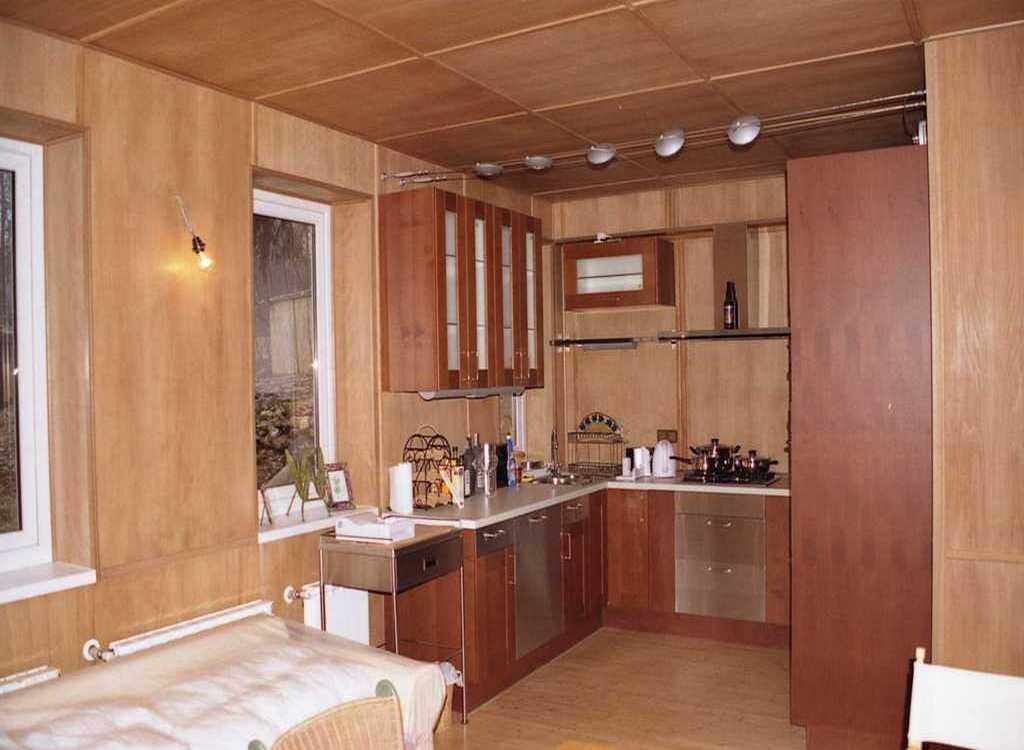
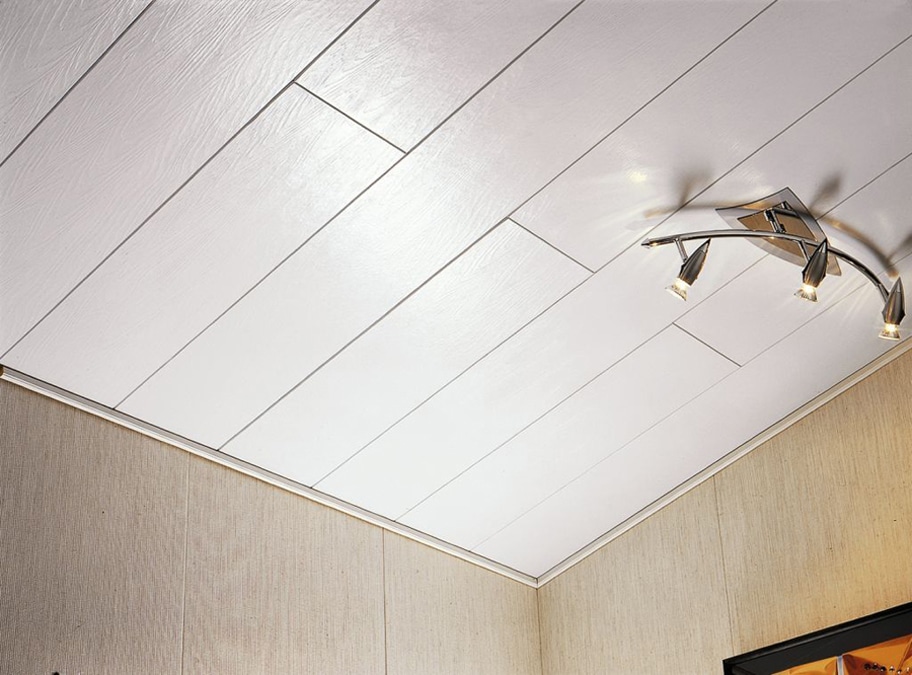
For apartment kitchens, partial finishing with MDF panels is often used. This can be the cladding of the lower part of the walls, used mainly in large rooms, since in small kitchens this space is almost completely covered with furniture. You can also cover the ceiling with MDF lining or sheeting. Moreover, if finishing with wood slabs is more recommended for the walls, the ceiling covering should be chosen in light neutral shades - white, soft blue, creamy. In addition to plain panels for ceiling will do imitation stone, such as light marble, and original reliefs.
Finishing MDF walls and ceiling in the kitchen

Modern kitchens with MDF wall finishing
Important! You should not choose the same material for covering the walls and ceiling - let the panels differ in texture or color so as not to visually reduce the volume and height of the room.
Dining area cladding
The beautiful structure and warm color of natural wood create an atmosphere home comfort, therefore, veneered or laminated MDF is often used to decorate the dining area - the part of the kitchen where common table the whole family gathers. This cladding looks much cozier than tiles and is much more practical than wallpaper. And since the dining area is located at some distance from the stove and sink, the impact of excess moisture or temperature on the finish is minimal.
Advice! If you use finishes of different colors, textures or shapes, you can visually differentiate between working and dining area kitchens.
![]()
Highlighting the dining area with wood finishes

A cozy duet - a massive tabletop and a wall with wood trim
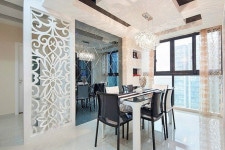
If the kitchen is spacious enough, has a long rectangular shape or combined with another room of the house, you can install a small partition, separating the dining room and work area not only visually. And this is where seamless wall sheets made of MDF that imitate wood will come in very handy. Moreover, veneer made from expensive species, a simple varnish coating, or material with realistic photo printing can be used for this. Air partitions made of MDF made by laser cutting look no less impressive.
Openwork partitions for zoning kitchen space:

On a note! In kitchens with no large area(for example, in “Khrushchev” buildings) the wall opposite the working one is finished with this material. Moreover, for this it is not even necessary to completely sheathe the entire area; it is enough to cover the surfaces free of furniture with MDF panels. Particularly good for partial cladding is a seamless sheet cut to fit the open space.
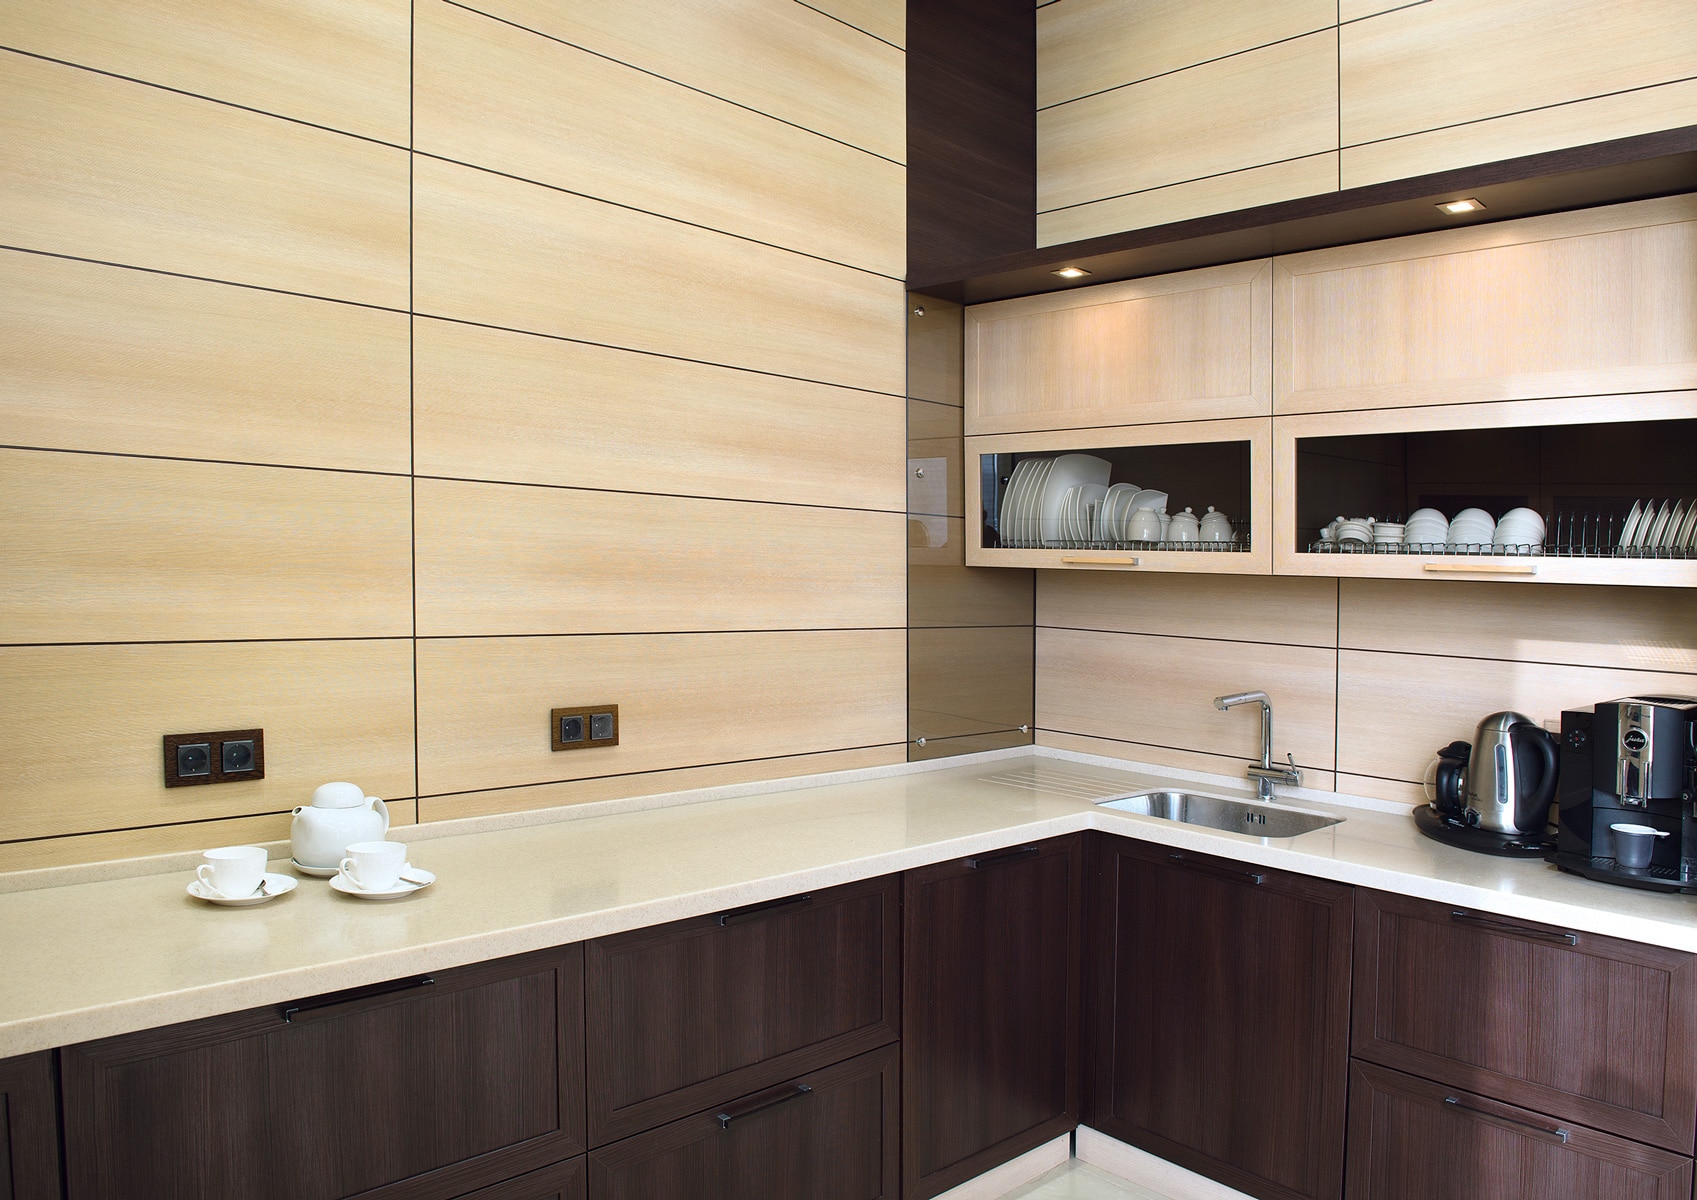
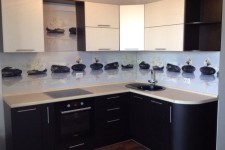
Application of MDF for kitchen apron
The section of wall between the upper and lower cabinets kitchen set refers to the working area, that is, it is here that the exposure to moisture and temperature is the highest. Therefore, MDF panels for finishing should be selected only with good protection (and ideally, moisture resistant) or additionally covered with a glass screen.
The most reliable option for wall panels for interior decoration kitchens are considered to be so-called MDF skins with a heat-resistant plastic coating. By the way, another advantage of these sheet slabs is their rich decorative assortment, including photo printing. For inspiration, we offer a selection of photos of wall panels on kitchen apron.
With plastic coating and photo printing:


With a relief pattern – interesting idea for fragmentary wall decoration:
The choice of finish for the apron should take into account the interior style of the room, color range and design of kitchen facades. These can be monochrome panels of any shade, coverings with a pattern, photo print, imitation of fabric, stone, brick. MDF panels with a beautiful wood structure look the most impressive and natural.
Wooden apron for working area:


On a note! It is better to mount the wall panels for the apron on the sheathing in order to run wiring underneath them to illuminate the work area and communications for connecting various household appliances.
DIY installation methods for MDF cladding
For finishing walls and ceilings with any MDF panels, there are only two installation options - adhesive and frame methods. The latter is considered more environmentally friendly, since it does not require chemicals, which when exposed high temperatures may release harmful substances. In a properly equipped kitchen negative impact possible glue evaporation is leveled out exhaust ventilation, therefore both options are equally popular and are successfully used for covering various surfaces.
Fastening panels with glue
This method can be used to mount any types of panels, but it is most reliable for fixing thin and medium MDF boards. Glue mounting is chosen only in cases where the surface does not have defects extending beyond the plane by more than 2-3 mm.
Important! For safe work with adhesive compositions, it is recommended to use protection (at a minimum - rubber gloves, at a maximum - a respirator) and ensure an influx of fresh air into the room.
The scheme for attaching panels for interior decoration of kitchen walls is simple and does not take much time:
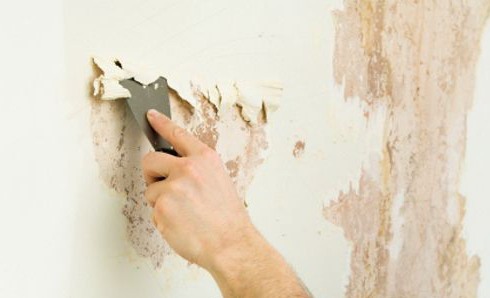
- The working surface is cleaned of old coating (residues of paint, wallpaper and other finishing materials) and primed. This is necessary to remove mold or mildew and protect against them. reappearance, degreasing, as well as increasing adhesion.
- When the walls are completely covered, a metal profile or wooden strip is attached to the lower edge near the floor with self-tapping screws. It is advisable to measure the first plank level to simplify the work of leveling the next rows of finishing panels and installing the plinth.
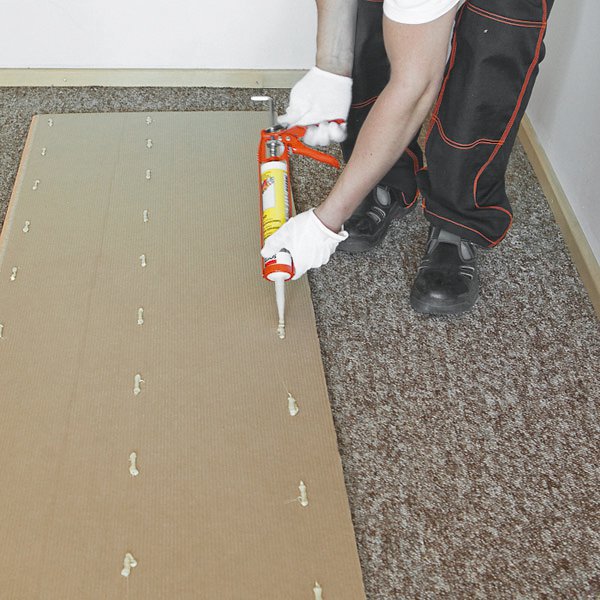
- Apply to the base adhesive composition- dotted in a checkerboard pattern or in zigzag stripes. In the case of fastening sheet material with a large area, the wall or ceiling itself is processed; for small planks, glue is applied to the MDF panel or tile itself.
You can apply glue to the plank if it small size

For long or voluminous fragments, it is better to treat the wall with glue
- Installation begins from the corner - the first panel is pressed against work surface, is leveled vertically and horizontally and tapped with a rubber mallet (or just a fist) for a tight fit. Then the following elements are attached.
- In the case of gluing lining or tiles, the correctness of the connection is checked with a level every 3-5 fragments. Excess adhesive that comes out is immediately removed with a cloth soaked in water or alcohol.
- After fixing all the cladding, install the necessary fittings - internal, external and finishing corners, plinths.
Important! It is most convenient for novice craftsmen to use so-called “liquid nails” for installation; more experienced ones can choose any universal reinforced adhesive compositions or even polyurethane foam.
Installation on frame or sheathing
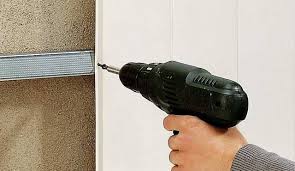
If the kitchen does not have perfectly flat surfaces, you will have to equip it with a frame made of metal profiles or wooden slats to decorate it with wall panels. This option is also chosen when installing hidden wiring and ceiling cladding.
Fastening MDF panels to the frame
Sequence of work:
- Preparatory stage consists of applying a primer with fungicidal properties to the walls or ceiling. All wooden parts of the future frame are treated with the same impregnation.
- The sheathing is being marked. When working with walls, the upper and lower slats are placed at a distance of 3-5 cm from the floor and ceiling, the rest are spaced 40-50 cm apart. For the ceiling frame, mark out a grid with a square side of 1 m.
- The frame elements are fixed to the working surface with metal or wood screws in increments of about 50 cm, checking for correct installation with a level.
- Installation of panels starts from the corner. The first lamella is leveled vertically and fixed to each batten of the sheathing with small nails at such a distance that they can then be covered with fittings. On the other side of the lamella, the comb is also attached to the frame. It is most convenient to use special clamps for this (in construction jargon - clamps).

Clamp fastening system
- The next lamella is installed in the lock of the previous one and is also fixed with a clamp by the comb. This rapport is repeated around the entire perimeter.
- If necessary, the last plank is cut to width with a hacksaw (if the gap is too narrow, you can reduce the width of the first and last fragments so that the difference is not noticeable).
- After installing all the main elements, the turn of the fittings comes - the necessary corners and baseboards are applied.

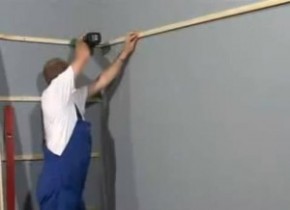
Video: how to attach MDF panels to a kitchen working wall
Now you know how to cover a ceiling or walls with MDF panels. This work is really simple and is accessible even to an unprofessional craftsman, but if you don’t have enough time for independent experiments, or you simply don’t have confidence in your own construction skills, you can always call on the help of specialists who will install MDF panels with high quality and in the shortest possible time.
Wall panels have become very popular relatively recently. These materials can radically change the design of an apartment without requiring large sums of money. Wall panels are very easy to care for, they practically do not get dirty and have good durability, so they are ideal for the kitchen. You can turn classic walls into unique style compositions, come up with unique interior and fill it with beautiful decorations. Today we will look at how to decorate a kitchen with wall panels.
Preparing to install panels
First you need to prepare all the materials that you may need. Therefore, buy in advance: wall panels, corners, wooden slats, dowels, level, staples, tape measure, profiles, pencil, screws, protective impregnation, etc. After this, evaluate the degree of flatness of the surface on which the panels should be attached. If the walls in the kitchen are perfectly level (which is unlikely), you can attach the panels directly to the wall using glue. This option only applies to kitchens with normal level humidity.
If the room is dominated high humidity, you will have to install a wooden frame. It can also be installed if the room has uneven walls. In this case, there remains some space between the wall and the kitchen wall panel that can be filled insulating material. In addition to sound insulation, it retains heat, so heating costs are reduced. In addition, in this way you can hide electrical wiring, for which you do not need to ditch the walls.
If the walls are not very smooth and you are not going to use a frame, you need to prepare them for finishing. To do this, you should thoroughly clean the walls from dust, dirt and let it sit. Be sure to delete any remaining old decorative coating, paint material or wallpaper. All irregularities should be eliminated using high-quality putty that is suitable for the type of surface. After this, you should walk along the walls with sandpaper.
Calculation of material for installation
Before attaching wall panels in the kitchen, you should calculate their number. To do this, you must know the dimensions of the wall panels for the kitchen. Please note that there should be no errors. It is necessary to measure the width of the kitchen walls and divide it by the width of the panel. This way you will get the number of products needed for finishing. It may not turn out whole. If this happens, you will have to carefully cut one panel and adjust it to size.
If there is a window, doorway or arch in the wall, you need to measure this area. After this, you should subtract the resulting number from the length of the wall. To finish the walls you will need profiles and corners with which you can secure the wall panels in the corners. It is recommended to leave gaps as panels (especially sheet panels) can expand over time. The height of each piece should be one centimeter less than the distance between the floor and ceiling.

After this you can cut the workpieces the right size. If you use a hacksaw, it is advisable to make cuts from the front side of the coating. If you plan to use a circular saw, you will need to cut the pieces from the base side. First, you should carefully cut the covering, then cut the panel itself with greater force. While cutting, try to keep the carpet knife strictly perpendicular to the panel.
For perfectly cut straight lines, it is better to use a straight edge or ruler. For sockets and switches, you need to cut appropriate holes in the material. Before attaching wall panels to the kitchen, they must lie in a room with room temperature more than twelve hours so that the humidity levels of building materials and the surrounding air can get closer to each other. Therefore, unpack the box and leave the material for a while.
Procedure for gluing wall panels
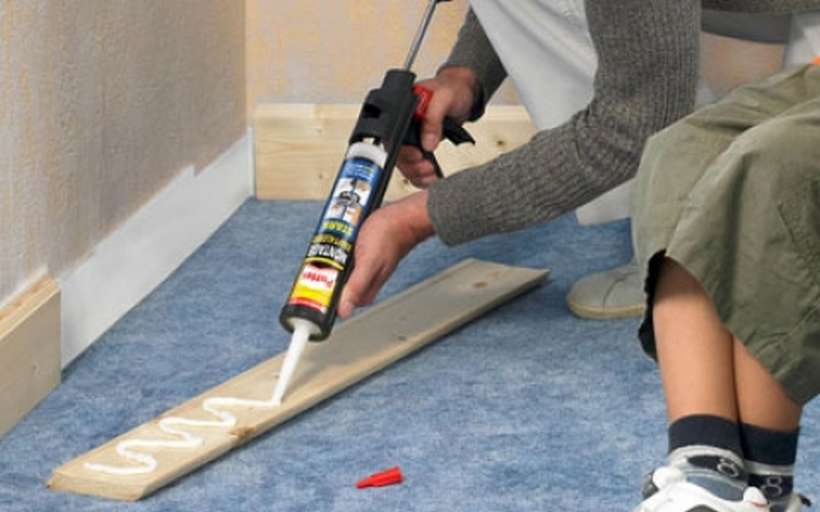
Sheets can be glued using acrylic, silicone or universal construction adhesive. It is advisable to study the adhesive composition on the packaging and perform all actions, taking into account the manufacturer’s advice. First, the wall panels are glued to the inner corner of the room, and then along the perimeter. The adhesive composition should be applied to the entire surface of the material.
Apply glue in even strips - along the long edges three centimeters from the edge and a little glue on the center every twenty centimeters. Do not join the panels closely; leave small gaps of a few millimeters. Subsequently, they should be filled with silicone sealant. The same small gaps should be left at the junctions of panels with windows, corners and doors.

The edges of each kitchen sheet wall panel must be installed plastic profiles suitable color and fill them with sealant. After this, you need to press the panels firmly against the wall and tap with a hammer so that the glue can set well. To better secure the material, you can attach a temporary wooden support. Wipe off excess sealant with a clean rag and further strengthen the sheets with nails or screws (if necessary).
Fastening panels to a wooden frame
If you have decided to wooden frame, start working on its foundation first. Prepare wooden blocks to install the frame. The thickness of the bars should depend on whether insulation will be installed between the frame and the panels, which will additionally soundproof the room and make it more comfortable. It is worth noting that the wall panels themselves are soundproofed.
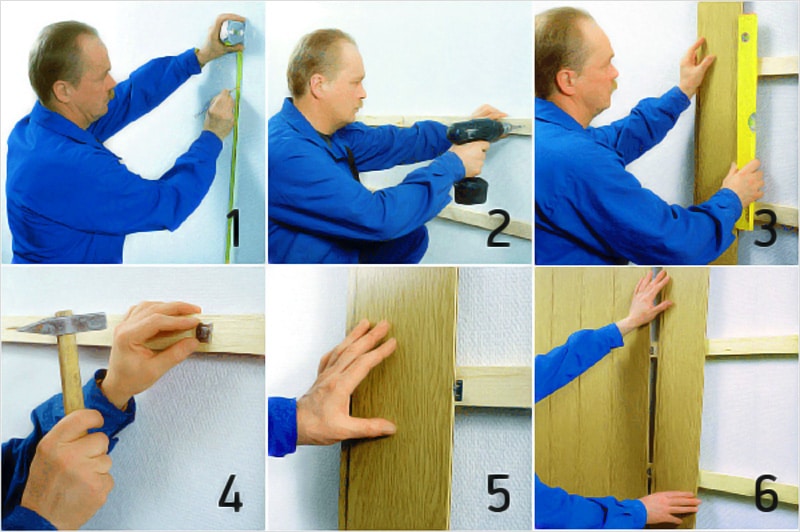
Next you should mark the walls. Remember that if the wall panels will be placed vertically, then the slats should be placed in a horizontal position. Using such an amazing material as wall panels, you can decorate the walls in the kitchen vertically, horizontally or diagonally. You can choose the right one color palette and bring any idea to life. In any case, the frame should be positioned perpendicular to the direction of the wall panels.
According to the markings, you should secure the bars to the surface using screws and dowels. Remember that between the bars you should leave a distance of fifty centimeters. Otherwise, the wall panels will not have the necessary stop points when fastening. Before installing plastic wall panels for the kitchen, the frame must be treated with a special protective impregnation. Otherwise, it may deteriorate due to humid air. Then you should install the corner profiles to install the wall panels using brackets.
And only now can you move on to the installation itself, which should start from the inner left corner. Then you can move to the window or door. The edge of the first panel should be inserted into the groove of the corner. The fastening edge of the panel must be installed on wooden slats. You can use staples for fastening.

The second panel fits into the groove of the first. Its fastening edge must be fixed to the sheathing. All other panels are installed in the same way. Don't forget to check verticality using a level. The last panel is inserted with its edge into the groove of the corner, it closes the connection. Once all the kitchen walls are covered with panels, you can install skirting boards between the walls and the floor, as shown in the photo of kitchen wall panels.
When installing wall panels in kitchens, some inaccuracies and inconsistencies may occur. To prevent situations of this kind, it is recommended to use small tricks. And they consist of the following:
- On plastic panels You can apply any color, pattern and texture. The decorative pattern is applied using special printing methods. The image can imitate wood, a natural stone etc. Elements can be painted in one color. It is necessary to apply to the drawing layer protective covering(matte or glossy), which will protect the surface from dust, moisture, damage and ultraviolet rays.
- Chipboard and wood fiber panels can be covered with veneer or varnish, provided the base is dry and even. If there are flaws, you should make a sheathing to which the panels are attached using brackets and screwed on the back side with screws.
- The panels can be mounted using the tongue-and-groove or tongue-and-groove method. In the latter case, it is necessary to dock the panels together to create a pattern. This option is ideal for kitchens with high environmental requirements. The groove-to-groove option can also be made with a decorative insert.
- If you plan to hang heavy equipment on the wall panels, they must be secured to the sheathing or to the base itself using long screws. In this case, it is better to avoid using glass wall panels for the kitchen.
- If you are renovating a kitchen with uneven walls, it is advisable to install panels on a frame. To do this, you need to screw the wooden blocks with screws to the surface so that they are located at a distance of 0.5 meters from each other. Then you can commit decorative material using a construction stapler or other fasteners. Otherwise, you will need to pre-prepare the surface by removing wallpaper or old paint by removing the plaster and leveling the walls.
- Wall panels come in matte and glossy finishes. The latter option creates the illusion of a mirror reflection, therefore visually enlarging the room. For small rooms this choice will be very successful. However, remember that glossy wall panels require special care. You can easily remove dirt on such panels, but you will have to do this often, since even traces of drops of clean water on the gloss are very noticeable.
Thus, it becomes clear that wall panels are a very good solution for finishing a kitchen. And it doesn't matter if you're chasing a concept budget option repairs, or the price of kitchen wall panels does not play a significant role for you. If you want to install such material yourself, you should plan the entire process in advance. If all points are followed correctly and consistently, the installation of wall panels in the kitchen will be easy and successful. We wish you to finish your kitchen impeccably and enjoy the fruits of your labor for a long time!
The kitchen is one of the most difficult areas to decorate. modern interior. This is especially felt when, since in addition to good aesthetic properties, the surface must also effectively withstand frequent contamination and be easy to clean.
Ceramic tiles are most often used to decorate work areas, but not everyone will like the mosaic structure, appearance and price of ceramic products.
The closest alternative tiles are wall panels that are not only not inferior, but also in many ways superior to ceramic products in terms of technical specifications and visual impression. Due to their artificial origin, the panels are quite easy to form, which in turn allows you to significantly diversify the surface texture and color range.
Kitchen finishing panels are made of PVC or MDF - which modification you prefer depends solely on your wishes.
Panels made of polyvinyl chloride have a lower cost and moisture resistance, but they can be installed exclusively on a pre-assembled frame. MDF sheets have heat and sound insulation properties and can be fixed to the wall using either adhesive or frame method.
TO disadvantages of MDF products should be attributed to their high cost and relatively weak resistance to moisture.
Also, this product is distinguished by ease of installation - even without professional skills, you can install the panels yourself without any difficulties. This article will provide you with detailed instructions about how to decorate a kitchen with wall panels.
Panel installation
Finishing the kitchen with panels is carried out in two ways - glue or on a pre-assembled frame. The first method is used exclusively in combination with MDF sheets - both MDF and PVC analogues can be mounted using the frame method. Below we will look at both technologies.
Panel stickers
The advantage of adhesive installation of MDF sheets is simplicity and cost-effectiveness - for fixation there is no need to assemble a supporting frame, which allows you to save money on the purchase of material. The disadvantage of this method is the lack of thermal insulation and the obligatory presence of the most even surface possible in order to avoid voids and excessive consumption of adhesive.
Most often, walls in the kitchen are finished using 122x244 wall panels using the adhesive method, since smaller analogues are easier to “plant” on the frame.
Surface preparation
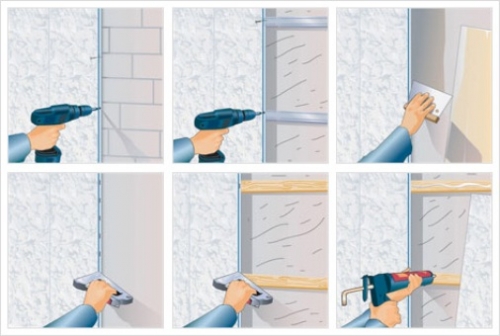
- Peeling layers of whitewash, paint, plaster, etc. must be removed from the walls. – the surface must be continuous and reliable. Cracks, cavities and other irregularities are filled with a repair mass, the composition of which is selected based on the structure of the original finish. As a result, you should have a smooth surface with a uniform texture;
- If the surface is porous, it is necessary to fill small voids and make the wall structure uniform.
Note! IN in this case This means pre-installation of sheets that complies with all building codes. In any other case, it may be necessary to level the walls with plaster or putty.
Gluing
Before gluing, the panels should be left for 24 hours in the room where they will be installed so that the material can adapt to the temperature conditions.
The sheets must be unpacked in such a way as to ensure air access to each element.
- The back of the panel is cleaned of dirt and degreased, after which an adhesive composition is applied to it, according to one of the schemes presented in the figure;

- The panel must be pressed tightly against the wall and the entire surface of the sheet must be tapped to evenly distribute the glue. To guarantee fixation, it is recommended to use spacers and other temporary fixations;
- Between the panels and the floor/ceiling/internal corner it is necessary to provide a temperature gap of at least 3 mm necessary for thermal expansion material.
- All joints, external and internal corners are masked with moldings and profiles, or filled with sealant - the first option is preferable, as it ensures complete tightness of the coating;
Note! If you use moldings or other connectors, sealant should also be applied to the joints to prevent moisture from penetrating the interior of the panel.
Frame installation is carried out using a tongue-and-groove lock, which is located at the ends of the panel. The elements are fixed to a pre-assembled frame, which allows you to smooth out small unevenness in the wall.
Assembling the sheathing
- As assembly material load-bearing frame can be used as wooden beam, and a metal profile. The thickness of the elements in this case does not play a big role, since finishing the walls with panels in the kitchen does not imply the presence of thermal insulation;
- First of all, the lowest rail/profile is installed, subsequent frame elements are located in increments of 40 cm from each other. If wooden slats are used, they are fixed using polyamide screws. Metallic profile mounted using metal fasteners;
- During installation, it is important to monitor the horizontal and vertical alignment of the profiles/beams using a building level. Ultimately, all frame elements should form a single plane and be on the same level;
- The covering begins from the inner corner - using a stapler or screws, a corner is mounted into which the first panel is inserted. Then the free side of the panel is fixed and the next one is inserted - for a tighter fit, you can tamp the panel by placing a piece of foam plastic between it and the hammer so as not to damage the edge;

- When the sheathing reaches the next corner, a corner is put on the end panel, after which the panel can be fixed. External corners are also formed using appropriate corners;
- To seal the sheathing, the joints are coated with sealant. It is most convenient to make longitudinal cuts with a construction knife, and transverse cuts with a hacksaw.
Bottom line
Finishing panels for the kitchen make it possible to diversify the interior with bright colors and new ideas, while maintaining the functionality of the coating. Along with a unique appearance, you will receive a surface that is resistant to stains and is easy to care for.
More detailed information You can learn more about this topic by watching the video in this article.