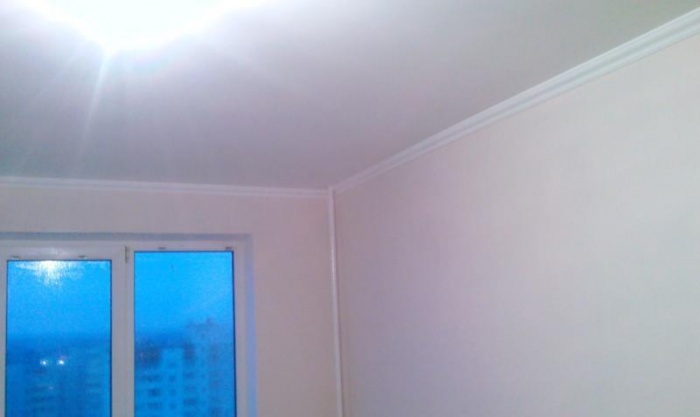
Smooth walls are the key perfect renovation and most often the most expensive of all procedures. To reduce the cost of work, many people ask themselves the question: how to level the walls with their own hands.
The first thing you need to do is understand why you need perfectly smooth walls. The alignment of walls in an apartment is usually determined by wallpapering and the correct geometric shape when arranging furniture.

The walls don't have to be aligned if you use live wallpaper. They smooth out small irregularities and a perfectly smooth surface is not essential for them (for example, bamboo wallpaper).

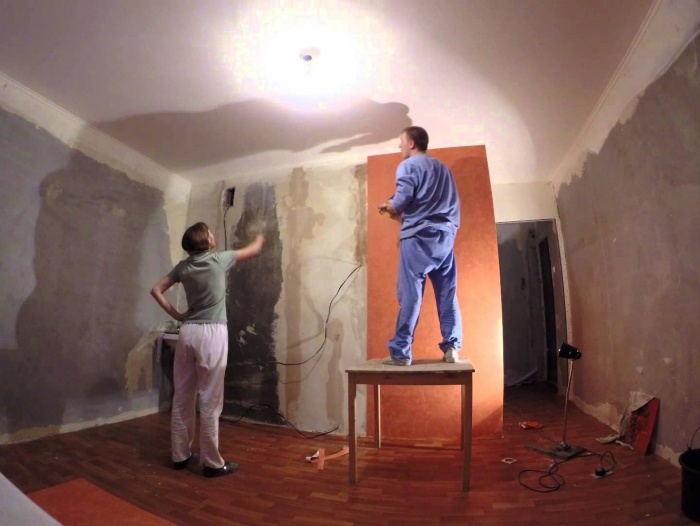
The process itself is presented on the Internet with many videos and photos of wall leveling. Also, before starting work, I would like to advise you to seek help from people who already have experience working with plaster and then carefully read the instructions indicated on the packages with the mixtures.


Types of alignment
If leveling the walls cannot be avoided, then this process can be done in several ways. Leveling with drywall is the least time-consuming. To do this, you just need to attach sheets of drywall to the wall, armed with a level.


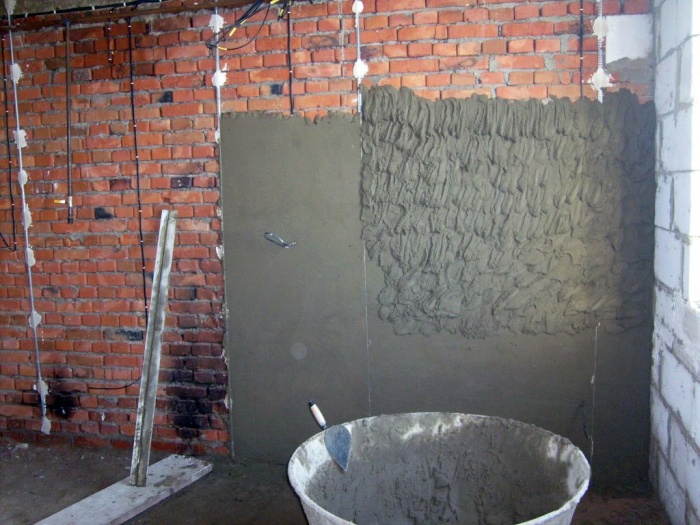
List of plaster for interior work great It comes with various impurities. If you bought an apartment with already leveled walls, then most likely they were leveled with ordinary sand concrete, but the evenness of such walls must be double-checked.

If the differences in the level of your walls are small, then you can also do this work with sandstone. However, it is worth considering that the degree of drying takes longer and therefore the work may take longer.

How to level walls with plaster, before this question you need to ask yourself another question, which plaster to choose. Based on experience, it is better to choose gypsum.

Plaster
If you choose leveling with plaster, then you will additionally have to purchase beacons (this is if you have other materials and tools in stock).

Alignment of walls according to beacons consists of their correct installation. First, we place beacons throughout the room. Along the height of the wall, every 30-40 centimeters, we install a dowel with a self-tapping screw into the surface. Typically, such “columns” are made at a distance of 80-90 cm from each other throughout the room.

The main thing is that they are all the same. Applying a leveler to the heads of the screws, we set the level along the entire height. We do this procedure with the entire room.


We mix a small amount of plaster and attach the beacons to these planes. We reinforce the joints with screws with plaster. After the procedure is completed, wait a while and let the plaster dry.

We prepare the plaster mixture based on the information written on the bag. We throw the finished mixture between two beacons, starting from the bottom. Then we take the rule, install it between two beacons and begin to lift the mixture from bottom to top with swaying. We make such movements until the mass is leveled out.


Remove the remaining mixture from the rule with a spatula and throw it onto the unplastered area. We are finishing all the walls at this rate. You should get even and smooth walls. Depending on the type of plaster, the walls turn white due to the presence of gypsum in the mixture.

putty
After the plaster has dried, we can begin to putty the walls. Putty is needed to remove small porous holes and bring the surface to perfect smoothness.

After puttying, we can begin removing the beacons. In order to remove them, you need to pry them from below with a screwdriver and pull them out along their entire height. Don’t be alarmed, we will fill up the resulting gap with plaster and rule.


You can level the walls simply with putty, but this case helps when the distortion of the wall is not so great. The permissible deviation is no more than 5 mm.

Drywall
There are two types of leveling walls with plasterboard. One has already been described above, but I would like to dwell on the other in a little more detail. If you have very strong differences in the walls, then it is cost-effective to level them with plasterboard.


To do this, a frame is made along all the walls. A guide profile is attached at the level of the floor and ceiling. A vertical profile is installed on them every 60 cm. And sheets of drywall are attached to this entire installation.

The joints must be glued with a special mesh and all irregularities and holes from self-tapping screws must be covered with putty.

If you want to make the walls somehow shaped, then only drywall will help, because under other conditions, the consumption of materials will be gigantic and cost a pretty penny.


Smooth walls in our lives are not a tribute to fashion, but a vital necessity. Improperly aligned walls can make life in your home miserable. The most harmless thing is wallpaper that constantly peels off, but the worst thing is various fungi and bacteria.

Before you begin leveling, decide whether it would be easier for you to knock down some sections of the walls to reduce the consumption of materials.

In Soviet times, walls were lined with sheets of plywood, but it has poor resistance to moisture. Also, the joints of the sides of the plywood sheets had to be either decorated or left as is.

As a result, for better quality work, it is better to sand the work to remove microcracks invisible to the eye.

Photo of wall alignment


Every owner of an apartment or private house who decides to take up major repairs of your home, many different questions arise regarding the implementation of certain construction or finishing works. One of the most common: what methods of leveling walls that can be done independently exist, and which one to choose in a particular case.
We have to admit, with regret, that the walls not only in private houses, but also in modern high-rise buildings, are rarely perfectly smooth, and therefore even the most expensive finishing on them will not look properly. Therefore, no matter what decorative coating is planned for the finishing of the premises, it is necessary to put the walls in order, giving them the necessary evenness, in almost any case.
Before choosing an alignment method, you need to determine how much the wall is curved. This can be done in several ways using different tools.
To determine the degree of deformation of surfaces, use a long rule, levels different designs and plumb lines.
- The rule, in this case, just like one of the building levels, must have a length of at least 2000÷2500 mm, since it is required that the tool rise vertically to almost the entire height of the wall, and also that it can be easily rotated along diagonals. As a rule, if it is not in the home “arsenal”, a perfectly straight slate can be used. But it should not be too thin, bending when force is applied, otherwise accurate measurements will not be possible. Its size in cross section 20x50 mm will be sufficient.

A batten, level or rule is applied to the wall surface vertically, horizontally and diagonally. They monitor the size of the gaps formed between the wall and the tool, which will show the degree of surface unevenness.
- Another simple and affordable way to check the verticality of a wall that does not require expensive tools is to use a plumb line. Even if the farm does not have such a device, it is easy to quickly make it yourself. To do this, you will need a thin but strong cord about three meters long, as well as a load weighing 150÷200 grams, best of all, a balanced, symmetrical shape.

Using a plumb line is not difficult: to do this, a nail is driven into the wall, under the ceiling, at a distance of 25÷30 mm from the joint, onto which the cord is attached, and the weight tied to it is freely lowered vertically along the wall. The load should hang freely, not reaching the floor by 10÷15 mm. When the load calms down and does not move, you can see how distorted the surface is - measure the gaps at various points in height - and compare the results.
- In addition to the evenness of the walls, it is necessary to check their perpendicularity, that is, the corners of the room must be straight.

A construction square will help in determining this parameter, which is applied in several places along the entire height of the joint and the necessary marks are made. True, the square must be quite large in order to accurately identify possible deviations.
If there is no large square, then it is better to apply the “Egyptian triangle” rule. To do this, two legs are laid from the corner along the walls, multiples of 3 and 4, and the hypotenuse should be a multiple of 5. For example, 1.5 m (0.5 × 3) is measured along one wall, 2 m (0.5 × 4), and the distance between these points in a straight line should be 2.5 m (0.5 × 5). If this is not the case, then the angle is clearly different from the straight one, and it is necessary to look for the cause and a way to eliminate it.
- Probably the most optimal and accurate option is the use of a laser level (laser plane builder).

This device sets perpendicular vertical planes, projects lines in space, along which, by simple measurements and comparisons of clearance values, it is easy to identify unevenness of wall surfaces, their correspondence to the vertical plane and mutual perpendicularity.
Having determined the deviations of the walls from the required plane, the location of irregularities - depressions or convexities, their approximate height or depth is immediately assessed.
— In the case where surface defects or deviations from the vertical plane are 8÷15 mm or more, the walls will have to be leveled by plastering along beacons or by installing plasterboard sheets.
— If the differences do not exceed 5÷8 mm, then you can correct the surface by applying a thin layer of plaster or putty mortar.
Preparing surfaces for leveling
In order to understand what stages the wall leveling work consists of, it is worth considering these processes in more detail. However, before moving on to brief description For each of the alignment methods, a few words need to be said about the preparatory activities common to all technologies.
The preparatory stage can be complex and tedious, but you should not ignore it, as this guarantees the quality of the leveled surface and its operational durability. Particular care must be taken when preparing walls for plastering, but drywall also requires its own special approach.

So, preparing walls for further leveling includes several important operations, which include the following:
- The first step is to completely clean the walls. decorative covering, if it is present on surfaces, it is removed old paint or wallpaper. These processes are carried out different ways, which are described in detail in a separate article.
- After the walls are freed from the old finish, it will open plaster layer, which requires the most thorough examination. Such an inspection is necessary, since cracks may have appeared on it during operation, or peeling, partial or complete, cannot be ruled out.
Depending on the extent of damage to the old plaster layer, it will have to be completely removed or proper repairs made. If this layer is thick enough, low-quality material is used for it, and its surface is uneven, then it is better to get rid of it completely.
If the wall has large protrusions, they will have to be knocked down, and small protrusions will have to be sanded or cleaned off with a wire brush.
- If “wet” work is expected on the wall, then to ensure electrical safety the room will most likely have to be de-energized. Usually in such cases it is planned to replace sockets and switches, which means that the old ones must be dismantled and then the exposed wires must be insulated.
- Having cleaned or repaired the wall surface, it needs to be primed several times - this is to strengthen and remove dust from the surface and to create conditions for reliable adhesion between the surface and the new leveling solution.
Careful preparation of walls is the key to the quality and durability of future finishing
This seemingly simple to understand, but labor-intensive stage has many nuances. A special publication on our portal tells more about all operations.
- After the primer has completely dried, you can proceed to applying putty, plaster, or installing special beacon profiles, along which the surfaces will be leveled.

- If you plan to level with plaster wooden walls, then they are cleaned of dust and primed with an antiseptic primer for wood. After this, the dried walls are sheathed with wooden slats - shingles, which will create good adhesion between the mortar and wood.
Methods for leveling surfaces
The choice of method for leveling the walls directly depends on their condition, that is, whether they have significant curvatures, or whether it is simply necessary to eliminate a slight surface relief that can appear through layers of paint or pasted wallpaper.
In fact, there are not many technological techniques for leveling walls. They have been used for decades, but with the advent of new building materials– are constantly being improved.
So, leveling the walls is carried out in the following ways:

- Plastering, that is, applying a special leveling layer to the surface mortar. In turn, this method can be divided into two types - leveling the walls using beacons and without using them.
- Installation of plasterboard sheets that determine the desired evenness of the wall surface (often also called “dry plaster”). This leveling option is also divided into two different approaches - fixing sheets to a frame, or frameless fastening of gypsum fiber boards directly to the wall.

- Leveling walls with putty This method of putting the surface in order is used in combination with the other two mentioned above, or independently. If the walls have a smooth surface without major geometric distortions, but there are small unevennesses on it, then putty will help bring them to ideal smoothness.
Plastering walls
A few words about leveling solutions
Currently, construction stores offer a very wide range of ready-made building mixtures intended for plastering work. They can be on different bases
- Cement-based plasters are used for exterior work, as well as for rooms with high humidity levels
- Gypsum mixtures are suitable for walls made of almost any material, but their scope is limited only to interior decoration.
However, many craftsmen and homeowners prefer to prepare plaster solutions themselves. And the basis for this, in addition to cement or gypsum, can also be lime or clay.
Lime and cement-lime mortars have proven themselves well for external and internal finishing, and clay-based plasters are generally inexpensive (if free raw materials are available) and are suitable for leveling wooden, clay or brick walls.
If you want to try your hand at plastering walls with a homemade solution, then the “recipe” for the preparation can be found in the table below:
| Name of solution | Components | Proportions of solutions, depending on the specific layer | ||
|---|---|---|---|---|
| "spray" | "priming" | Covering or “washing” | ||
| Cement | Cement: sand | 1: (2.5÷4) | 1: (2÷3) | 1: (1÷2) |
| Lime | Lime paste: sand | 1: (2.5÷4) | 1: (2÷3) | 1: (1÷1.5) |
| Clay | Clay: sand | 1: (3÷5) | 1: (3÷5) | 1: (3÷5) |
| Cement-clay | Cement: clay: sand | 1:4:12 | 1:4:12 | 1:4:12 |
| Cement-lime | Cement: lime paste: sand | 1: (0.3÷1):(3÷5) | 1: (0.7÷1):(2.5÷4.5) | 1: (1÷1.5):(1.5÷2) |
| Lime-clay | Lime paste: clay: sand | 0.2÷1:(3÷5) | 0.2÷1:(3÷5) | 0.2÷1:(3÷5) |
| Lime-gypsum | Lime paste: gypsum: sand | 1:(0.3÷1):(2÷3) | 1:(0.5÷1.5):(1.5÷2) | 1:(1÷1.5) |
Plastering walls without installing beacons
Wall alignment plaster mortar without beacons is possible in cases where the wall is relatively flat, without serious deformations, depressions and depressions, and to put it in order it will be enough to apply a leveling mixture of relatively small thickness. It must be said right away that this method of tidying up the surface is much more difficult than plastering using beacons, since leveling has to be done by eye, and this is not at all easy to do without proper skill. Therefore, if there is no experience in this work, then it is better to entrust it to professional craftsmen.
The process of plastering walls without beacons can be divided into several stages - these are “spraying”, “soil” and “washing”.
- "Spray"- this is the first layer of mortar applied to the wall when leveling it. The mixture for this stage should have the consistency of thick sour cream.

When applying the mortar to a brick or stone wall, its layer should be 10÷12 mm, on shingles wooden surface 15÷18 mm.

“Spraying” is carried out with a trowel, onto which the solution is scooped up and, with a little effort, applied to the surface. If the surface of the wall is relatively flat and does not require the application of a thick layer of plaster, then sometimes craftsmen “spray” it even with a wide brush. When applying the solution with a brush, you should not make a large sweep with your hand, otherwise, part of the mixture will be splashed around the room.
You can apply the first layer of plaster using the “spreading” method. In this case, you will need a spatula 200÷250 mm wide, with which the solution is taken from the container and evenly distributed over the surface of the wall with strokes. Perfect alignment of this layer is not required, as it will become the basis for further work.
- "Priming"- this is the second layer when plastering walls without beacons, and it is applied only after the “spray” has completely dried. To apply the “soil”, a thicker solution is used - it is thrown onto the surface, starting from the bottom of the wall, filling in the areas not covered by the first layer, thus bringing both layers to approximately the same thickness.

Having applied this solution to a section of the wall 350÷400 mm high, it is leveled using a rule, collecting excess mixture, which is sent back to the container, since it can still be used in further work.

When leveling, unfilled areas may additionally appear, which must be immediately filled with solution and then the rule must be passed over this area.
Sometimes, instead of the rule, a special tool is used to level this layer - a grater.

A trowel is also used to level the solution, simultaneously collecting its excess and filling the identified voids.
- The “wash” or top layer of plaster consists of a liquid solution and is intended to eliminate all the flaws remaining on the surface of the wall after applying the “primer”. The thickness of this layer should be no more than two millimeters, so it is very important to maintain the correct consistency of the plaster solution.
In this regard, if the mixture is prepared independently and not purchased ready-made, all materials used in it must be sifted through a sieve with cells no larger than 0.5 ÷ 1 mm. The solution is kneaded until smooth, as there should not be even small lumps left in it.

Next, the surface of the wall is moistened with water and a thin layer of liquid solution is applied to it using a spatula and a trowel. Then, the wet solution is rubbed in with circular movements, which are made counterclockwise. Therefore, this stage of work is often called surface grouting.
When choosing this method of leveling the wall, during each stage of work it is necessary to control the verticality and required evenness of the surface using a rule and a level.
Leveling walls with plaster according to beacons
Leveling walls with plaster mortar using beacons is a more popular method than without installing them, since these elements greatly simplify the work and result in a perfectly flat surface. However, in order for the work to be successful, there is no need to rush when performing them, especially if the process is being performed by a master for the first time.
Leveling Beacon System
As beacons for leveling surfaces, special perforated metal profiles are most often used, having a protrusion, the height of which can vary depending on the required thickness of the plaster layer.

The beacons are installed vertically on the wall surface, at a distance from each other, ensuring convenient operation with the rule of the available length (approximately 200÷300 mm less than the length of the rule). For beginners, an installation step of no more than 1000÷1200 mm is usually optimal. Fastening of profiles is most often done on slides of quick-drying mortar laid out along the line.
Sometimes improvised devices are used to display beacons, for example, pieces of plywood, drywall or ceramic tiles, which are also glued to the solution according to pre-set marks and a plumb line.

However, leveling across entire profiles is much easier, since they are fixed vertically from floor to ceiling and do not allow deviation from the intended level.
The conclusion suggests itself that the most important thing in the process of aligning walls with beacons is their correct alignment, which is done in compliance with certain rules.
Basic techniques for setting up a beacon system
Installing leveling beacons is not as simple as it seems at first glance, since there are some nuances that must be constantly remembered. A professional view of the technology of this stage is presented in an article on our portal.
If we talk about the accessible method of placing beacons in a few words, very simplified, then this process is carried out as follows:
- The first step is to set up the outer profile elements, that is, those located closer to the corners of the room.

- Then, between them horizontally, in three or four places, cords are stretched, which will serve as a guide for the installation of intermediate beacons.
- The required level of the beacons relative to the wall can be achieved by recessing the profiles into the mounds of mortar on which they are fixed.
There are several interesting, accurate and at the same time accessible technologies for placing beacons. This is discussed in detail in other publications on our portal.
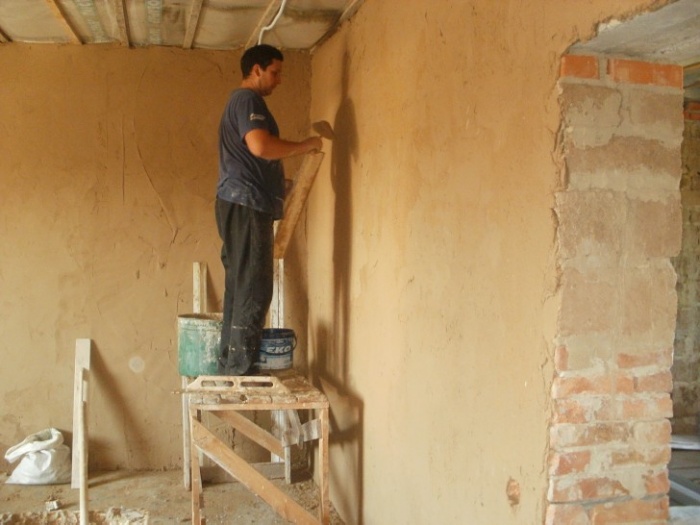
The process of plastering walls
Work is usually carried out in sections with a height of 450÷500 mm. Experienced craftsmen They can afford large areas, but it is better for a novice plasterer not to rush into this - there will be an opportunity to identify and correct mistakes.
- A solution of medium density, with a height that should exceed the level of the beacons by 15÷20 mm, is applied to a certain section of the wall using the “spray” method (or application and distribution with a spatula, if spraying has not yet worked out). This thickness is necessary so that when the mixture is leveled as a rule, as few voids as possible remain on the applied layer.

- Next, the applied solution, starting from the bottom of the coated section of the wall, is leveled with a rule, which is rested with an edge against the metal beacons and driven along them, as if on rails. In this case, excess solution is usually collected, which is regularly removed with a spatula, sent back to the container and used for the next spray. When leveling, the rule is mixed progressively upward, but at the same time slightly moved horizontally in one direction or the other, which helps fill all the voids in the layer and make the most of the entire applied solution.
- Most often, several such passes will usually have to be made, with the identified cavities being filled using a trowel or spatula. The result should be a flat surface, flush with the guides of the beacon system.
- After plastering the wall, when the mortar has set slightly, the beacon profiles are carefully removed from the thickness of the plaster. The remaining grooves are sealed with mortar and leveled over the common surface.
- Next, the still wet surface of the plaster is rubbed with a special construction float. The work is done in a circular motion counterclockwise.
- To refine the internal and external corners of the wall, a special corner spatula is used.

- External corners, especially in cases where a thick leveling layer is applied, are recommended to be reinforced with metal perforated corners, which are pressed into the wet mortar and adjusted to the building level.
Let's learn to align walls using beacons!
On the pages of our portal there is a detailed publication dedicated to. It places special emphasis on the issues of creating beacon systems different types– from ordinary profile to mortar and string.
Leveling walls with plasterboard (dry plaster)
Since drywall became available for free sale, and at a price accessible to everyone, it has become the most popular material used to level walls. The fact is that any homeowner is quite capable of working with sheets of this “dry plaster” without resorting to the help of a construction team. Moreover, there are two ways to fix it to the surface - with construction glue and with frame sheathing. Therefore, you can choose the option that is more suitable for a specific room and for ease of installation.
Installation of drywall without frame
So, you can level the wall with plasterboard by fixing its sheets with glue made on a gypsum base. Moreover, using this method, even a strongly curved surface can be made smooth. However, if the wall is severely deformed, you will have to seriously work on it, since you will need to create unique beacons against which the sheet will rest finishing material. Self-tapping screws with wide heads or slate nails, which are driven into the wall with the ends of the heads in a single plane, can be verified by any in an accessible way. Slides are applied to these lighthouses adhesive composition, and then a plasterboard sheet is carefully pressed against these points.

1 – old wall surface to be leveled;
2 – screwed-in self-tapping screws, the ends of the heads of which are aligned in the same vertical plane. The pitch between the screws is 200÷300 mm;
3 – slides of gypsum-based construction adhesive;
4 – sheet of drywall.
It is much easier to install drywall on more or less flat wall, preparing it with a primer. To do this, the adhesive mass is applied pointwise in slides to the sheet itself or to the surface of the wall.

Next, the drywall is lifted and pressed against a vertical surface, and then, if necessary, its verticality is adjusted by gentle tapping. In order not to damage the sheet, the adjustment can be carried out with the edge of the rule, which immediately covers the entire width of the sheet.

When fixing the sheet to the wall, the correctness of its position must be checked with a building level. The second and all subsequent sheets are adjusted to the first finishing sheet fixed on the wall. After the glue has dried, the seams between the drywall are sealed with a sickle mesh or special tape, and then filled with putty.
Quickly and reliably - plasterboard on the wall without creating a frame
The main steps of this method were listed above, however, this installation technology still contains some nuances, which are also good to know about when getting started. Therefore, it is recommended to pay attention to the article on our portal.
Frame method of installing drywall
The frame method of leveling walls has its advantages and disadvantages, and at the same time is even more popular than fixing sheets with glue.
The disadvantage of this technology is that the frame system significantly reduces the area of the room, since the sheathing itself, and plus a sheet of plasterboard, make up a total thickness of at least 50 mm, that is, the room will be reduced on each side by this distance.
The advantages of such leveling are much greater, therefore, if the area allows, then this method will become ideal option room transformation.

An obvious “advantage” of this installation is the ability to insulate and soundproof the wall by installing a layer of appropriate material in the space between it and the cladding. This is especially true for apartments located in panel buildings.
Another positive aspect is that the frame system does not require “super-thorough” preparation of the walls.
- They need to be cleaned of the decorative coating just to make sure that there are no deep cracks in the wall. Small surface defects will not interfere with installation work.
- It is necessary to prime the walls before fixing the profiles, and for this purpose an antiseptic solution is used, which will protect the surfaces from the appearance and development of mold.
After the primed surface has completely dried, you can begin marking and installation work.
Profiles are usually installed in increments of 600 mm (along the axes), since the width of all plasterboard sheets is 1200 mm. Thus, each vertically installed sheet will be fixed along three lines. In addition, this is convenient from the point of view that the overwhelming majority of insulation materials are produced in mats of exactly this width - 600 mm.
To achieve ideal evenness of the walls, it is necessary to carefully align the metal profiles vertically, thereby setting the future plane of the surface being created.

Since the profiles are fixed in special brackets - straight hangers, with perforated side “wings”, it is possible to accurately adjust their distance from the wall. The hangers are fixed along the line using dowels or self-tapping screws (depending on the wall material) in increments of 500÷600 mm.
The protruding ends of the side shelves, after fixing the racks in them, easily bend back, so they will not interfere with the further fixation of the drywall sheets.
To make it easier to cope with the alignment of the frame, first the outer posts are accurately aligned vertically and relative to each other and secured. Then cords are stretched between them, which will indicate how far the intermediate profiles should be extended from the wall.
If the ceilings in the room are high enough, then between vertical posts sometimes horizontal cross members are mounted, which will give the system additional rigidity and strength.

The sheets are secured to the frame using special black self-tapping screws TN25 (3.2×25 mm), the heads of which must be recessed into the plasterboard by 1÷1.5 mm. In the future, these remaining holes from the caps will need to be puttied.
It should be noted that sometimes plasterboard sheets are mounted in two layers - in this case, the created wall covering will have higher strength. The sheets of the outer layer must overlap the joints of the sheets of the lower one.
After the wall is leveled with the plasterboard system, they proceed to sealing the joints, and after the solution has dried, the wall is primed and puttied. The putty layer should completely hide the joints. The final stage of work is the application of a decorative coating - paint or wallpaper.
Universal material - drywall
Modern Finishing work It is already difficult to imagine in houses and apartments without the use of drywall.
– this is far from the only way to use it. For example, this material allows you to quickly and efficiently build indoors.
Bringing the surface of the walls to perfection with putty can be called the final stage for any chosen method of leveling them when interior decoration. In addition, putty, as the only leveling layer, is used if the wall itself is already quite smooth, but has minor errors in the form of small depressions or minor roughness that can appear through decorative finishing- wallpaper or coloring.

The putty has a finer mixture structure, and when mixed, it acquires high plasticity, is easily applied and distributed on a prepared, primed surface, masking flaws and making the wall perfectly smooth.
This leveling layer is applied using spatulas (trowels) various widths, but on large areas always use a wide spatula, with work surface 400 or more millimeters.

Puttying walls is a rather complex process that requires some experience, since you need to achieve smoothness of the walls, and a spatula in inept hands with its edges almost always leaves grooves of varying depths on the surface of the raw plastic mortar, and this must be avoided. If they have formed, they must be leveled immediately, since after setting putty mixture this will be difficult to do.
As a rule, two (or even more) layers are applied - one leveling, and the second, finishing, bringing the surface to perfection. Accordingly, for different stages can be applied and different kinds putty.

The final stage of putty work is always grinding the surface to the desired degree of smoothness. This final stage of leveling the walls is carried out using a special grater, onto which mesh attachments or sandpaper of the required grain size are installed. There is also a special electric tool– grinding machines different principle actions to speed up this rather labor-intensive process.
Many craftsmen, in order to achieve an ideal result, use portable lighting when performing sanding work, which perfectly reveals poorly leveled areas of the wall, down to the smallest surface defects.

How to learn how to putty walls correctly?
This technological operation is quite complex, and the first results may not be encouraging. It’s okay, the skill will develop, the main thing is to listen to the advice of experienced finishers. A good selection of such recommendations, with step-by-step illustrated instructions, is posted in the article on our portal about.
So, based on everything said above, we can conclude that even if you have no experience in leveling walls, it is possible to choose a method that will be within the capabilities of even a novice builder. By taking on these works, you can not only save a decent amount, but also be confident in their quality - after all, it is done, as they say, “for yourself.” Therefore, when starting an apartment renovation, you need to carefully weigh your financial and creative capabilities, and boldly get down to business.
At the end of the publication there is a short video sketch, which should also help the reader in choosing a method for leveling the walls.
Video: Which method of wall leveling should I choose?
There are many ways to finish walls, but most of them require a level and straight base, but in reality everything is not so smooth. Walls modern houses and especially buildings old building They only seem smooth, but are not suitable for cladding with tiles, laminate or panels, since they have horizontal or vertical differences invisible to the eye. In this article we will tell you how to properly level walls for finishing with any materials.
Any renovation begins with preparation, and leveling walls is no exception. In this case, first of all, it is necessary to determine the degree of surface unevenness in order to know how best to level the walls and how much materials will be needed.
How to determine the degree of curvature of a wall:
- Arm yourself with a long construction rule 2-2.5 m long. Drive a nail into the corner of the room closer to the ceiling, leaving the head sticking out 2-3 mm (so that you can tie a string to the nail). This nail is your starting beacon.
- Tie a nut or any other weight to a cord or strong thread and hang it by the nail so that the weight does not touch the floor. Wait until it stops swinging and the thread forms a straight line.
- Drive the second beacon nail into the bottom of the wall and drive it in just enough so that the head and thread are at the same level.
- Repeat this procedure with another corner on the opposite wall. As a result, you will get 4 beacons around the perimeter and 2 straight lines, respectively.
- Take a long thread or cord and stretch it between the top nail of one part of the wall and the bottom nail of the other (diagonally). Repeat with the second pair of beacons. When you fasten the threads crosswise, make sure that they do not touch the surface of the wall.
- Now, with the help of these threads, stretched over four points, you can determine the condition of any wall in the room.
Selecting an alignment method
Leveling with dry mixtures
Leveling the walls with plaster, as practice shows, is the most versatile option, relevant for any finishing material, be it wallpaper or tile. Despite the high labor intensity of working with mixtures, you get a better and more durable result.

How to level walls with putty:

Helpful advice: When choosing a dry mixture, pay attention to the thickness of the layer, as well as the nature of the binding component. For example, it is recommended to use gypsum solutions for rooms with low or normal humidity, since such walls in the kitchen or bathroom will quickly become damp and crack. For wet rooms, choose mineral-based mixtures. Cement plaster You can prepare it yourself by mixing 1 part of cement grade no lower than 400 with 6 parts of sifted fine sand and diluting everything with water to a creamy state. You can vary the amount of sand to get different plasticity of the solution - the less sand, the more plastic the solution, and it is easier to work with (but then you will need more cement, which means repair costs will increase). Attention! Use ready solution you need 1-2 hours in advance, otherwise it will harden or lose its properties, so do not knead large volumes at once.
Leveling with plasterboard
It is much easier to level walls with plasterboard than with dry building mixtures. This job is much cleaner, faster and more suitable for novice builders. A wide range of gypsum boards allows you to work in almost any room, even with high level humidity. In addition, drywall allows you to level walls with strong differences in height and horizontality, which would require applying an overly thick layer of plaster. And although this method is relevant for finishing with wallpaper or paint, in some cases it is the only way to get even and smooth walls.

There are two ways to install gypsum boards to level walls: on a frame and with glue. The first method is suitable for surfaces with serious differences and helps to level wooden walls, the second can hide minor surface defects and get a perfectly flat base for finishing. It is also possible to combine these two options to achieve a neat connection between the walls and ceiling. The frame method is the most common, so we will consider it first and in detail.
For the manufacture of the frame, a special metallic profile under gypsum board. Fixation is carried out using self-tapping screws. Before telling the instructions on how to level the walls under wallpaper or tiles, one nuance should be mentioned frame method– due to the large thickness of the resulting cladding, several centimeters of useful wall area are lost on each side (about 4-5 cm). And if in a spacious room this may not be noticeable, then for small rooms it is better to use another method.

Instructions and video on how to properly level walls:
- Remove the old coating from the walls and clean the surface.
- In this case, priming is necessary not to increase adhesion, but to strengthen and protect the walls from moisture and fungus. If you are sheathing external wall or a wall in a damp room, treat it with an antiseptic.
- Build a frame from a galvanized profile, first installing a UD profile along the floor, ceiling and adjacent walls to form a frame. Then inside this frame you can attach jumpers from a thinner CD profile, which will hold plasterboard sheets. All the intricacies of the fastening process are described in more detail in the article “”.
- When the frame is ready, you can begin installing the gypsum boards, but before that you need to measure, draw and number them so that they clearly fit into the given area. GCR is convenient because it can be easily processed at home with available tools. The article “” describes everything in detail.
- To seal the seams between sheets of drywall, use a special self-adhesive mesh. Glue it onto the seams, and then cover it with starting putty to bring it flush with the surface. Subsequent treatment of the wall depends on the chosen cladding. If you are laying tiles or other dense, non-transparent material, you can simply cover the joints with putty and that’s it. But before painting or wallpapering, the wall should be completely covered with white finishing putty with a layer of 1-2 mm, sanded and primed. The article “” says a lot of useful things on this topic.
Now you know what you can use to line the walls with tiles, wallpaper or any other finish. We hope this article will help you quickly and efficiently make repairs yourself. Finally, we suggest that you familiarize yourself with one more useful video how to level walls with plasterboard:
Leveling walls with your own hands is not a simple process, which even a beginner can handle with effort. First you need to decide on the desired result and method of work. There are several ways to level walls with your own hands; in each case there is an optimal option.
Types of alignment
Based on the operating technology and material, a distinction is made between dry and wet leveling. Dry leveling It is advisable to use in rooms with large surface errors, in wooden houses. Wet leveling used for both minor and noticeable deviations. Let's take a closer look at how to properly level walls using each technology.
Dry leveling
Dry leveling, also known as frame leveling, significantly saves costs compared to plastering a falling wall - this is an important advantage.

To begin work, the required material is calculated:
- the guide profile is purchased in double the perimeter size;
- rack profile - the quantity is equal to the ratio of the perimeter of the room to the width of the drywall (standard 1 m 20 cm), multiplied by two, plus 4 corners;
- anchor wedges or dowel nails - divide the perimeter by 50 cm and multiply by 2;
- screws for metal - multiply the number of rack profiles by 4;
- GKL - divide the perimeter by 1 m 20 cm;
- self-tapping screws for gypsum board - divide the perimeter of one sheet by 60 cm and multiply by the total number of sheets;
- serpyanka - the number of rack profiles is multiplied by their height;
- deep penetration primer - 150 ml per 1 sq. m.;
- putty for seams - consumption varies depending on the manufacturer;
- putty on gypsum board.

Frame alignment allows you to create the ideal geometry of the room; it is suitable for any type of finishing.
Using a laser level, the frame of the structure is marked, the guide profiles are attached with anchors or dowels along the marked marks on the ceiling and floor.
Rack profiles are cut at the ends, petals are created through which self-tapping screws are screwed. They are inserted into the guides and fastened at a distance of 60 cm from each other.
Sheets of plasterboard are screwed to the finished frame in 0.6 m increments, and the heads of the self-tapping screws are sunk in.
The seams are rubbed with a special putty; it is more elastic. To avoid the appearance of cracks, sickle is embedded into the putty.

To finish leveling the surface, putty is used: a mixture is prepared and spread over the entire surface. In order to save processing time and the cost of the finishing layer, it is worth choosing gypsum boards with beveled edges, then the difference in height will be insignificant. You can cut the edges yourself.

In addition to plasterboard, other materials can be used for frame leveling: fiberboard, chipboard, pvc panels, plywood, lining and more modern OSB board.

Advice! The choice of alignment method depends on personal preferences and financial capabilities. Therefore, before starting repairs, it is worth describing all possible types of finishing, their cost, and then making a decision.
Wet leveling
Leveling walls with a mixture is a more labor-intensive and messy process. But it allows you to save space, and in some cases, finances - with minor deviations, the consumption of mixtures will be less. The alignment method depends on the requirements for the final result.
There are two ways to do the work: by beacons and by rule. Perfect alignment of wall corners is impossible without beacons and corner elements. This labor-intensive process is relevant for the bathroom and kitchen. Here the geometry of the room is very important when installing furniture correct form minor errors become noticeable. Leveling recommendations from professionals:
In practice, two methods are often combined: walls with windows and doors are aligned using beacons, and other walls are aligned according to the rule. Also, rooms with external corners require careful alignment according to the beacons.
The choice of mixture for leveling the walls depends on the finishing coating. This could be wallpaper, paint, decorative plaster.
The alignment of walls under wallpaper depends on its type:
- for a light thin coating you need a light base without the slightest errors;
- glass wallpaper and vinyl wallpapers dense texture can hide minor imperfections in the base;
- Liquid wallpaper, depending on the grain size, requires a perfectly flat surface or allows small flaws.

Leveling walls for painting always requires a perfectly flat surface. Involves several stages of puttying and the use of a high-quality mixture. The choice of polymer putty allows you to prepare the surface for painting in one stage of puttying without sanding and re-plastering.

Coarse-grain decorative plaster does not require puttying of the walls; plastering is sufficient for a smooth base; smoothness does not matter.
Important! Regardless of the number of layers and finishing coat, each stage ends with a primer. It is necessary for better adhesion of layers and saving material.
Difficult cases in alignment
How to level walls in wooden house? For this case, it is permissible to use both methods of work, but frame option preferable. The technology of work is the same as described above.

The important point is the height sheathing material in a non-settled house, it should be 5-10 cm fewer walls. Leveling with a mixture is a more labor-intensive process: it requires careful treatment of the walls with an adhesive compound, attaching shingles or mesh to hold the plaster. Preliminary cladding for plastering looks like this.

Even in modern new buildings you can find clay walls. This material is low cost, has good hygroscopicity - ideal for use in residential areas. How can you level rare clay walls?
In fact, nothing complicated: leveling occurs by plastering and filling with lighter or more balanced mixtures. Gypsum or clay mixtures are suitable for this.
Aligning the outer corner of a wall with your own hands becomes much easier if you use a special perforated corner. It can be narrower or wider, depending on need. The corner creates perfectly even sides and remains in the plaster. For puttying, it is convenient to use a special angled spatula, which will require a minimum of skill and effort.

Aligning corners in a room of irregular geometric shape with your own hands is a very labor-intensive process. Using drywall will take up more space than plastering, but will go faster. In any case, the corner elements are installed perpendicular to each other. Then, in line with them, beacons are attached to the alabaster wall along the wall. The laser level simplifies the process of aligning beacons and corner elements. The most crucial moment has been completed; all that remains is to fill the space between the beacons with plaster.
Material selection
For high-quality finishing, its speed, and ease of work, material and tools are important. You shouldn't skimp on them.

Mixtures for leveling walls are available in different grain sizes and whiteness. The more expensive the mixture, the less hassle it will be. Particularly convenient are ready-made compositions of plasters and putties, which are ready for application without dilution with water. Such mixtures are characterized by long-term retention of properties even in open form, which is very important for beginners - after all, ordinary solutions dry quickly and are inconvenient to apply. Ready-made formulations Sold in buckets, after use, leftovers can be stored in the bucket until the expiration date.
White putty saves painting costs; it is necessary for light wallpaper. Therefore, when choosing, it is worth specifying the color of the mixture if you need to align the walls in the apartment with wallpaper.

High-quality drywall does not crumble or chip - its processing will be much faster. Having factory bevels (image above) on the sheet saves total consumption finishing mixture and time for finishing. The same applies to profiles - rigid profiles create a strong frame and are not subject to deformation during installation.
Advice! Choosing cheap material, don't count on quick repair, such savings will require more patience and skill in work.
It's nice to improve your home yourself, but the wrong approach can spoil the mood. Before starting repairs, you need to soberly assess your strengths, study necessary information. You can always entrust the work to professionals.
The question of how to level the walls is asked by many apartment owners who are planning to do the repairs themselves. Not so long ago, the range of materials for leveling walls was not large. Today, the situation in the building materials market has changed dramatically, but there are only 2 methods for eliminating uneven surfaces:
- their cladding is gypsum plasterboard;
- plastering with construction mixtures.
These methods of leveling walls have both positive and negative sides. Those who prefer plasterboard will not have to deal with the labor-intensive process of preparing walls for plastering. They just need to seal the cracks and secure the sheathing under the sheets to the walls. In addition, any communications can be hidden under the plasterboard. However, by using sheet materials to level the walls, homeowners significantly reduce their area.
A similar problem does not arise when leveling walls with building mixtures, but the process itself is labor-intensive. Surfaces for plastering require careful preparation. Beacon profiles need to be fixed to the walls, based on which the plaster will generally be distributed over the surface. In addition, wall leveling mixtures are often unable to cope with uneven surfaces that are too large. However, those who decide to level the walls with “Rotband” will find it easier to cope with the task than builders who use other compounds in their work.
Characteristics of the mixture "Rotband"
"Rotband" is a gypsum plaster that has a number of advantages over other mixtures. She:
- excellent contact with most surfaces;
- has high plasticity;
- not prone to cracking and delamination;
- has a relatively light weight;
- dries quickly;
- practically does not shrink;

The disadvantages of the mixture for leveling walls include:
- high price;
- impossibility of use in rooms with high humidity;
- weak adhesion of the Rotband layers to each other.
True, the last drawback is eliminated if, before applying the next layer, the previous one is treated with a special primer.
When plastering with Rotband, the same tool is used as when working with other mixtures:
- trowels;
- putty knife;
- grater;
- rule.
Surface preparation
Before you start leveling the walls with Rotband, they need to be prepared. You need to remove them:
- wallpaper;
- old paint;
- dust, dirt, grease stains;
- peeling fragments of plaster.
At this stage, a tool such as;
- brushes;
- spatulas;
- hammer and chisel.

Finally, the remaining dust is removed from the walls with a vacuum cleaner or a damp brush. Significant cracks should be repaired cement-sand mortar. After this, the surfaces must be treated with Betonkontakt or Grundirmittel primer. The latter is produced by Knauf, therefore it is most compatible with Rotband.
First you need to take a rule and check the condition of the wall with it. If the walls are fairly even, with differences of no more than 5-7 mm, they can be leveled without installing beacons. Using a tool such as a spatula, Rotband is applied to the surface like putty.
In other cases, beacons have to be installed. I must say right away what is better to buy plastic profiles, which can be left in the wall after plastering. Metal beacons (even galvanized ones) will begin to corrode over time, and rusty spots will definitely appear through the wallpaper. You can safely install steel beacons if the wall is subsequently covered with tiles.
Before installing the beacons, “slides” of gypsum plaster are applied to the wall with a spatula. The distance between them in a vertical row should be about 30 cm. The longer the rule, the greater the horizontal distance between the “cakes”, but in any case it should be slightly less than the length of the device, since the tool will rest on adjacent walls when leveling beacons.

First, it is better to install the beacons closest to the corner parts of the room. They need to be pressed into the “slides” and checked for verticality with a level or plumb line. 2-3 threads should be pulled between them and, guided by the cords, install the remaining profiles. Next, you need to additionally check the plane by applying a building level or rule to the beacons (perpendicular to them).
Plastering with "Rotband"
To obtain a high-quality mixture, you must follow the manufacturer’s recommendations for its preparation.
It is best to prepare the solution using a tool such as a construction mixer or a hammer drill (powerful drill) with a special attachment. Ready mix should be completed within half an hour.
Use a trowel to apply the solution between the beacons. Following the rules, you should distribute the solution along the wall. Leveling the surface must begin from the bottom. Excess solution is removed from the device with a spatula and placed in a container. The solution is again poured into the remaining recesses, and the rule is passed over the unleveled areas again. In the corners of the room, it is more advisable to use a corner trowel for plastering.

If plastering in several layers is necessary, a new layer is applied after the previous one has hardened. Before re-plastering, the dried layer is primed. In addition, cross-shaped notches are made on it. When multi-layer plastering, the rule is used only for finishing leveling. The main tool for applying Rotband during preliminary plastering of the surface is a trowel. The leveling process is completed 2-3 hours after plastering by rubbing the surface with a float moistened with water.
About the ease of working with Rotband
It should be noted that even the most distant person from the construction profession can level the walls in an apartment with the Rotband mixture. Having received minimal experience with gypsum plaster, the master will be able to create a surface ready for finishing almost any material.
Related posts:
